

Black Temple — Raid Guide
 views
viewsBlack Temple
Originally the temple was called Karabor and served as a sanctuary for the draenei. After the temple's clergy were slain by fel-corrupted orcs, the warlocks of the Shadow Council seized the sanctuary and gave it a new name — the Black Temple. Later, Illidan Stormrage cast out the temple's ruler — the pit lord Magtheridon — and took the throne, turning the temple into his own palace.
Bosses
- High Warlord Naj'entus.
- Supremus.
- Shade of Akama.
- Teron Gorefiend.
- Gurtogg Bloodboil.
- Reliquary of Souls.
- Mother Shahraz.
- Illidari Council.
- Illidan Stormrage.
How to Get into the Black Temple
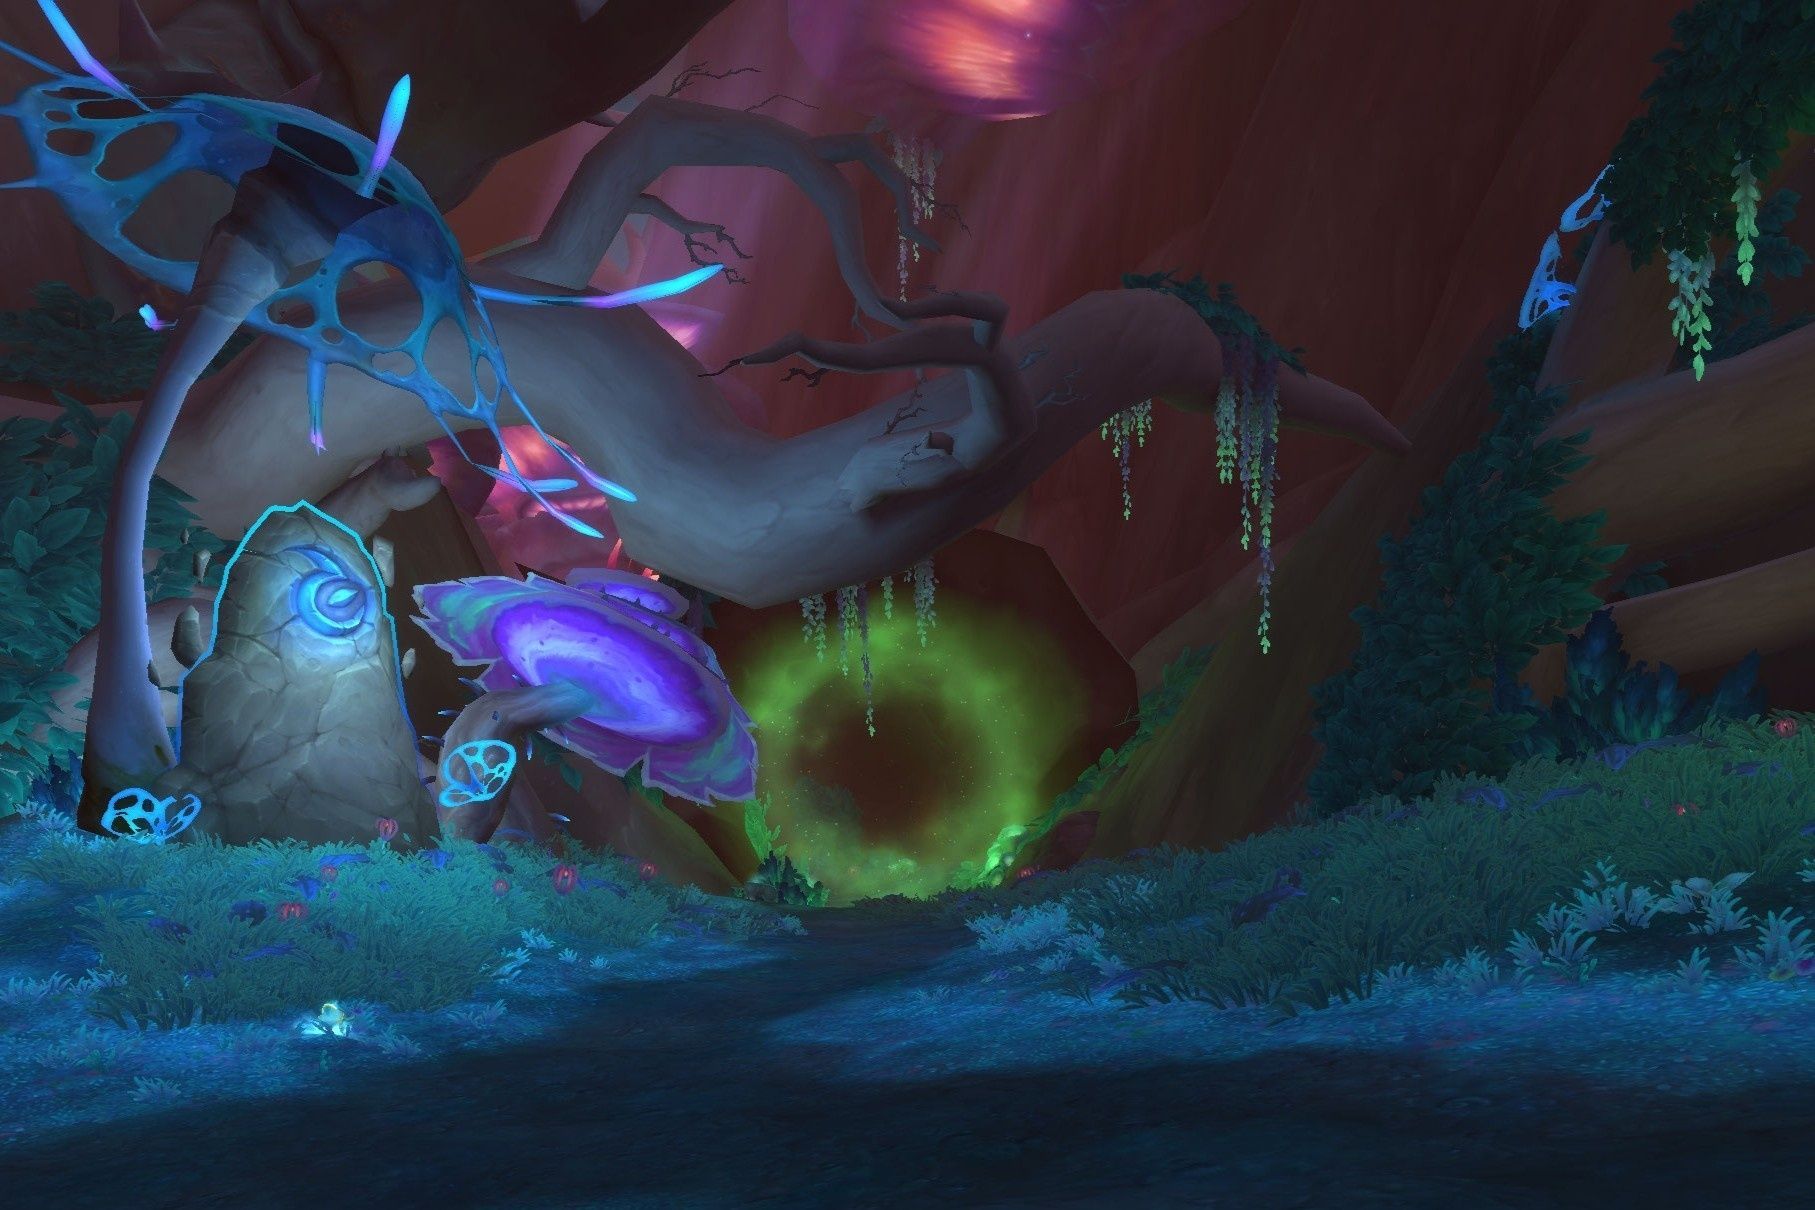
The raid entrance is located in the Shadowmoon Valley, at the eastern wall of the temple. There is no main gate here — a crack in the wall leads inside, through which you can reach the Karabor Sewers. Once you obtain the  Medallion of Karabor, you will be able to teleport straight to the entrance.
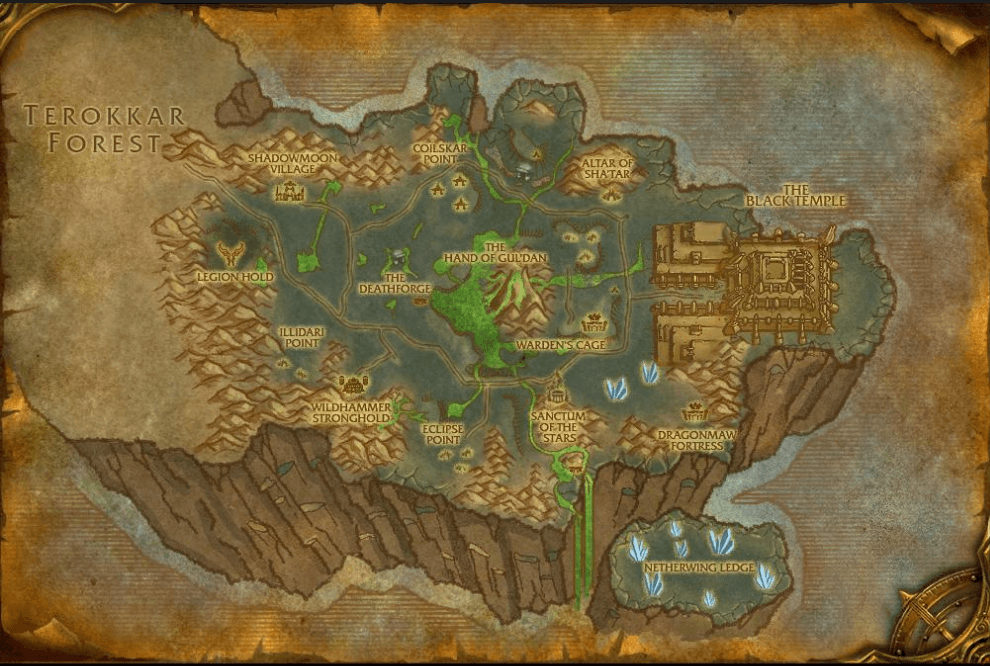
To enter the raid, you must complete a long attunement quest chain: be level 70, join either the Aldor or the Scryers, gain access to Arcatraz, and be attuned to the Battle for Mount Hyjal, Serpentshrine Cavern, and Tempest Keep.
Item Levels and Loot
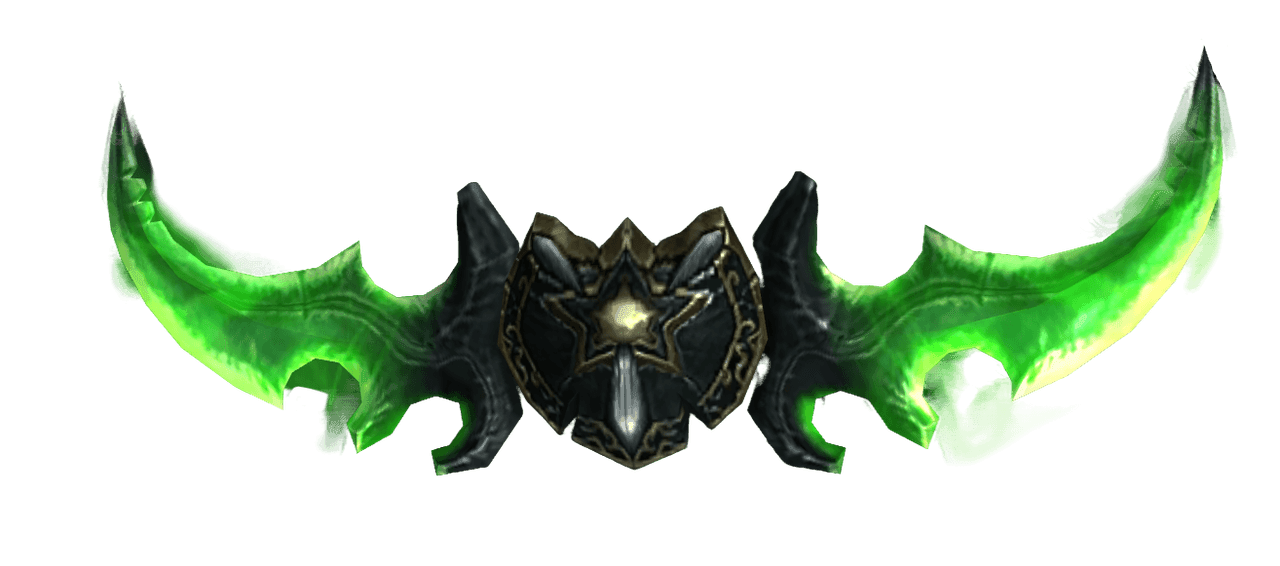
The raid's bosses drop gear of varying item level: the further you progress through the raid, the higher the item level of the loot. The Black Temple also drops Tier 6 tokens for the shoulder, leg, and chest slots, and the final boss drops the legendary Warglaives of Azzinoth.
| Loot Source | Item Level |
|---|---|
| Bosses and trash | 141 |
| Tier 6 tokens | 146 |
| Illidan Stormrage | 151 |
Tier 6 tokens come in three types: Protector (warrior, hunter, shaman), Vanquisher (rogue, mage, druid), and Conqueror (paladin, priest, warlock).
High Warlord Naj'entus
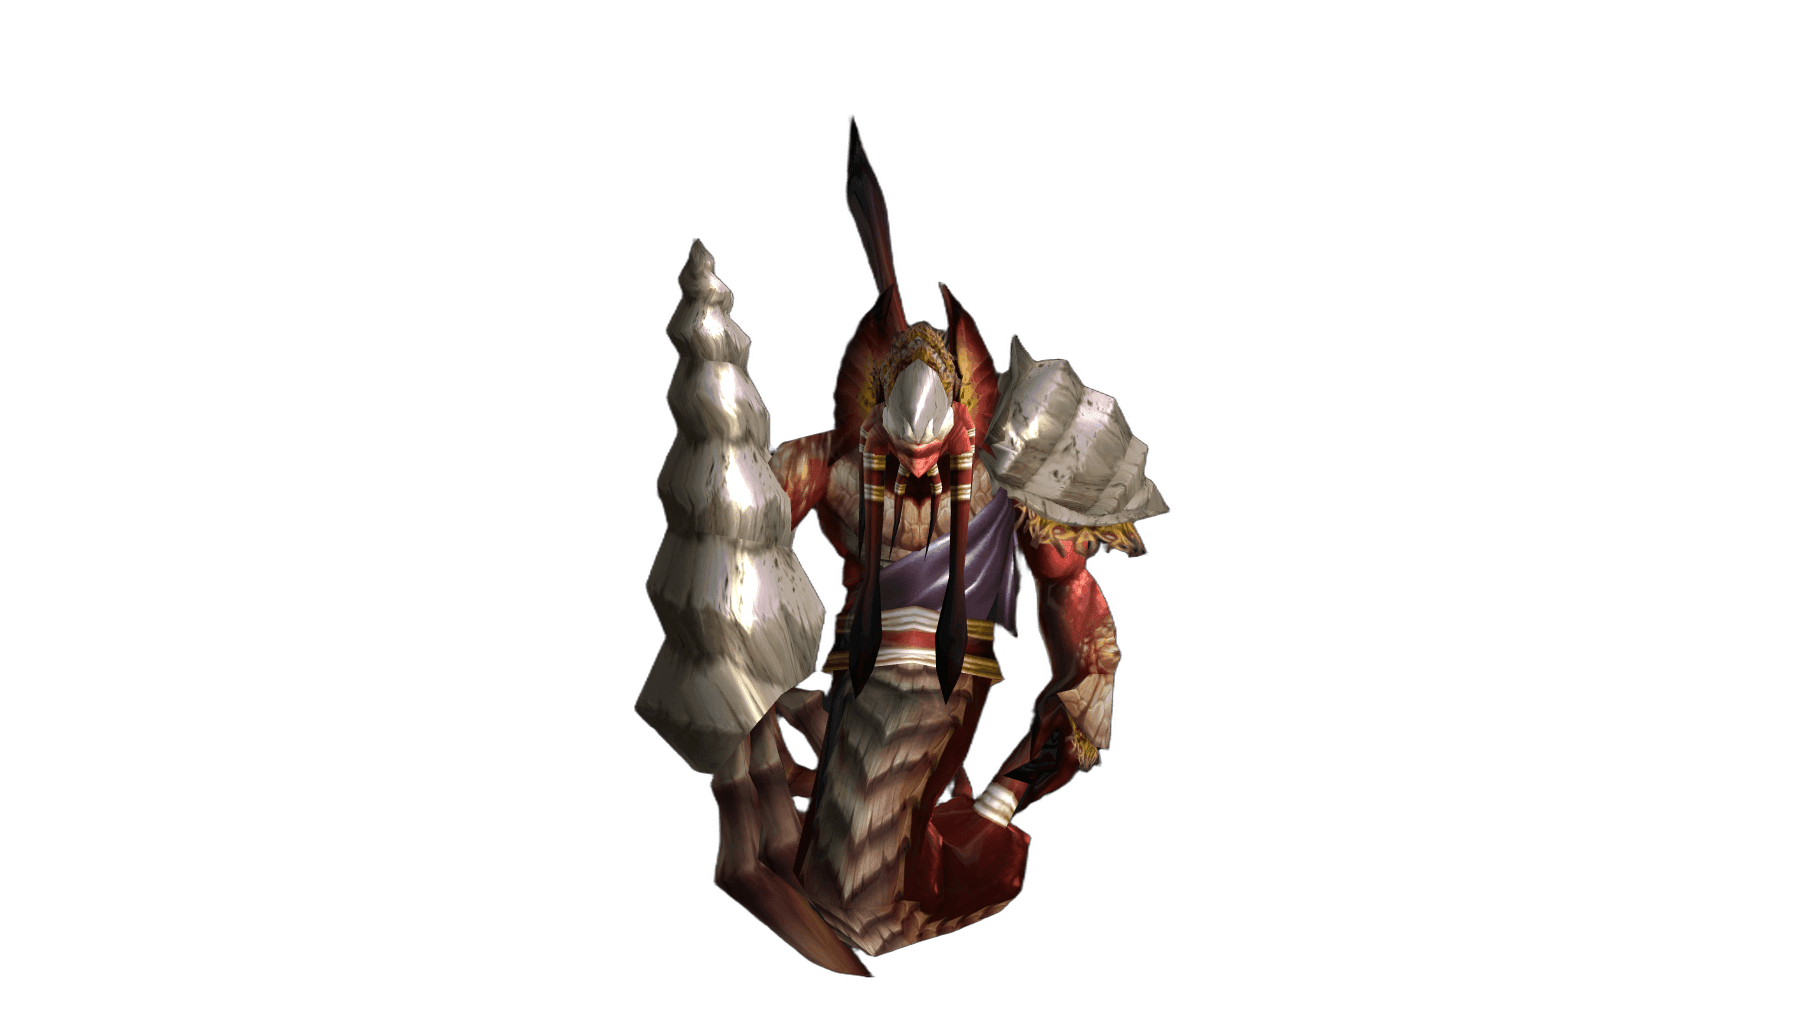
High Warlord Naj'entus — the naga leader who guards the flooded Karabor Sewers — is the first obstacle on the way into the Black Temple. He impales his foes with bone spines, shields himself with churning water, and unleashes icy waves upon the raid, keeping uninvited guests from pushing deeper into the temple.
Below we break down each of the boss's abilities in detail.
Fight Overview
The fight is single-phase, with no intermediate phases or breaks. The main mechanic is the  Tidal Shield: periodically Naj'entus makes himself invulnerable and begins restoring 1% of his maximum health every 2 sec. The shield can only be removed by throwing a
  Naj'entus Spine — an item that players obtain by freeing their allies from Impaling Spine.
Destroying the shield triggers  Tidal Burst — heavy frost magic damage to the entire raid. That is why the raid must be at full health before the shield is broken: any player with low health will die instantly. Because of this, everyone should stack extra stamina before the fight — aim for no less than 10,000 health.
The rest of the time the boss pelts the raid with  Needle Spine, so the group must stay spread out. After 8 minutes
  Berserk activates, and the fight almost inevitably ends in a wipe.
Main Boss Abilities
- Needle Spine (Healer)
Naj'entus launches a spine at a random raid member. On impact, Needle Spine Explosion triggers, dealing damage to everyone within 6 yards of the target. This is constant background damage to the raid throughout the fight.
- Impaling Spine (Important)
Naj'entus impales a random player (other than the main tank), dealing heavy damage instantly and periodic damage for its full duration, while also stunning the target. A large spine appears next to the victim: another player must run over and click on it to free their ally and receive a Naj'entus Spine in their bag.
- Tidal Shield (Important)
Naj'entus surrounds himself with a shield, becoming immune to all attacks and restoring 1% of his maximum health every 2 sec. The shield is destroyed only by using a Naj'entus Spine from your inventory — with a throw range of 25 yards.
- Tidal Burst (Deadly)
When the Tidal Shield is destroyed, a wave sweeps across the area, dealing heavy frost magic damage to the entire raid. Break the shield only when the raid is fully healed.
- Berserk (Deadly)
8 minutes after the fight begins, Naj'entus enrages and wipes the raid very quickly. This is effectively an enrage timer: the boss must be killed before it hits.
Naj'entus Fight Strategy
- Tanks
Keep Naj'entus in place and face him away from the raid. The main tank never receives Impaling Spine, so your primary job is to hold threat steadily and survive the boss's regular hits while the raid deals with the spines.
- Healers
This fight is primarily on you. Before the Tidal Shield is broken, the raid must be fully healed — otherwise Tidal Burst will kill anyone who isn't at full health. At the same time, you have to cover the constant damage from Needle Spine and quickly top off players affected by Impaling Spine.
- DPS
Spread out farther than 6 yards from one another so that Needle Spine Explosion doesn't catch your neighbors. Free your allies from Impaling Spine as quickly as possible and keep your Naj'entus Spines ready: as soon as Tidal Shield appears, wait for the healers' call and break it — every second the shield is up returns 0.5% health to the boss.
Loot
| Item | Equipment Slot |
|---|---|
 Slippers of the Seacaller Slippers of the Seacaller |
Cloth armor: feet |
 Guise of the Tidal Lurker Guise of the Tidal Lurker |
Leather armor: head |
 Mantle of Darkness Mantle of Darkness |
Leather armor: shoulders |
 Helm of Soothing Currents Helm of Soothing Currents |
Mail armor: head |
 Fists of Mukoa Fists of Mukoa |
Mail armor: hands |
 Boots of Oceanic Fury Boots of Oceanic Fury |
Mail armor: feet |
 Eternium Shell Bracers Eternium Shell Bracers |
Plate armor: wrists |
 Pearl Inlaid Boots Pearl Inlaid Boots |
Plate armor: feet |
 Tide-Stomper's Greaves Tide-Stomper's Greaves |
Plate armor: feet |
 The Maelstrom's Fury The Maelstrom's Fury |
Dagger |
 Rising Tide Rising Tide |
One-handed axe |
 Halberd of Desolation Halberd of Desolation |
Two-handed polearm |
 Ring of Calming Waves Ring of Calming Waves |
Finger |
 Ring of Captured Storms Ring of Captured Storms |
Finger |
Supremus
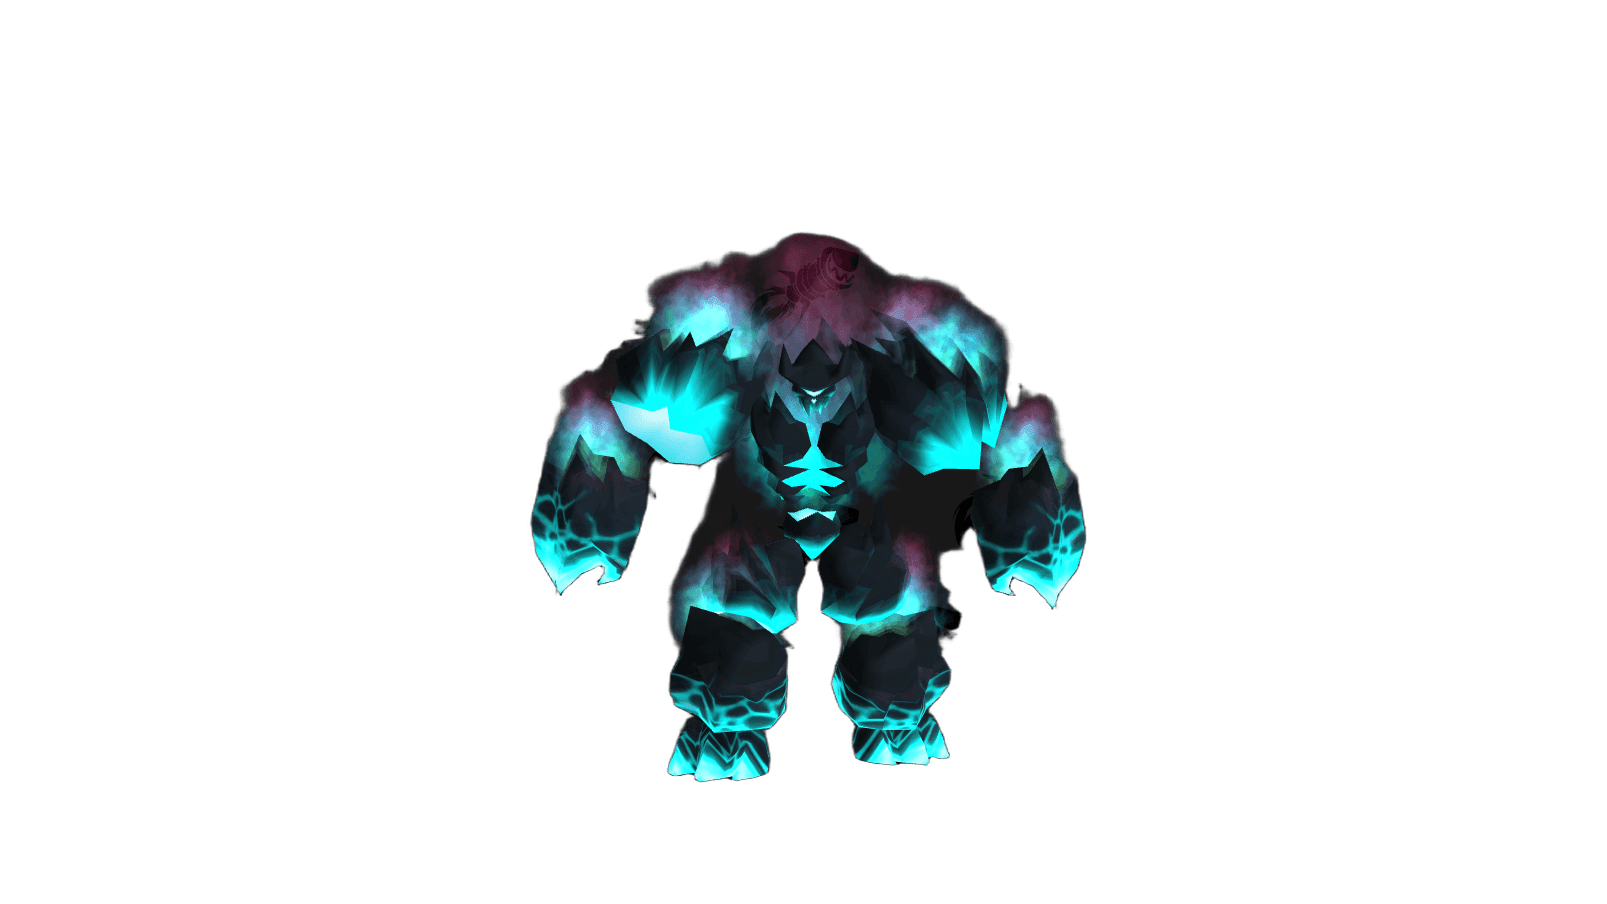
Supremus — a colossal Abyssal demon set to guard the inner courtyard of the Black Temple. He drives his molten fists into the stone, raising waves of liquid fire from beneath the ground, and when he flies into a frenzy he abandons everything and chases random players across the whole courtyard, leaving erupting volcanoes in his wake.
Below we break down each of the fight's abilities in detail.
Fight Overview
The fight consists of two phases that alternate roughly once a minute and repeat until the boss dies. The raid needs at least two tanks.
In the first phase, Supremus stands calmly in place, but every few seconds he uses  Hateful Strike: the ability picks the three players with the highest threat in melee range and hits whichever of them has the most current health, excluding the main tank. That is exactly why a second tank is needed — a "strike soaker." At the same time, every 8 sec.
  Molten Punch triggers, spawning
  Molten Flame at the boss's feet — blue tongues of fire that crawl toward a random player.
In the second phase the boss becomes empowered, starts moving more slowly and dealing enormous melee damage, but is no longer controllable: he uses  Fixate and chases random players, changing target roughly every 10 sec. If the victim is standing right next to him, Supremus first knocks them back with Charge. Meanwhile,
  Volcanic Geysers erupt all over the area.
When returning from the second phase to the first, threat is completely reset, so the tanks have to build it up again. After 15 minutes Berserk activates.
Main Boss Abilities
- Hateful Strike (Tank)
In the first phase Supremus frequently uses Hateful Strike. The ability checks the three players with the highest threat in melee range and hits whichever has the most current health, while never picking the main tank. The raid absolutely needs a second tank for these strikes.
- Molten Punch (Important)
Every 8 sec. Supremus slams his fist into the ground, spawning a source of Molten Flame at his feet.
- Molten Flame
A patch of blue flame that crawls toward a randomly chosen player, growing as it goes. It pursues the target for about 10 sec., then remains in place for about another 10 sec. and disappears. Those standing in the flame take damage every second.
- Fixate (Deadly)
In the second phase Supremus picks a random player and chases only them, completely ignoring threat. A melee hit from the empowered boss almost certainly kills any player, so the chosen target must run. The target changes roughly every 10 sec.
- Charge
If a player is standing right next to the boss when Fixate selects a target, Supremus first knocks them far away and only then begins the chase.
- Volcanic Geyser (Important)
In the second phase, volcanoes erupt at random spots across the area, dealing fire damage to everyone nearby. Each geyser disappears after about 20 sec. While fleeing from the boss, it's important not to run into a fresh volcano.
- Berserk (Deadly)
15 minutes after the fight begins, Supremus enrages and kills the raid. This is the fight's enrage timer.
Supremus Fight Strategy
- Tanks
You need at least two tanks: the main tank holds the boss, and the second takes Hateful Strike. The "strike tank" must have more health than any melee DPS, otherwise the ability will go to a DPS and kill them. In the first phase, move the boss slightly to lead him away from Molten Flame. On the transition from the second phase to the first, threat resets — pick the boss up as quickly as possible, but don't move in too close beforehand, or you risk catching Fixate and dying.
- Healers
In the first phase the main load is the tank under Hateful Strike and players caught by Molten Flame. In the second phase the raid spreads out heavily across the area — position yourself in advance so you keep the fleeing players within healing range while staying out of the Volcanic Geysers.
- DPS
In the first phase, stand in compact groups and move out of Molten Flame. In the second phase you can freely attack the boss and only run when Fixate selects you specifically — use the entire courtyard for this and go around the Volcanic Geysers.
Loot
| Item | Equipment Slot |
|---|---|
 Waistwrap of Infinity Waistwrap of Infinity |
Cloth armor: waist |
 Nether Shadow Tunic Nether Shadow Tunic |
Leather armor: chest |
 Wraps of Precise Flight Wraps of Precise Flight |
Mail armor: wrists |
 Bands of the Coming Storm Bands of the Coming Storm |
Mail armor: wrists |
 Naturalist's Preserving Cinch Naturalist's Preserving Cinch |
Mail armor: waist |
 Pauldrons of Abyssal Fury Pauldrons of Abyssal Fury |
Plate armor: shoulders |
 The Brutalizer The Brutalizer |
One-handed axe |
 Syphon of the Nathrezim Syphon of the Nathrezim |
One-handed mace |
 Legionkiller Legionkiller |
Crossbow |
 Felstone Bulwark Felstone Bulwark |
Shield |
 Idol of the White Stag Idol of the White Stag |
Relic: idol |
 Choker of Endless Nightmares Choker of Endless Nightmares |
Neck |
 Band of the Abyssal Lord Band of the Abyssal Lord |
Finger |
Shade of Akama
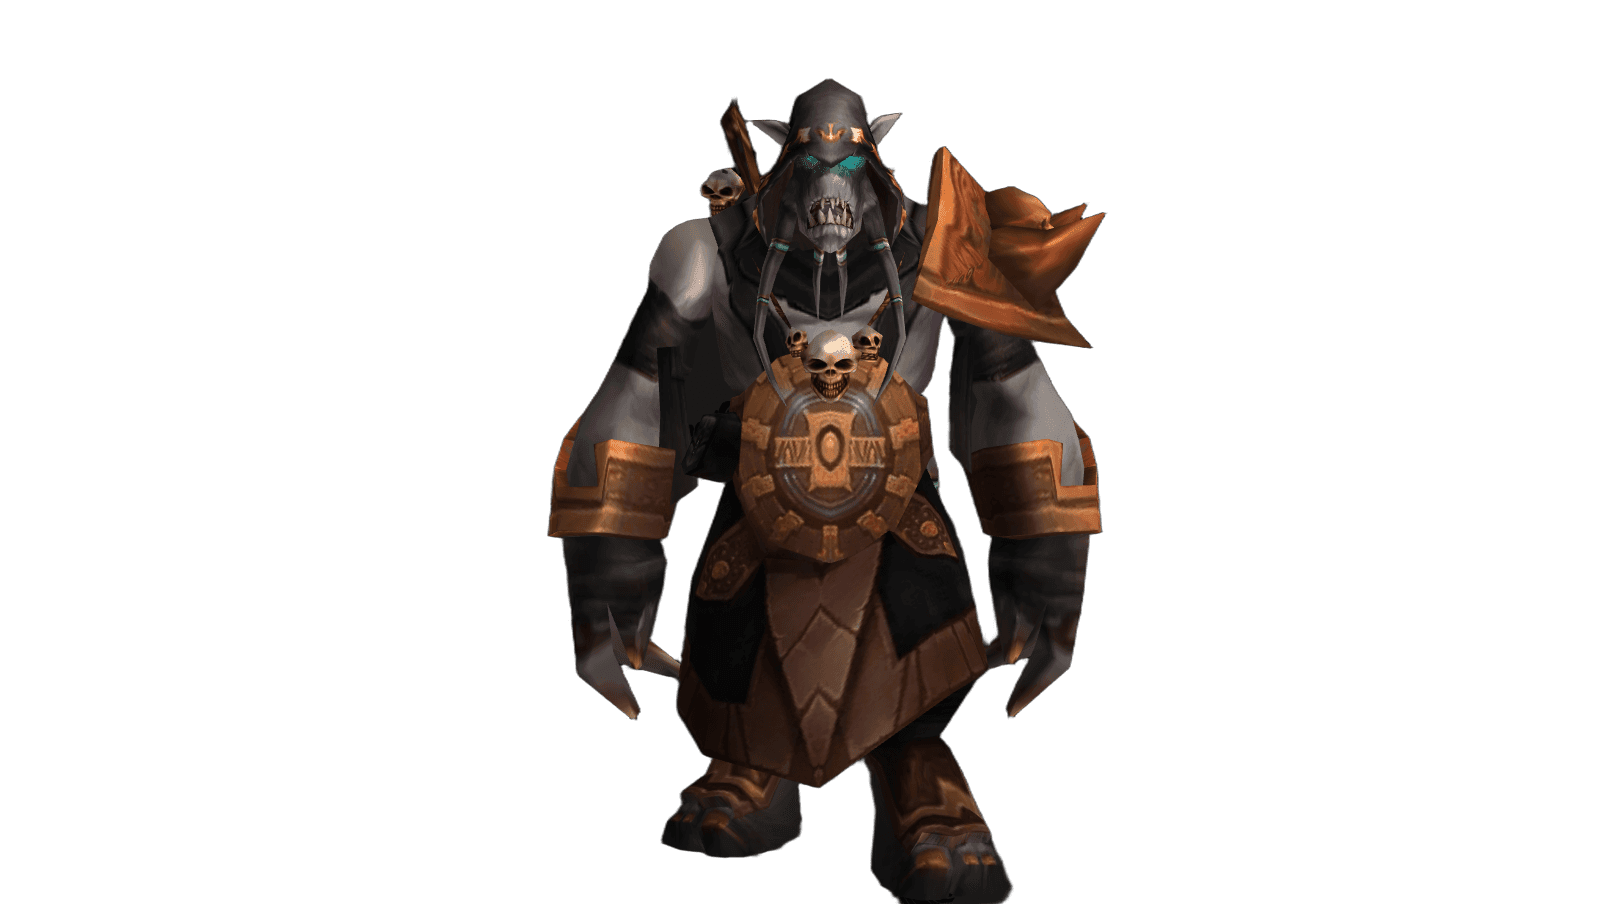
Shade of Akama — the dark half of the soul of Akama, chieftain of the Broken, torn out of him and held captive within the temple by Illidan. As long as six spellbinders of the Ashtongue clan sustain it with a ritual, the Shade remains motionless — but the moment they are killed, it rushes at the real Akama to consume him for good.
Below we break down each of the fight's abilities in detail.
Fight Overview
This is a fight not so much against a boss as against waves of minions: players never tank the Shade of Akama itself at any point in the fight.
The first phase is a race against time. The raid must kill the six Ashtongue Channelers as quickly as possible; they continuously maintain the ritual around the Shade and do not attack players at all. While this race is underway, Ashtongue Elementalists, Ashtongue Spiritbinders, and Ashtongue Rogues emerge from the left and right passages in groups of three, and Ashtongue Defenders arrive separately from them. Usually a tank is assigned to each passage, a third picks up the defenders, and any extra enemies are kept under control — for example, with  Polymorph.
The main danger of the phase is the Ashtongue Spiritbinder: its  Chain Heal can set your progress on the channelers back.
The second phase begins when the last channeler falls: the Shade is freed, moves through the hall toward the real Akama, and engages him in combat. Akama tanks his own Shade. Now it's a race in the opposite direction — to kill the Shade before it kills Akama, or the fight resets. After the Shade dies, all remaining minions vanish.
Main Boss Abilities
- Chain Heal (Important)
The Ashtongue Spiritbinder's chain heal. This is precisely what can roll back the raid's progress on the channelers — interrupt it or keep the spiritbinders away from the Ashtongue Channelers.
 Spirit Mend (Important)
A periodic heal from the Ashtongue Spiritbinder that restores the target's health every 2 sec.
Spirit Mend (Important)
A periodic heal from the Ashtongue Spiritbinder that restores the target's health every 2 sec. Spirit Heal
A direct heal from the Ashtongue Spiritbinder.
Spirit Heal
A direct heal from the Ashtongue Spiritbinder. Eviscerate
A melee strike from the Ashtongue Rogue that deals direct damage.
Eviscerate
A melee strike from the Ashtongue Rogue that deals direct damage. Debilitating Poison (Healer)
A poison from the Ashtongue Rogue: it slows attack and casting speed and deals periodic damage. The effect can be removed by cleansing — and it absolutely must be removed.
Debilitating Poison (Healer)
A poison from the Ashtongue Rogue: it slows attack and casting speed and deals periodic damage. The effect can be removed by cleansing — and it absolutely must be removed. Lightning Bolt
A ranged spell from the Ashtongue Elementalist that deals nature damage. It can be interrupted.
Lightning Bolt
A ranged spell from the Ashtongue Elementalist that deals nature damage. It can be interrupted. Rain of Fire
The Ashtongue Elementalist creates a zone of fire on the ground that deals area damage. Just don't stand in the fire.
Rain of Fire
The Ashtongue Elementalist creates a zone of fire on the ground that deals area damage. Just don't stand in the fire. Shield Bash (Important)
The Ashtongue Defender interrupts a target's spell in melee range. Keep the defenders away from healers and casters.
Shield Bash (Important)
The Ashtongue Defender interrupts a target's spell in melee range. Keep the defenders away from healers and casters. Debilitating Strike (Tank)
An attack from the Ashtongue Defender that applies the effect of the same name: the target's melee damage is reduced by 75% for 5 sec.
Debilitating Strike (Tank)
An attack from the Ashtongue Defender that applies the effect of the same name: the target's melee damage is reduced by 75% for 5 sec.
Shade of Akama Fight Strategy
- Tanks For tanks this is a fight against the minions — the boss itself isn't tanked at all. Split into teams by passage: a tank on the left and right plus a separate tank on the Ashtongue Defenders. Quickly taunting the first target in each wave makes life much easier, and the rest should be crowd-controlled right away. There's no need to tank the Ashtongue Channelers in the center — they don't attack.
- Healers
Stay away from the Ashtongue Defenders with their Shield Bash and remove Debilitating Poison from the DPS. In the second phase, make sure raid damage doesn't distract you from the main goal — Akama doesn't need to be healed, but there isn't much time to kill the Shade.
- DPS
In the first phase, all priority goes to the Ashtongue Channelers, and among the minions, kill the Ashtongue Spiritbinders first, interrupting their Chain Heal. Keep the rest under Polymorph and other crowd-control effects. As soon as the Shade becomes vulnerable, pour everything into it, including
 Bloodlust.
Loot
| Item | Equipment Slot |
|---|---|
 Amice of Brilliant Light Amice of Brilliant Light |
Cloth armor: shoulders |
 Focused Mana Bindings Focused Mana Bindings |
Cloth armor: wrists |
 Wristbands of Divine Influence Wristbands of Divine Influence |
Cloth armor: wrists |
 Kilt of Immortal Nature Kilt of Immortal Nature |
Leather armor: legs |
 Shadow-Walker's Cord Shadow-Walker's Cord |
Leather armor: waist |
 Shoulders of the Hidden Predator Shoulders of the Hidden Predator |
Mail armor: shoulders |
 Spiritwalker Gauntlets Spiritwalker Gauntlets |
Mail armor: hands |
 Flashfire Girdle Flashfire Girdle |
Mail armor: waist |
 The Seeker's Wristguards The Seeker's Wristguards |
Plate armor: wrists |
 Grips of Silent Justice Grips of Silent Justice |
Plate armor: hands |
 Praetorian's Legguards Praetorian's Legguards |
Plate armor: legs |
 Myrmidon's Treads Myrmidon's Treads |
Plate armor: feet |
 Blind-Seers Icon Blind-Seers Icon |
Off hand |
 Ring of Deceitful Intent Ring of Deceitful Intent |
Finger |
Teron Gorefiend
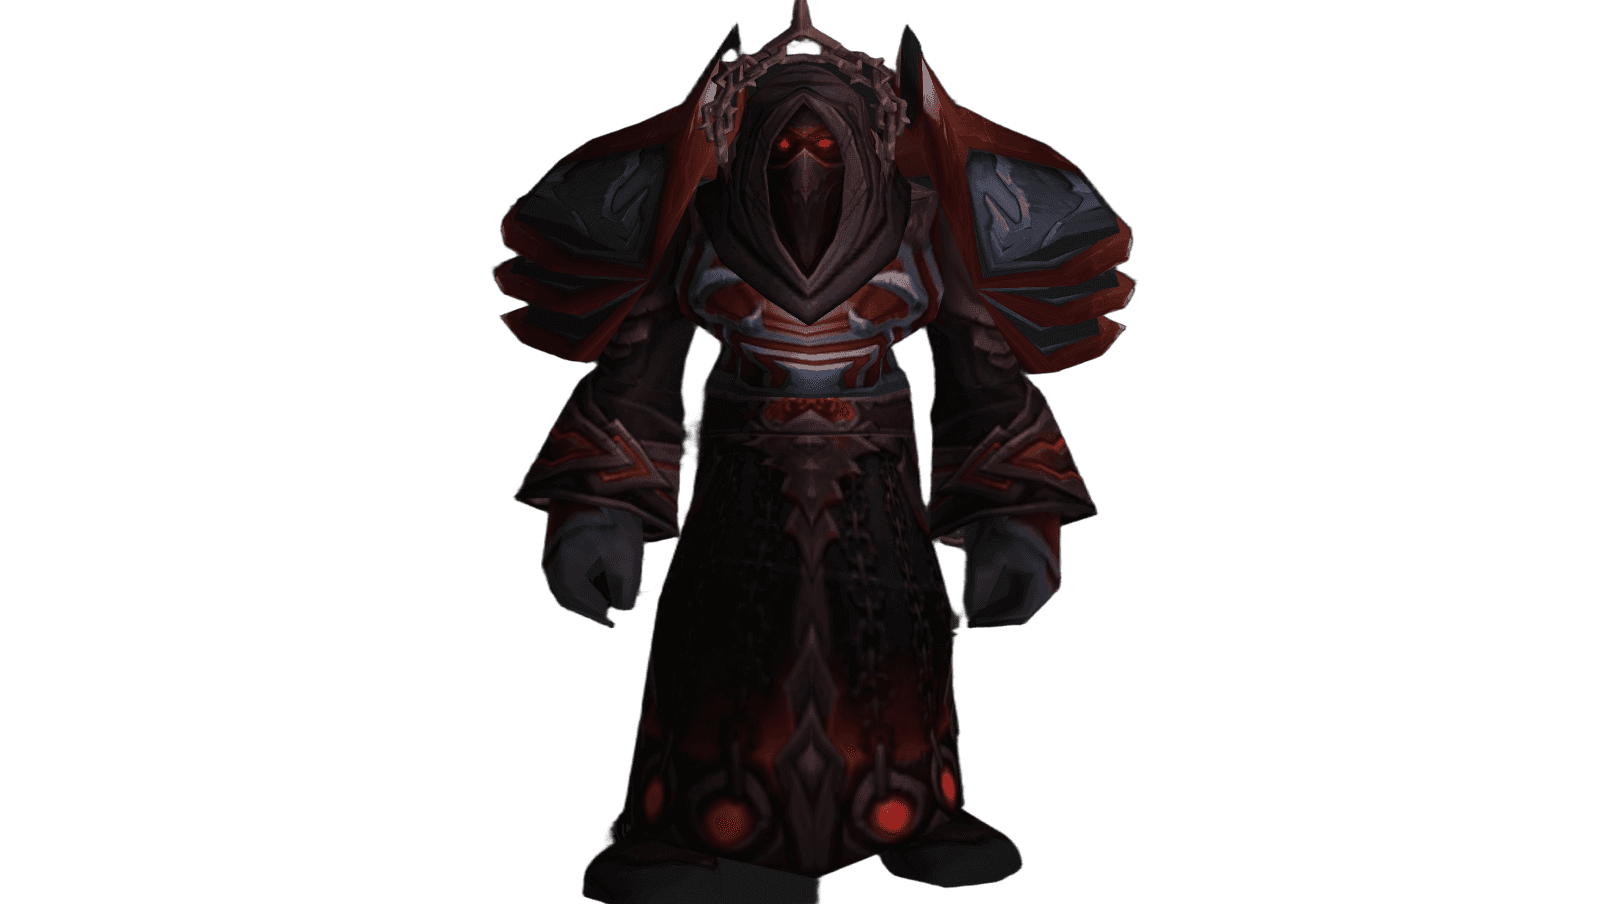
Teron Gorefiend — the first death knight of Draenor, whose soul was implanted into the body of a fallen Horde knight. Resurrected within the walls of the Black Temple, he kills players one by one, turning them into vengeful spirits, and sends creatures of darkness into the raid that only the dead themselves can stop.
Below we break down each of the fight's abilities in detail.
Fight Overview
The fight is single-phase and requires just one tank, but it has a unique guaranteed-death mechanic —  Shadow of Death.
Teron is held where he stands, while the whole raid moves as far back into the hall as possible and stacks tightly: the boss has no dangerous area damage, but a tight formation strengthens Chain Heal and  Circle of Healing. The distance is needed so that dead players have more time to finish off their constructs.
Background damage comes from three abilities:  Summon Doom Blossom conjures a purple cloud that pelts the raid with shadow magic;
  Incinerate applies a strong periodic fire damage effect to a random player that should be dispelled; and Crushing Shadows increases the shadow magic damage the target takes.
The main thing, though, is Shadow of Death: once every 30 sec. the effect lands on a random player (other than the main tank) and kills them after 55 sec. The player turns into a  Spirit of Redemption and gains a set of special abilities, while four Shadowy Constructs appear nearby and head toward the living players. Only spirits can interact with them. By moving to the far corner of the hall in advance, the spirit has time to destroy all four before they reach the raid.
Main Boss Abilities
- Shadow of Death (Deadly)
The fight's main mechanic. Once every 30 sec. it is applied to a random player other than the main tank and kills them after 55 sec. At the moment of death, four Shadowy Constructs appear, and the player themselves turns into a Spirit of Redemption with a new set of abilities.
- Summon Doom Blossom
Teron conjures a floating purple cloud that pelts random raid members with shadow bolts.
- Incinerate (Healer)
Selects a random raid member, deals fire damage instantly, and applies a very strong periodic damage effect. It's a magic effect — a quick dispel removes the most painful part.
- Crushing Shadows (Important)
Applied to random players and increases the shadow magic damage they take, making the doom blossom's barrage truly dangerous.
Spirit of Redemption Abilities
- Spirit Volley
Damage to all Shadowy Constructs around the spirit. Cooldown — 15 sec.
 Spirit Chains
Immobilizes all Shadowy Constructs around the spirit for 5 sec. Cooldown — 15 sec.
Spirit Chains
Immobilizes all Shadowy Constructs around the spirit for 5 sec. Cooldown — 15 sec. Spirit Lance
Deals damage to a single construct and slows it; the slow gradually wears off.
Spirit Lance
Deals damage to a single construct and slows it; the slow gradually wears off. Spirit Strike
Used on Teron: briefly reduces the damage he deals and inflicts minor frost magic damage.
Spirit Strike
Used on Teron: briefly reduces the damage he deals and inflicts minor frost magic damage. Spirit Shield
Applied to a living ally and protects them from shadow magic damage.
Spirit Shield
Applied to a living ally and protects them from shadow magic damage.
Teron Gorefiend Fight Strategy
- Tanks
The boss needs only one tank — other tanks are better off entering the fight as a DPS or healer. Teron doesn't need to be moved or turned in any special way: just hold threat and reduce incoming damage. The top threat target never receives Shadow of Death.
- Healers
Stand close together so that Chain Heal and Circle of Healing work at full strength. Quickly dispel Incinerate and pay especially close attention to players under Crushing Shadows.
- DPS
When you receive Shadow of Death, ask a warlock to cast Soulstone Resurrection on you, and 15–20 sec. before the effect expires, run off to the far corner of the hall. In spirit form, open with a combo of Spirit Volley + Spirit Chains, then cast Spirit Lance once on each construct, starting with the farthest one, and repeat the combo on cooldown. Use Spirit Strike and Spirit Shield only after all the constructs are destroyed.
Loot
| Item | Equipment Slot |
|---|---|
 Cowl of Benevolence Cowl of Benevolence |
Cloth armor: head |
 Robe of the Shadow Council Robe of the Shadow Council |
Cloth armor: chest |
 Insidious Bands Insidious Bands |
Leather armor: wrists |
 Botanist's Gloves of Growth Botanist's Gloves of Growth |
Leather armor: hands |
 Softstep Boots of Tracking Softstep Boots of Tracking |
Mail armor: feet |
| Gauntlets of Enforcement |
Plate armor: hands |
 Girdle of Lordaeron's Fallen Girdle of Lordaeron's Fallen |
Plate armor: waist |
 Soul Cleaver Soul Cleaver |
Two-handed axe |
 Rifle of the Stoic Guardian Rifle of the Stoic Guardian |
Gun |
 Twisted Blades of Zarak Twisted Blades of Zarak |
Thrown weapon |
 Shadowmoon Destroyer's Drape Shadowmoon Destroyer's Drape |
Back |
 Totem of Ancestral Guidance Totem of Ancestral Guidance |
Relic: totem |
Gurtogg Bloodboil
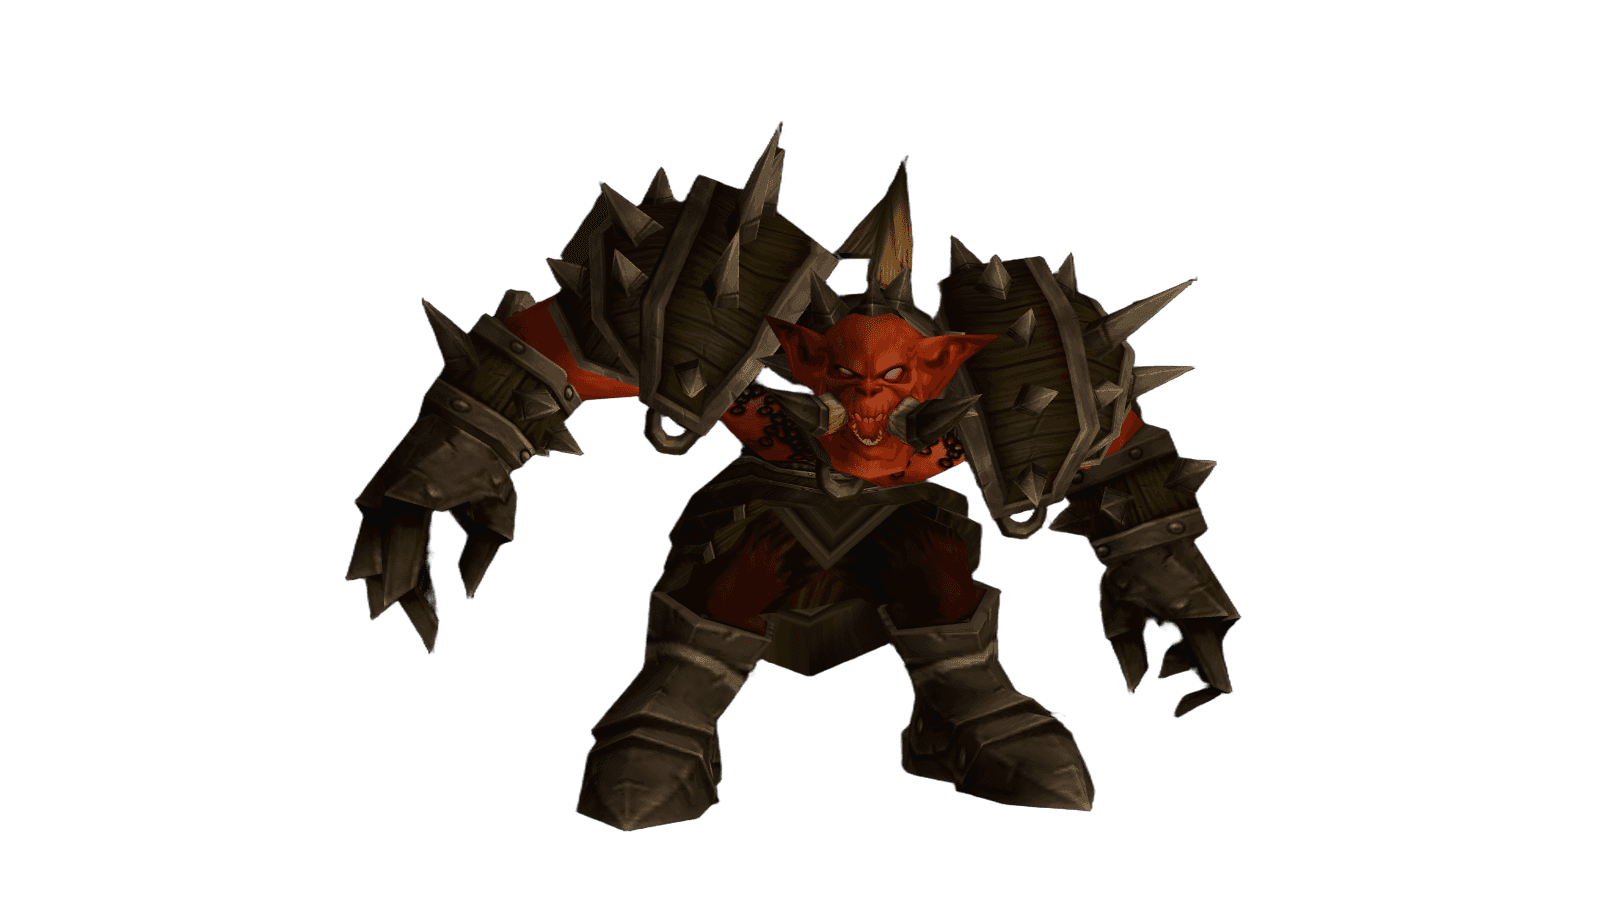
Gurtogg Bloodboil — a mutated fel orc, an overseer of monstrous strength within the Black Temple. He tears tanks apart with acidic wounds, boils the blood in the veins of those who keep their distance, and then picks a single victim, pours fel power into them, and unleashes all his fury upon them.
Below we break down each of the fight's abilities in detail.
This is a fight with very high damage to both tanks and the raid — some hybrids may need to enter as healers.
Fight Overview
The fight consists of two phases that alternate until the boss dies. After 10 minutes berserk activates.
The first phase lasts 90 sec. With every hit, Gurtogg applies  Acidic Wound to the target — a stacking effect lasting 60 sec., so the tanks have to swap. Usually three tanks are used: the third is needed as a safety net, because
  Bewildering Strike disorients the current tank and itself forces a swap. In front of himself the boss hits with
  Fel Arcing Smash and
  Fel-Acid Breath, so he is always turned away from the raid.
The main raid mechanic of the phase is  Bloodboil: every 10 sec. the ability hits the five players farthest from the boss and applies a stacking periodic damage effect. That's why the ranged and healers split into three groups of five: the current group moves a bit farther than the rest, takes Bloodboil on themselves, and returns to the main formation, and over the next 10 sec. another group does the same.
The second phase begins when Gurtogg applies  Fel Rage to a random player. The boss switches only to them and hits with increased damage, ramping up with
  Fury, while
  Fel Geyser erupts beneath the victim's feet. Everyone else gets
  Insignificance and generates no threat at all — this is the best window for all your damage cooldowns. The phase lasts 30 sec., and the key is not to let the bearer of Fel Rage die: the boss's buffs will not fall off, and he will instantly tear apart the rest of the raid.
Main Boss Abilities
- Acidic Wound (Tank)
Applied to the target of any of Gurtogg's melee attacks. A stacking effect that deals periodic damage and reduces armor, lasting 60 sec. It's precisely because of this that a tank rotation is needed.
- Bloodboil (Important)
Used once every 10 sec. in the first phase on five targets at once — the five players farthest from the boss are selected. It applies a stacking effect that deals periodic physical damage over 24 sec.
- Fel-Acid Breath (Tank)
A cone in front of the boss: it deals nature damage instantly and then periodic damage to everyone hit.
- Bewildering Strike (Tank)
Used periodically in the first phase on the top threat target and disorients them for 8 sec. The boss ignores the disoriented target, causing a forced tank swap.
- Fel Arcing Smash (Healer)
Used roughly every 10 sec. in both phases. Deals increased melee damage to everyone in the cone in front of the boss and reduces the healing they receive by 50% for 4 sec.
- Fel Rage (Deadly)
Applied to a random player after 90 sec. of the first phase and begins the second. It sharply increases the target's maximum health and armor, the damage they take by 300%, and the healing they receive by 100%. At the same time Gurtogg's own damage grows by 85%, and he gains the stacking haste buff Fury. Throughout this time the boss attacks only the bearer of the effect.
- Fel Geyser (Important)
Erupts from the ground at the spot where the bearer of Fel Rage is standing, knocking back other players and dealing nature damage.
- Insignificance
Applied at the same time as Fel Rage to everyone except its bearer, reducing the threat they generate by 100%.
Gurtogg Fight Strategy
- Tanks
You need three tanks to comfortably rotate the stacks of Acidic Wound: two can swap with each other, but a third is necessary as a safety net in case of Bewildering Strike. Damage to tanks is very high, and the boss must always be kept turned away from the raid so that Fel Arcing Smash and Fel-Acid Breath hit only the tanks.
- Healers
This is one of the raid's toughest fights for healing. In the first phase, keep the group rotation going under Bloodboil and don't forget about tanks with high stacks of Acidic Wound. In the second phase, all attention goes to the bearer of Fel Rage;
 Blessing of Protection on them makes them immune to the boss's attacks and, at the same time, does not make Gurtogg switch targets.
 - DPS
Split into three groups of five and take turns moving the farthest away to take Bloodboil on yourselves. Before the transition to the second phase, spread out slightly. During Fel Rage, move away from its bearer to avoid Fel Geyser, and pour on all your damage — Insignificance completely removes threat.
Loot
| Item | Equipment Slot |
|---|---|
 Blood-Cursed Shoulderpads Blood-Cursed Shoulderpads |
Cloth armor: shoulders |
 Garments of Temperance Garments of Temperance |
Cloth armor: chest |
 Belt of Primal Majesty Belt of Primal Majesty |
Leather armor: waist |
 Vest of Mounting Assault Vest of Mounting Assault |
Mail armor: chest |
 Leggings of Divine Retribution Leggings of Divine Retribution |
Plate armor: legs |
 Girdle of Stability Girdle of Stability |
Plate armor: waist |
 Girdle of Mighty Resolve Girdle of Mighty Resolve |
Plate armor: waist |
 Messenger of Fate Messenger of Fate |
Dagger |
 Staff of Immaculate Recovery Staff of Immaculate Recovery |
Two-handed staff |
 Wand of Prismatic Focus Wand of Prismatic Focus |
Wand |
 Shroud of Forgiveness Shroud of Forgiveness |
Back |
 Unstoppable Aggressor's Ring Unstoppable Aggressor's Ring |
Finger |
 Shadowmoon Insignia Shadowmoon Insignia |
Trinket |
Reliquary of the Lost
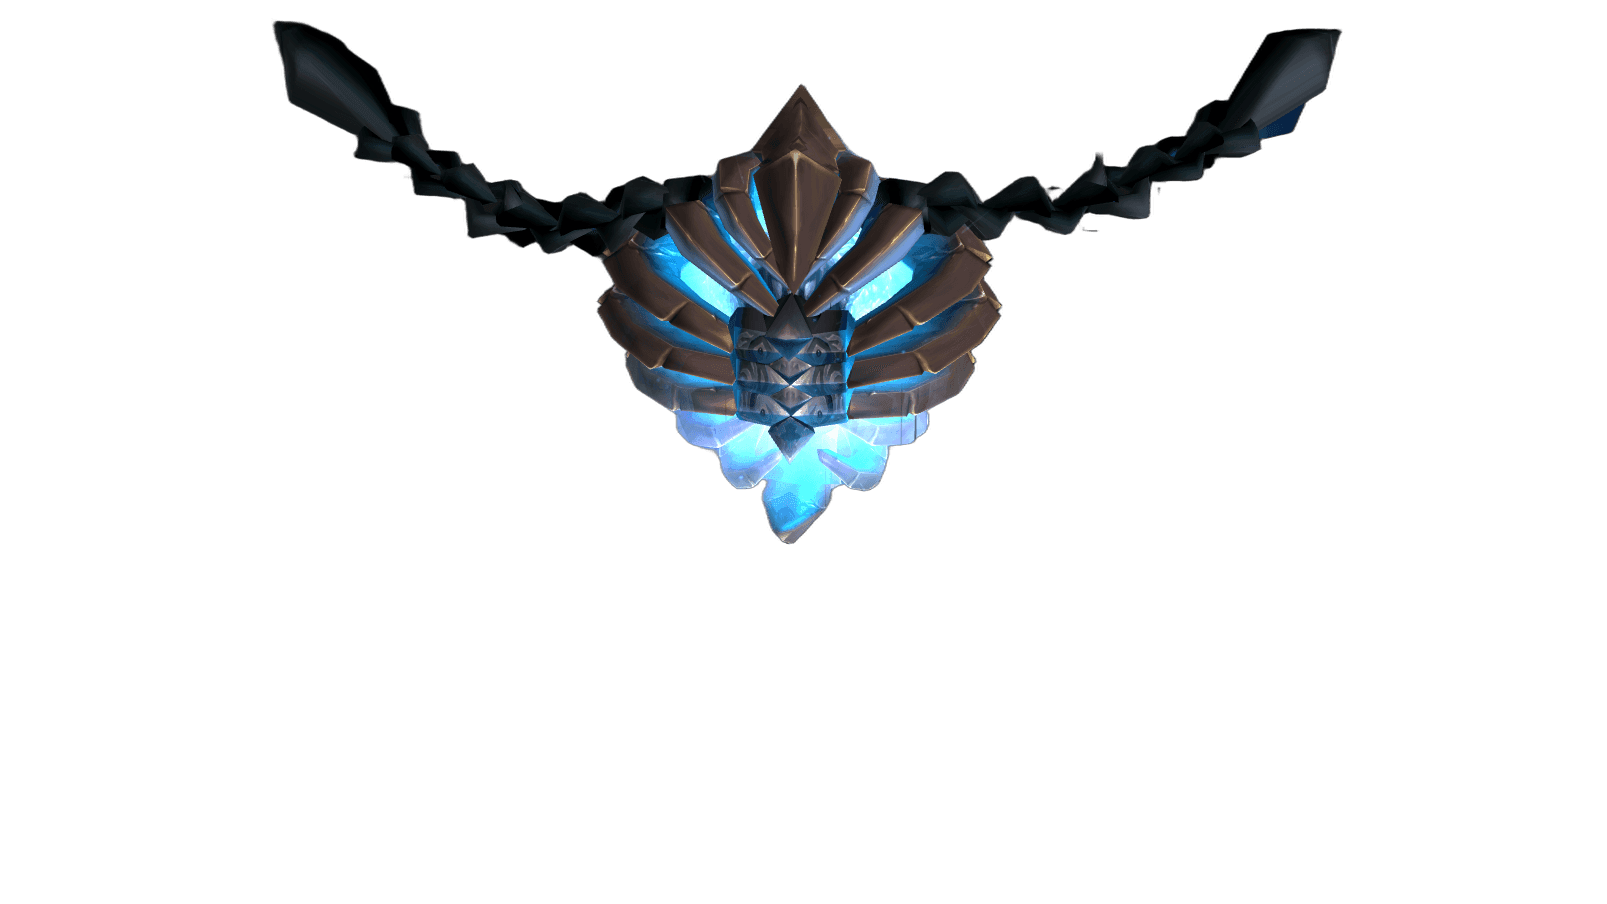
Reliquary of the Lost (commonly known as the Reliquary of Souls) — an ancient sarcophagus in which three incarnations of a fallen soul are imprisoned: the Essence of Suffering, the Essence of Desire, and the Essence of Anger. The raid must fight each of them in turn, and each imposes its own rules of battle.
Below we break down each of the fight's abilities in detail.
Fight Overview
The fight consists of three sequential phases — one for each essence. Between phases there is a short respite in which the raid's health and mana are fully restored, so healers don't need to spare their mana.
First phase — Essence of Suffering. Because of the  Aura of Suffering, healing in the raid is completely disabled. Every 5 sec. the boss uses
  Fixate and always picks the player standing closest to it — so the raid itself decides who takes the hit and spreads the damage out in turn. Roughly every 45 sec. the boss enters Frenzy: it's convenient to soak this with a rogue using
  Evasion or a hunter using
  Deterrence.
  Soul Drain must be dispelled quickly. This essence has zero armor, so armor-reduction effects are useless.
Second phase — Essence of Desire. The  Aura of Desire doubles healing, gradually lowers the maximum mana pool and, most importantly, reflects 50% of the damage dealt to the boss back onto the DPS. Every 5 sec. the boss casts
  Spirit Shock, and it must be interrupted every time. Periodically a
  Rune Shield appears, under which interrupting is impossible — it must be removed immediately with a dispel or
  Spellsteal.
  Deaden doubles the damage taken by the tank, but a warrior can reflect it with
  Spell Reflection, doubling the damage dealt to the boss itself.
Third phase — Essence of Anger. The  Aura of Anger gradually ramps up raid damage while simultaneously boosting the players' own damage. Each taunt triggers
  Seethe, and random players receive
  Spite. The tank is hit by
  Soul Scream, which burns mana and rage in a cone in front of the boss.
Main Boss Abilities
Essence of Suffering
- Aura of Suffering (Deadly)
A first-phase aura affecting the whole raid: it reduces healing, health regeneration, and armor by 100%, and the defense skill by 500. Healing in this phase is impossible at all.
- Fixate (Important)
Every 5 sec. the boss selects a new target — it always becomes the player standing closest to it. This is exactly how the raid controls who takes the damage.
- Frenzy (Tank)
Roughly 45 sec. after the fight begins, it increases the Essence of Suffering's attack speed and damage for 15 sec.
- Soul Drain (Healer)
Applied to random players, it burns mana and deals periodic damage. It's a magic effect — dispel it quickly.
Essence of Desire
- Aura of Desire (Important)
A second-phase aura: it doubles all healing, gradually reduces the maximum mana pool, and makes the DPS take damage equal to 50% of what they deal to the boss.
- Spirit Shock (Deadly)
Deals enormous damage and disorients the main tank. It is cast every 5 sec. and must be interrupted every time without exception.
- Rune Shield (Important)
A shield that absorbs damage and makes the boss's spells uninterruptible. Remove it with a dispel or Spellsteal immediately.
- Deaden (Tank)
An effect on the main tank that doubles all damage they take for 10 sec. A warrior can reflect it with Spell Reflection — then the damage taken by the boss itself is doubled.
Essence of Anger
- Aura of Anger (Healer)
A third-phase aura: it deals increasing periodic shadow magic damage to the entire raid while simultaneously and gradually boosting the damage dealt by players.
- Seethe (Important)
Triggers whenever the boss is taunted. It applies to the whole raid, except the one taunting, an effect granting +200% to generated threat for 10 sec., and to the boss a buff of +100% attack speed, which can be removed with a hunter's
 Tranquilizing Shot.
 - Spite (Healer)
Selects a random player and makes them immune to damage for 6 sec., but when it ends it deals heavy nature damage to them.
- Soul Scream (Tank)
A cone in front of the boss that burns mana and rage. Tanks should approach it with low resources to take less damage.
Reliquary of the Lost Fight Strategy
- Tanks
In the first phase there is no healing at all — evasion and rotation are what save you: every 5 sec. the boss hits whoever is standing closest, so "tanking" is distributed among several players. In the second phase a warrior tank is highly desirable for Spell Reflection against Deaden. In the third phase there must be only one tank: any extra taunt triggers Seethe. Before Soul Scream, keep your resource at a minimum.
- Healers
In the first phase healing is useless — pour on damage without sparing mana, and only watch for dispelling Soul Drain. In the second phase the DPS take half the damage they deal, so healing flows in a constant stream across the whole group. In the third — increasing damage from the Aura of Anger and spikes from Spite.
- DPS
In the first phase, control your distance: the one closest to the boss is whoever should currently take Fixate. In the second phase, set up an interrupt rotation for Spirit Shock with two players, keep
 Curse of Tongues on the boss, and watch out for the reflected damage. In the third phase, watch your threat carefully under Seethe — sometimes it's better to simply stop attacking — and drink a
  Major Nature Protection Potion in advance before the Spite spikes.
Loot
| Item | Equipment Slot |
|---|---|
 Gloves of Unfailing Faith Gloves of Unfailing Faith |
Cloth armor: hands |
 Elunite Empowered Bracers Elunite Empowered Bracers |
Leather armor: wrists |
 Grips of Damnation Grips of Damnation |
Leather armor: hands |
 Naturewarden's Treads Naturewarden's Treads |
Leather armor: feet |
 The Wavemender's Mantle The Wavemender's Mantle |
Mail armor: shoulders |
 Boneweave Girdle Boneweave Girdle |
Mail armor: waist |
 Crown of Empowered Fate Crown of Empowered Fate |
Plate armor: head |
 Dreadboots of the Legion Dreadboots of the Legion |
Plate armor: feet |
 Torch of the Damned Torch of the Damned |
Two-handed mace |
 Naaru-Blessed Life Rod Naaru-Blessed Life Rod |
Wand |
 Touch of Inspiration Touch of Inspiration |
Off hand |
 Pendant of Titans Pendant of Titans |
Neck |
 Translucent Spellthread Necklace Translucent Spellthread Necklace |
Neck |
Mother Shahraz
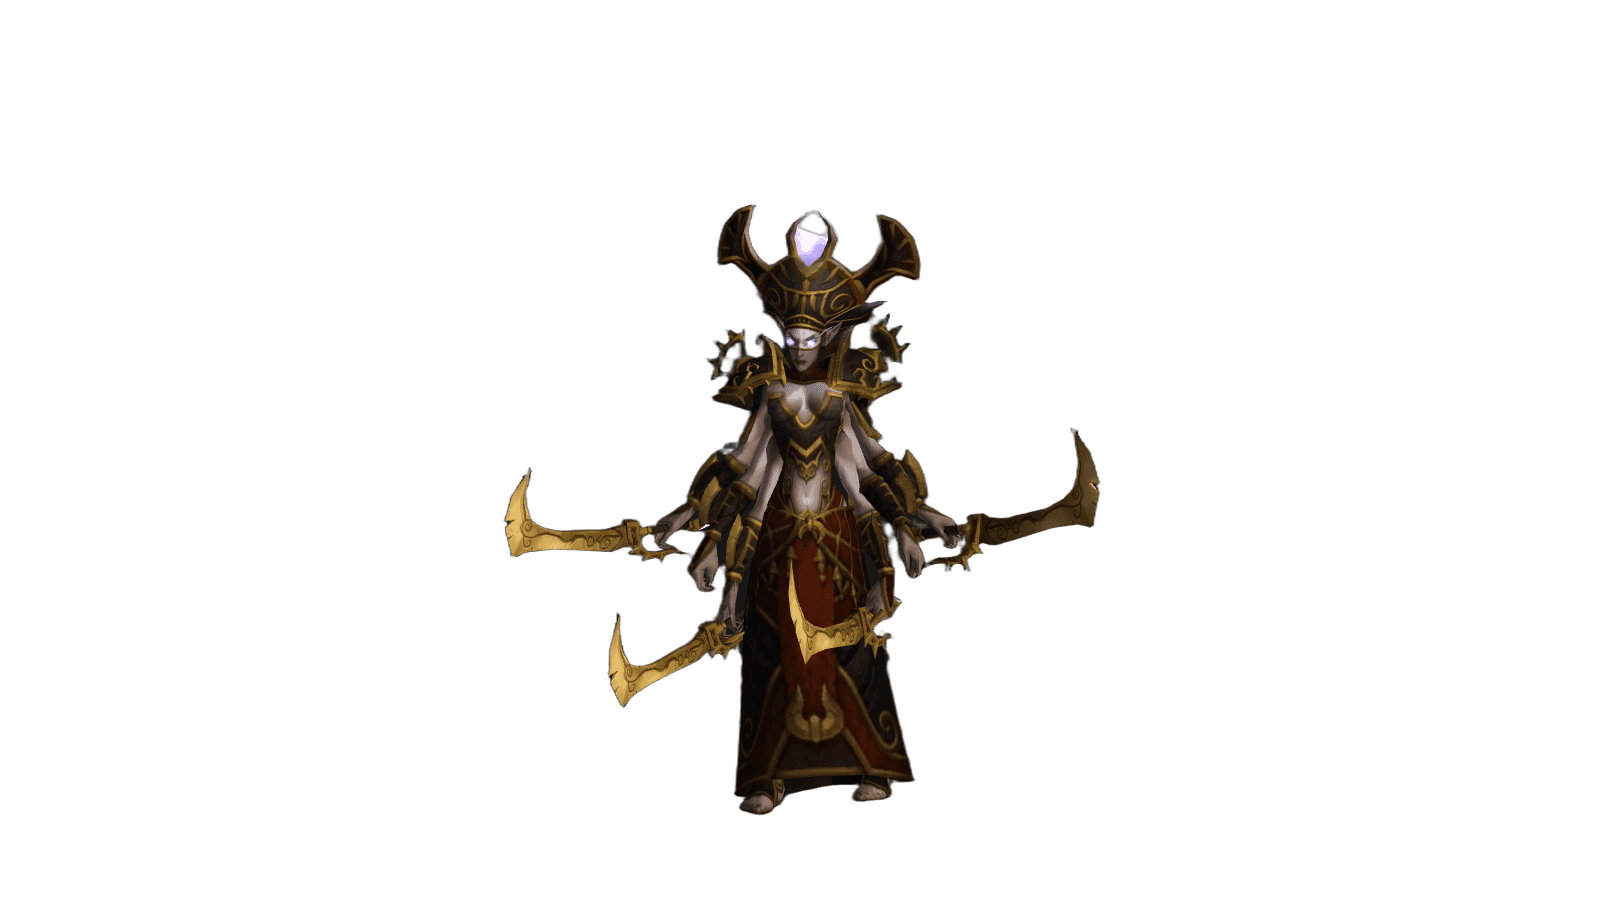
Mother Shahraz — the haughty shivarra mistress, the seventh boss of the Black Temple, accessible only after the first six have fallen. She cleaves tanks with her blades, laces the hall with beams of shadow magic, and binds players to one another with deadly bonds.
Below we break down each of the fight's abilities in detail.
Fight Overview
Mechanically the fight is simple, but it is the raid's biggest test of shadow magic damage. Most raids equip shadow resistance gear here — aim for about 174 points from gear plus 70 from  Prayer of Shadow Protection. The Medallion of Karabor (+40),
  Enchant Cloak - Greater Shadow Resistance (+15),
  Flask of Chromatic Wonder (+35), and
  Arcanum of Shadow Warding (+20) all help.
The raid needs three tanks to split  Saber Lash among themselves — it can't be survived alone or by two. The strike has a pleasant side effect: players hit by it become immune to the beams and to
  Fatal Attraction, so tanks don't need shadow resistance.
Throughout the fight Shahraz strikes the raid with beams —  Sinful Beam, Sinister Beam, Vile Beam, and Wicked Beam — each of which hits a random player and jumps to neighbors. Ranged and healers stand by the walls or behind a statue to negate the knockback from Sinister Beam, and keep their distance from the boss because of
  Interrupting Shriek.
The only truly difficult mechanic is Fatal Attraction: it teleports three random players to a single point and binds them with beams. The bond can be broken by running 25 yards apart from one another.
You should also watch the prismatic auras separately —  Prismatic Aura: Shadow,
  Prismatic Aura: Arcane,
  Prismatic Aura: Fire,
  Prismatic Aura: Nature,
  Prismatic Aura: Frost, and
  Prismatic Aura: Holy: each reduces damage from one school and boosts the rest, and they change over the course of the fight.
Main Boss Abilities
- Saber Lash (Tank)
A devastating attack whose damage is split among all targets in front of the boss — which is why three tanks are needed. Players hit by it gain an effect making them immune to the beams and to Fatal Attraction.
- Fatal Attraction (Deadly)
Teleports three random players to a single random point in the hall and binds them with purple beams. As long as a beam holds, each takes shadow magic damage per second. The bond breaks when the players move at least 25 yards apart.
- Interrupting Shriek (Important)
Silences all players within 18 yards of the boss for 10 sec. Casters and healers must not stand close.
- Sinful Beam (Healer)
Hits a random player and jumps to those nearby, catching up to 10 people. Deals heavy shadow magic damage to each.
- Sinister Beam (Important)
A beam that hits up to 10 players: it deals shadow magic damage and knocks them back.
- Vile Beam (Healer)
A beam that hits up to 10 players and applies periodic damage — shadow magic damage every 2 sec. for 8 sec.
- Wicked Beam
A beam that hits up to 10 players and burns part of each one's mana.
- Prismatic auras (Important)
Six alternating effects: Prismatic Aura: Shadow, Prismatic Aura: Arcane, Prismatic Aura: Fire, Prismatic Aura: Nature, Prismatic Aura: Frost, and Prismatic Aura: Holy. Each reduces the damage dealt by one school and increases the damage of the rest.
Mother Shahraz Fight Strategy
- Tanks
You need three tanks to split Saber Lash — without extra targets in front of the boss it kills a tank in one hit. Tanks don't need shadow resistance: the effect from Saber Lash itself makes them immune to the beams.
- Healers
Stay farther than 18 yards from the boss because of Interrupting Shriek and position yourself so that Sinister Beam doesn't knock you into a dangerous spot. The main load is the constant beam damage and spikes from Fatal Attraction.
- DPS
Equip shadow resistance gear. React instantly to Fatal Attraction and run apart in different directions —
 Rocket Boots Xtreme or Rocket Boots Xtreme Lite help break the bond almost instantly. If you deal damage with different schools, watch the prismatic auras from the list above and switch to the school whose damage is currently boosted.
Loot
| Item | Equipment Slot |
|---|---|
 Pauldrons of the Forgotten Protector Pauldrons of the Forgotten Protector |
Tier 6 token: shoulders (warrior, hunter, shaman) |
| Pauldrons of the Forgotten Vanquisher |
Tier 6 token: shoulders (rogue, mage, druid) |
| Pauldrons of the Forgotten Conqueror |
Tier 6 token: shoulders (paladin, priest, warlock) |
 Leggings of Devastation Leggings of Devastation |
Cloth armor: legs |
 Shadowmaster's Boots Shadowmaster's Boots |
Leather armor: feet |
 Heartshatter Breastplate Heartshatter Breastplate |
Plate armor: chest |
 Blade of Savagery Blade of Savagery |
One-handed sword |
 Tome of the Lightbringer Tome of the Lightbringer |
Relic: libram |
 Nadina's Pendant of Purity Nadina's Pendant of Purity |
Neck |
Illidari Council
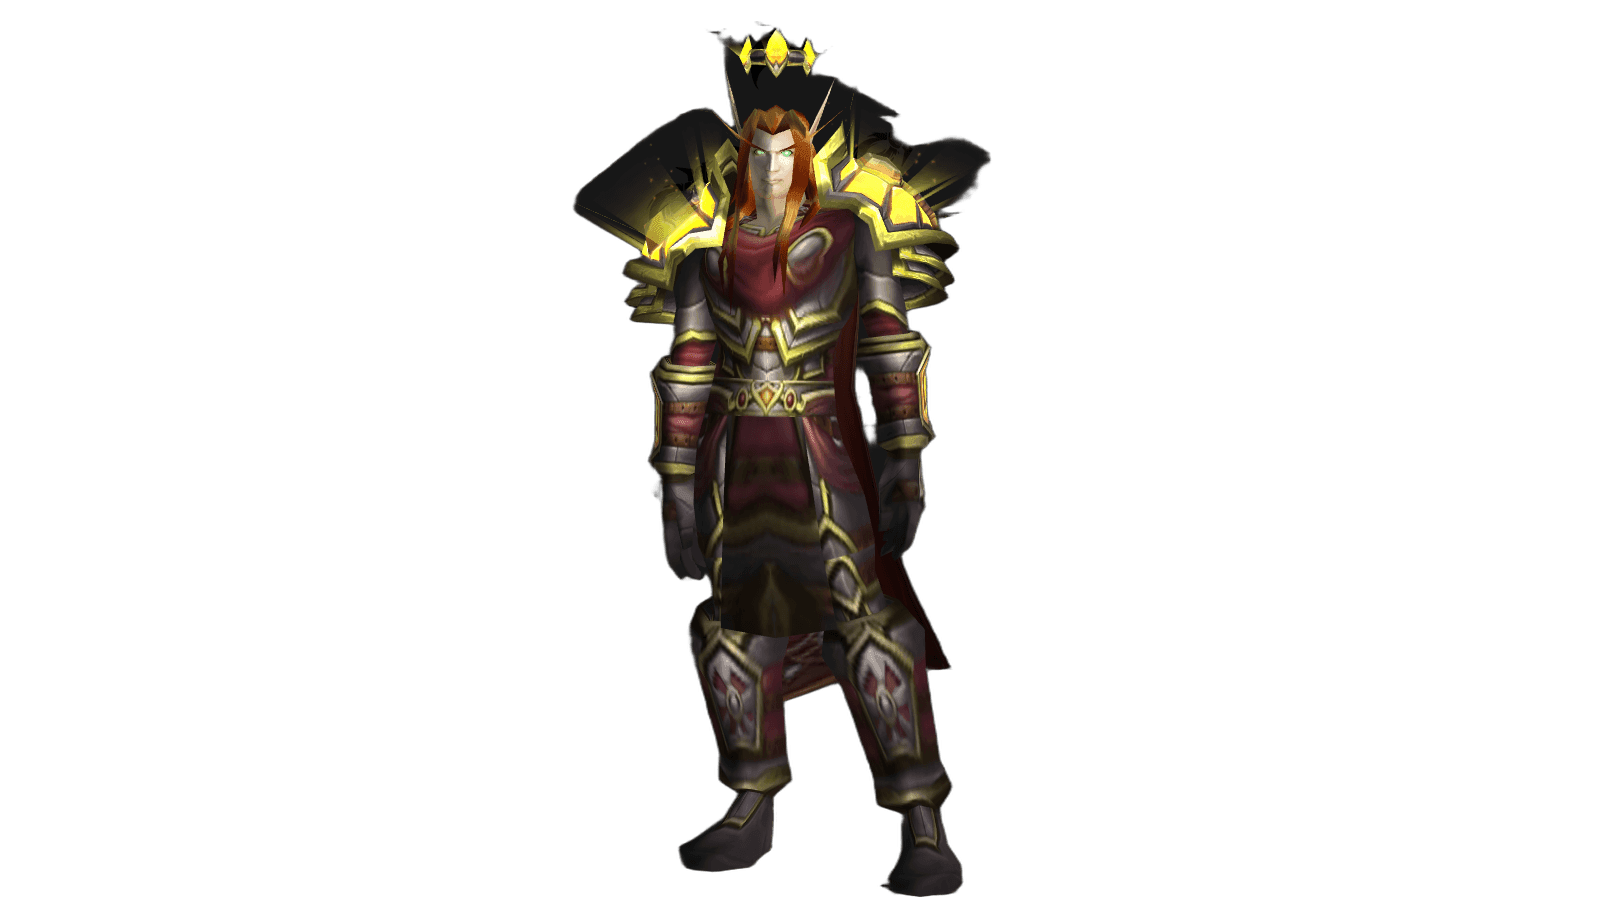
Illidari Council — four of Illidan's closest lieutenants, the raid's penultimate trial: the mage High Nethermancer Zerevor, the paladin Gathios the Shatterer, the rogue Veras Darkshadow, and the priestess Lady Malande. All four fight at the same time and share a common health pool.
Below we break down each of the fight's abilities in detail.
Fight Overview
All members of the council share a common health pool, and all four remain in the fight until the end — so the raid must simultaneously handle four different sets of mechanics.
High Nethermancer Zerevor is tanked by a mage: the player uses Spellsteal to steal the ultra-powerful Dampen Magic that the boss casts on himself, and holds him at range. If someone gets in close, Zerevor will start casting  Arcane Explosion. He strikes the raid with
  Flamestrike and Blizzard — you must move out of these zones immediately.
Gathios the Shatterer is the main target for damage. He is led away from the others so that  Devotion Aura and
  Chromatic Resistance Aura don't buff his allies. He grants them Blessing of Protection and
  Blessing of Spell Warding, and hits the tank with seals and judgments while constantly placing
  Consecration underfoot.
Veras Darkshadow goes into  Vanish roughly once a minute for 30 sec., spreading
  Deadly Poison across the raid, after which
  Envenom triggers. When he comes out of stealth, he must be picked up by a tank instantly.
Lady Malande is the most important member of the council. Her  Circle of Healing fully restores the entire council's health and must be interrupted every time. Since Gathios regularly covers her with blessings, she is assigned both physical and magical interrupts. Periodically she puts a
  Reflective Shield on herself.
Main Boss Abilities
High Nethermancer Zerevor
- Dampen Magic (Important)
An ultra-powerful version of dampen magic that Zerevor casts on himself: it reduces the magic damage he takes by 75%, but gives −500 to healing received. A mage can steal this buff with Spellsteal and tank the boss safely.
- Arcane Explosion (Important)
Area damage that Zerevor uses if someone gets too close: heavy arcane magic damage to everyone within 10 yards.
 Arcane Bolt (Tank)
His main ranged attack when no melee players are nearby: very high arcane magic damage, with a 2 sec. cast time.
Arcane Bolt (Tank)
His main ranged attack when no melee players are nearby: very high arcane magic damage, with a 2 sec. cast time.- Flamestrike
A large fire zone in a random spot: damage instantly within 8 yards and then periodic damage over 12 sec.
- Blizzard
A zone that deals periodic damage to everyone standing in it.
Gathios the Shatterer
- Blessing of Protection (Important)
Applied to a council member and makes them immune to physical damage for 15 sec.
- Blessing of Spell Warding (Important)
Applied to a council member and makes them immune to magic for 15 sec.
 Judgment of Blood (Tank)
Deals periodic holy magic damage to Gathios's tank over 9 sec. It works in tandem with
Judgment of Blood (Tank)
Deals periodic holy magic damage to Gathios's tank over 9 sec. It works in tandem with  Seal of Blood.
 Judgment of Command (Tank)
Deals heavy holy magic damage. A warrior can fully negate it with Spell Reflection. It works in tandem with Seal of Command.
Judgment of Command (Tank)
Deals heavy holy magic damage. A warrior can fully negate it with Spell Reflection. It works in tandem with Seal of Command.- Consecration (Tank)
Consecrates the ground for 20 sec., dealing periodic holy magic damage to those standing inside. The boss has to be moved constantly.
- Devotion Aura
Buffs nearby council members: +20% armor for 30 sec.
- Chromatic Resistance Aura
Buffs nearby council members: +250 resistance to all schools of magic for 30 sec.
Veras Darkshadow
- Vanish (Important)
Roughly once a minute Veras goes into stealth for 30 sec. and, the whole time, spreads Deadly Poison across the raid.
- Deadly Poison (Healer)
Applied to random players while Veras is stealthed: high periodic nature damage over 4 sec.
- Envenom (Healer)
Triggers when Deadly Poison ends, instantly dealing heavy nature damage to the target.
Lady Malande
- Circle of Healing (Deadly)
Restores a huge amount of health to all council members. Because of the shared health pool, every uninterrupted cast sets the raid far back — interrupting is mandatory.
 Divine Wrath
Periodic holy magic damage on a single target: damage instantly and then periodic damage over 8 sec. Interrupting it is desirable.
Divine Wrath
Periodic holy magic damage on a single target: damage instantly and then periodic damage over 8 sec. Interrupting it is desirable. Empowered Smite
A single-target spell dealing high holy magic damage. It can be interrupted.
Empowered Smite
A single-target spell dealing high holy magic damage. It can be interrupted.- Reflective Shield (Important)
A shield that absorbs damage and returns half of what it absorbs to attackers. While it's up, Malande must be attacked carefully.
Illidari Council Fight Strategy
- Tanks
High Nethermancer Zerevor is tanked by a mage: steal his Dampen Magic with Spellsteal and keep your distance so as not to trigger Arcane Explosion. A warrior is ideal for Gathios the Shatterer for the sake of Spell Reflection against Judgment of Command; lead him away from the others and don't stand in Consecration. Veras Darkshadow is best held by a paladin or druid — they have both magical and physical abilities to pick him up after Vanish even under Gathios's blessings.
- Healers
The main load is the constant damage from Deadly Poison and Envenom on random players, as well as Gathios's tank under Judgment of Blood. Don't forget to move out of Flamestrike and Blizzard.
- DPS
The main damage goes to Gathios the Shatterer; hitting the others is not worthwhile while they have Blessing of Protection and Blessing of Spell Warding on them. Assign two interrupters to Lady Malande at once — one with a physical and one with a magical interrupt — so that no Circle of Healing goes through, and be careful with damage under the Reflective Shield.
Loot
| Item | Equipment Slot |
|---|---|
 Leggings of the Forgotten Protector Leggings of the Forgotten Protector |
Tier 6 token: legs (warrior, hunter, shaman) |
| Leggings of the Forgotten Vanquisher |
Tier 6 token: legs (rogue, mage, druid) |
| Leggings of the Forgotten Conqueror |
Tier 6 token: legs (paladin, priest, warlock) |
 Belt of Divine Guidance Belt of Divine Guidance |
Cloth armor: waist |
 Veil of Turning Leaves Veil of Turning Leaves |
Leather armor: shoulders |
 Forest Prowler's Helm Forest Prowler's Helm |
Mail armor: head |
 Helm of the Illidari Shatterer Helm of the Illidari Shatterer |
Plate armor: head |
 Cloak of the Illidari Council Cloak of the Illidari Council |
Back |
| Madness of the Betrayer |
Trinket |
Illidan Stormrage
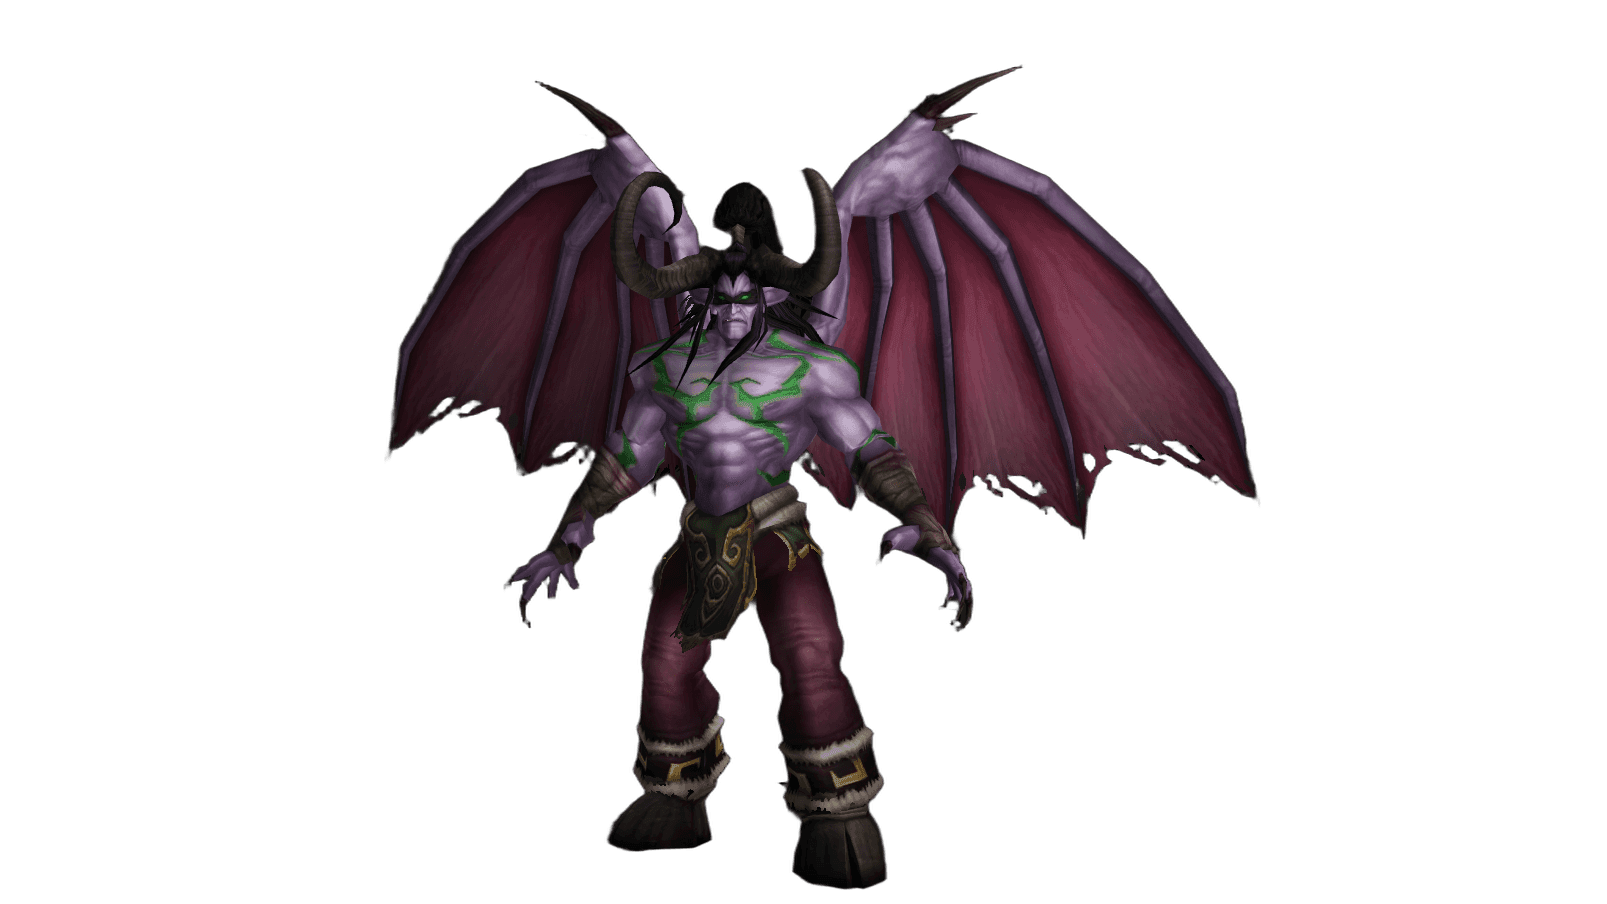
Illidan Stormrage, the Betrayer, is the final boss of the Black Temple and the lord of all Outland. He cleaves the raid with the Warglaives of Azzinoth, soars into the air and scorches the hall with beams from his eyes, transforms into a colossal demon and summons shadow minions — and only with the help of Maiev Shadowsong can he be subdued.
Below we break down each of the fight's abilities in detail.
Illidan drops the legendary Warglaives of Azzinoth and chest Tier 6 tokens for all classes, and all his loot is 10 item levels above the rest of the raid.
Fight Overview
The fight consists of five phases and requires four different tanks: one "regular" tank with physical mitigation (warrior or paladin), two with maximum fire resistance (warrior, paladin, or druid), and one warlock with maximum shadow resistance.
Phase 1 takes place on the ground. Illidan is held by the tank with physical mitigation: it's important to have a combined 100% of block, dodge, and parry so as not to take  Shear, which shaves off 60% of maximum health. The boss leaps up and slams down with
  Flame Crash, leaving blue flame, hits with a cone of Draw Soul (noticeably healing for each target hit), and applies
  Parasitic Shadowfiend to random players. The phase ends at 65% health.
Phase 2 — Illidan takes flight and hurls down both glaives, from which two Flames of Azzinoth are born. Each is held by a fire-resistance tank, who does not stray far from "their" glaive, otherwise the Flame gains Uncaged Wrath. From above, Illidan hits with  Fireball,
  Dark Barrage, and Eye Blast. The phase ends when both Flames are killed.
Phase 3 repeats the first, but  Agonizing Flames is added — the raid must spread out. After a minute, phase 4 begins.
Phase 4 — Illidan transforms into a demon. He is tanked by the warlock with shadow resistance, standing far from both the boss and the raid:  Aura of Dread burns everyone within 15 yards, and Shadow Blast hits everyone within 20 yards of the tank. The boss showers the raid with
  Flame Burst and uses Summon Shadow Demons. After 60 sec. he returns to the third phase's mechanics, and phases 3 and 4 alternate until 30% health.
Phase 5 begins at 30%: Maiev Shadowsong comes to the rescue, placing shadow traps, and Illidan gains the ability to fall into a Frenzy. The best time to drag the boss into a trap is precisely during his frenzy.
Main Boss Abilities
- Shear (Tank)
Used on the top threat target and reduces their maximum health by 60% for 7 sec. If the attack is blocked, dodged, parried, or missed, the effect is not applied — so the tank needs 100% avoidance.
- Flame Crash (Important)
Illidan leaps up and slams down, dealing area damage and leaving a lingering blue flame on the ground that deals fire damage every 2 sec. The boss must be moved slightly aside each time.
- Draw Soul (Tank)
A cone in front of the boss: heavy shadow magic damage to everyone hit, while Illidan heals noticeably for each target hit. Keep the boss turned away from the raid and be sure to apply a healing-reduction effect to him.
- Parasitic Shadowfiend (Important)
Applied to random players: periodic shadow magic damage over 10 sec. When it ends, two Parasitic Shadowfiends appear at the player's feet, running to other players and reinfecting them.
- Fireball (Healer)
In the second phase, hits a random player: fire damage to them and everyone within 10 yards.
- Dark Barrage (Healer)
In the second phase, selects a random player and deals very high periodic shadow magic damage over 10 sec.
- Eye Blast (Deadly)
Two beams that deal enormous damage to everyone in their line and leave a lingering blue flame — heavy periodic fire damage to those standing in it.
- Uncaged Wrath (Deadly)
If a Flame of Azzinoth is led too far from the glaive it's bound to, it gains +500% damage and +200% movement speed.
 Flame Blast (Tank)
A cone of fire in front of the Flame of Azzinoth — turn it away from the raid.
Flame Blast (Tank)
A cone of fire in front of the Flame of Azzinoth — turn it away from the raid.- Blaze (Important)
Green fire that the Flame of Azzinoth leaves behind as it moves. Extremely painful — tanks have to slowly walk the Flame around the area.
- Agonizing Flames (Important)
In the third and fifth phases, hits a random player: fire damage to them and everyone within 5 yards, plus a 60 sec. effect dealing periodic damage to the target and everyone around them. The raid must stay spread out.
- Aura of Dread (Deadly)
In demon form, deals periodic shadow magic damage to everyone within 15 yards and increases the shadow magic damage they take by 30%. Everyone, including the tank, must stay farther than 15 yards.
- Shadow Blast (Tank)
In demon form, constantly used on the warlock tank: enormous shadow magic damage to them and everyone within 20 yards of them.
- Flame Burst (Important)
In demon form, hits all raid players at once: fire damage to each, and each one hit deals the same amount to everyone within 5 yards of them.
- Summon Shadow Demons (Deadly)
Summons four Shadow Demons at Illidan's feet. Each picks a random player, stuns them, and moves toward them; if a demon reaches its target, that player dies instantly and the demon selects a new victim.
- Frenzy (Deadly)
In the fifth phase, Illidan periodically enrages: +50% damage dealt and +30% attack speed for 20 sec.
Illidan Fight Strategy
- Tanks
You need four tanks: a "regular" one with physical mitigation, two with maximum fire resistance, and one warlock with shadow resistance. In the first and third phases, the physical-mitigation tank slightly repositions the boss after each Flame Crash and keeps him turned away from the raid because of Draw Soul. In the second phase, the fire tanks slowly walk the Flame of Azzinoth, moving out of Blaze but not straying from the glaive so as not to trigger Uncaged Wrath. In the fourth phase, the warlock stands far from both the boss and the raid because of Shadow Blast.
- Healers
In the second phase the main load is the two fire tanks and players under Dark Barrage, who need focused healing to survive. In the third and fifth phases Agonizing Flames is added, and in the fourth — Flame Burst on the whole raid.
- DPS
Be sure to apply a healing-reduction effect to the boss against Draw Soul — a rogue's
 Wound Poison, a warrior's
  Mortal Strike, or a hunter's
  Aimed Shot all work (they don't stack, one is enough). Ranged are responsible for destroying the Parasitic Shadowfiends — it's convenient to place an
  Ice Trap off to the side in advance and spawn the parasites there. In the second phase all damage goes into the Flame of Azzinoth. The Shadow Demons are easiest to take down with a mage's Improved Blizzard or a warlock's pre-prepared
  Seed of Corruption.
Loot
| Item | Equipment Slot |
|---|---|
 Chestguard of the Forgotten Protector Chestguard of the Forgotten Protector |
Tier 6 token: chest (warrior, hunter, shaman) |
| Chestguard of the Forgotten Vanquisher |
Tier 6 token: chest (rogue, mage, druid) |
| Chestguard of the Forgotten Conqueror |
Tier 6 token: chest (paladin, priest, warlock) |
 Cowl of the Illidari High Lord Cowl of the Illidari High Lord |
Cloth armor: head |
 Cursed Vision of Sargeras Cursed Vision of Sargeras |
Leather armor: head |
| Faceplate of the Impenetrable |
Plate armor: head |
 Warglaive of Azzinoth Warglaive of Azzinoth |
Legendary one-handed sword: main hand |
| Warglaive of Azzinoth |
Legendary one-handed sword: off hand |
 Shard of Azzinoth Shard of Azzinoth |
Dagger |
 Crystal Spire of Karabor Crystal Spire of Karabor |
One-handed mace |
 Zhar'doom, Greatstaff of the Devourer Zhar'doom, Greatstaff of the Devourer |
Two-handed staff |
 Black Bow of the Betrayer Black Bow of the Betrayer |
Bow |
 Bulwark of Azzinoth Bulwark of Azzinoth |
Shield |
 Shroud of the Highborne Shroud of the Highborne |
Back |
 Stormrage Signet Ring Stormrage Signet Ring |
Finger |
 Memento of Tyrande Memento of Tyrande |
Trinket |
 The Skull of Gul'dan The Skull of Gul'dan |
Trinket |
Author

Fouren
Fouren has been playing World of Warcraft for over 15 years. He is an active player with 12 Cutting Edge achievements under his belt, and has reached the top 1% and 0.1% multiple times on various classes. His main classes are healers, particularly Holy Paladin.

Comments
0No comments yet. Be the first to comment!