

Venomous Abyss — Raid Guide
 views
viewsVenomous Abyss
This is a Midnight expansion raid in which players face eight bosses. It is located in Atal'Utek, deep within the Vaults of Atal'Utek on the Coiled Isle. Here, Amani trolls and the Soulcoil cult are awakening an ancient evil slumbering at the Coiled Altar — and the raid must stop them before Ula'tek herself breaks free.
In this guide we will cover each raid boss in detail: their abilities, combat tactics, and the loot they drop.
Raid Entrance Location
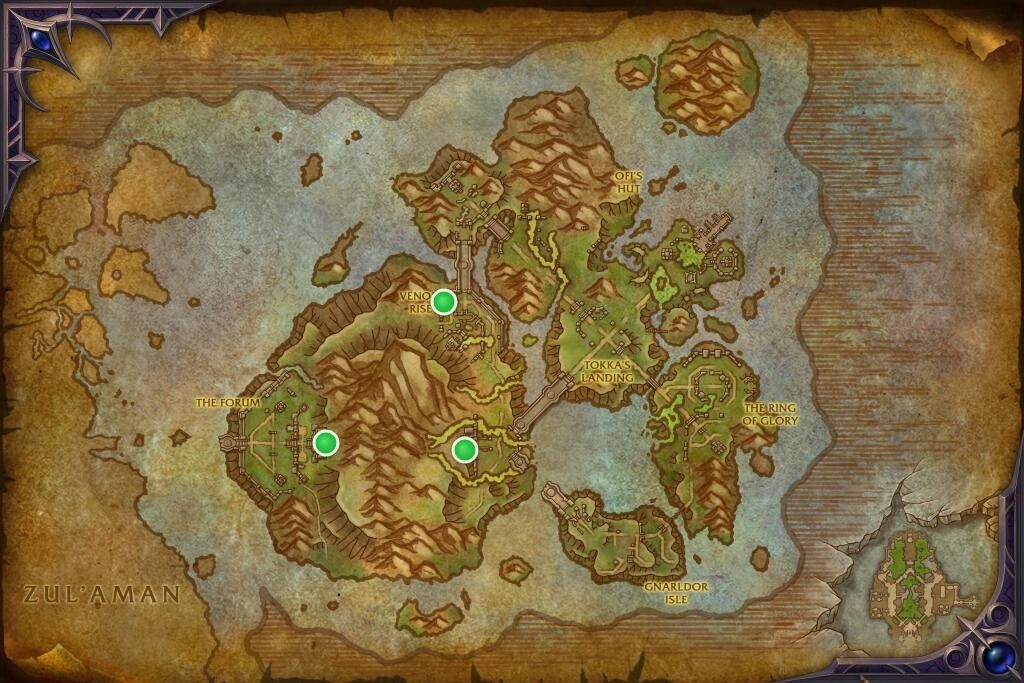
The raid entrance is on the Coiled Isle, inside the Vaults of Atal'Utek. Three gates marked on the map below lead to the island; once inside the Vaults, head north — that is where the raid entrance is located.
Item Levels and Currency
Bosses in the raid drop gear of varying item levels: the further into the raid, the higher the loot quality. Killing bosses also awards Mistcrests — currency used to upgrade gear, with the type depending on difficulty.
| Difficulty | Item Level | Mistcrests |
|---|---|---|
| Looking for Raid | 279–289 (Veteran) | Veteran Mistcrest |
| Normal | 292–302 (Champion) | Champion Mistcrest |
| Heroic | 305–315 (Hero) | Hero Mistcrest |
| Mythic | 318–328 (Myth) | Myth Mistcrest |
On Mythic difficulty the last two bosses — Coiled Altar and Ula'tek — drop item level 344 gear.
Nek'zali the Soulcoiler
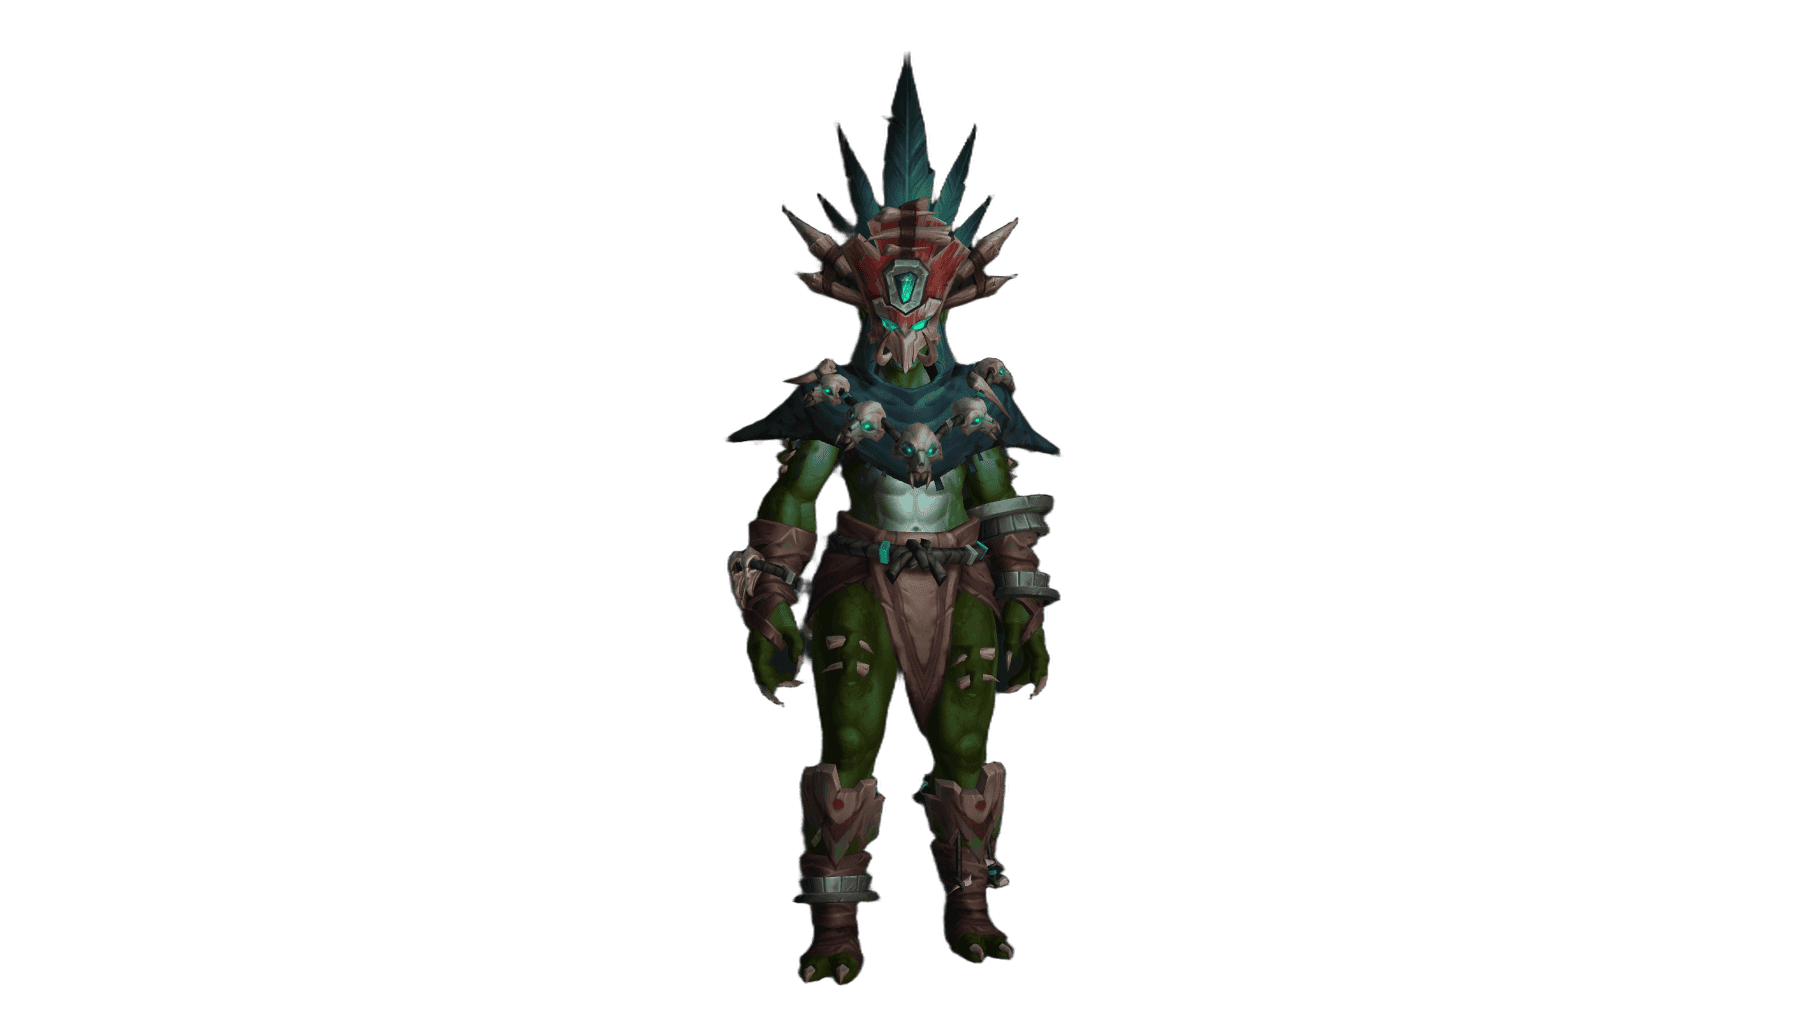
Nek'zali the Soulcoiler is a priestess of the Soulcoil cult from the Amani tribe. Right in the middle of the fight she charges the necrotic Soulcoil Well at the center of the hall, raises undead Amani trolls from their sarcophagi, and drives them toward the well to feed it power and unleash waves of dark magic upon the raid.
Below we will cover each boss ability in detail.
The fight description uses abilities from the Mythic version of the raid.
Fight Overview
The primary danger of the fight is the Soulcoil Well in the center of the hall. Nek'zali charges it with the Soulcoil Rite and drives undead Amani trolls toward it. If a player dies in the well or a minion reaches it, the boss is empowered and the fight becomes dramatically harder — so the well must be kept "clean" at all times.
At 50% health Nek'zali retreats and triggers the Ritual of Awakening: she can only be brought back into the fight by severing the awakening threads. When she reaches full energy she enters Uncoiled Rage and fights with doubled power until death. The raid must therefore survive a sharp damage spike near the end and finish the boss off quickly.
Boss Abilities
 Soulcoil Rite (Healer)
The Soulcoil Well surges, granting Nek'zali 5 energy and dealing heavy Shadow damage to the entire raid immediately and then periodically for several seconds. The effect stacks: the more souls that enter the well, the more dangerous the damage becomes.
 Soulcoil Well (Important)
A well of necrotic energy at the center of the hall where Soulcoil cult servants come to life. Each undead Amani troll that reaches the well triggers Soulcoil Rite. Players standing in the well take heavy damage every second, and a player who dies inside gains the Captured Soul effect and empowers the boss. Stay away from the well.
-
Nek'zali ensnares several players and pulls them toward her over 5 seconds, then flings them away and deals Shadow damage. A spectral essence remains in the target, dealing periodic damage; after the effect fades a Slumbering Sectant appears at the player's location.
 Possession Barrage (Tank)
Nek'zali launches spectral echoes at her primary target. The echoes explode on impact, dealing Shadow damage — the further an echo travels, the less damage it deals.
 Hollowing Strikes (Tank)
Nek'zali's attacks tear soul fragments from her target, dealing periodic Shadow damage and reducing the amount of healing and absorb shields the target receives. The effect stacks, so tanks should swap.
 Soulcoil Ignition (Healer)
Nek'zali agitates the Soulcoil Well repeatedly, triggering Soulcoil Rite over and over and dealing powerful periodic damage to the raid. During the channel, anguished echoes emerge from the well.
 Ritual of Awakening (Intermission Phase)
At 50% health, devoted soulcoiler Javaeh activates awakening threads and shields Nek'zali with them. The boss only returns to the fight after all threads are severed.
 Uncoiled Rage (Lethal)
Upon reaching full energy, Nek'zali unleashes her potential: her attack and movement speed increases by 150%, damage dealt increases by 500%, and she becomes immune to taunt. This is effectively a soft enrage — the boss must be finished before the raid can no longer survive.
Nek'zali Strategy
Tanks
Keep Nek'zali faced away from the raid and swap on stacks of
Hollowing Strikes. Be ready to absorb Possession Barrage: its damage is reduced with distance, so the active tank stands in melee while the raid stays behind.Healers
Pre-cool for
Soulcoil Rite and Soulcoil Ignition — these are the main raid damage spikes. Monitor players affected by  Essence Rend.
DPS
Do not let undead Amani trolls reach the well, and do not die inside it. During the intermission phase, quickly sever the threads of
Ritual of Awakening, kill the Slumbering Sectants that appear, and save personal cooldowns for the Uncoiled Rage phase.
Loot
| Item | Equipment Slot |
|---|---|
 Initiate's Sacrificial Tights Initiate's Sacrificial Tights |
Cloth Armor: Legs |
 Nek'zali's Spiritwalkers Nek'zali's Spiritwalkers |
Cloth Armor: Feet |
 Vestment of the Awakening Vestment of the Awakening |
Leather Armor: Chest |
 Restless Spirit Shackles Restless Spirit Shackles |
Leather Armor: Wrists |
 Crown of the Eternal Fang Crown of the Eternal Fang |
Mail Armor: Head |
 Soulslither Spaulders Soulslither Spaulders |
Mail Armor: Shoulders |
 Cursed Reliquary Cincture Cursed Reliquary Cincture |
Mail Armor: Waist |
 Skullguard of the Risen Sacrifice Skullguard of the Risen Sacrifice |
Plate Armor: Head |
 Entombed Cultist's Sabatons Entombed Cultist's Sabatons |
Plate Armor: Feet |
 Strongblood's Ceremonial Cleaver Strongblood's Ceremonial Cleaver |
One-Hand Axe |
 Hexing Spiritrender Hexing Spiritrender |
Dagger |
 Tomb-Creeper's Claw Tomb-Creeper's Claw |
Fist Weapon |
 Bubblefin Splash Guard Bubblefin Splash Guard |
Shield |
 Frostscale's Mystic Frond Frostscale's Mystic Frond |
Off-Hand |
 Amani Summoning Shawl Amani Summoning Shawl |
Back |
 Alluring Bubbleband Alluring Bubbleband |
Finger |
 Soulcoiler Ritual Vessel Soulcoiler Ritual Vessel |
Trinket |
Entombed Wardens
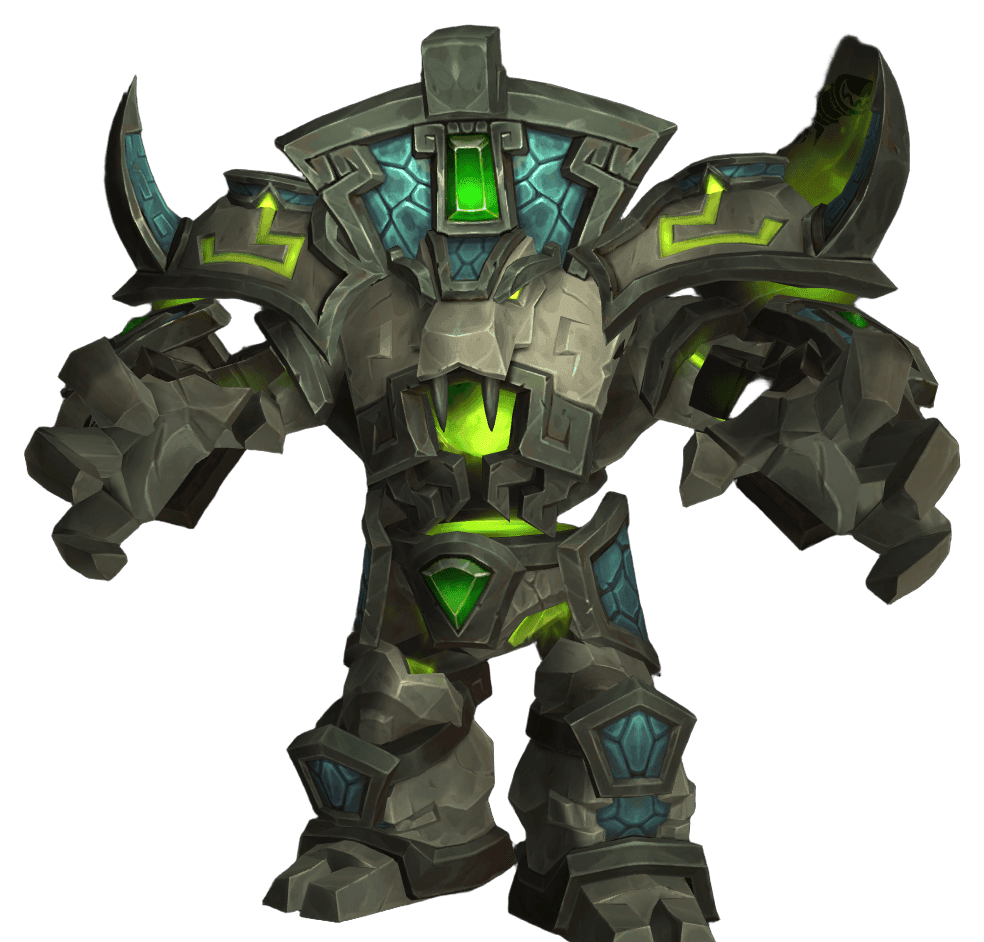
The Entombed Wardens are two ancient golems of Ula'tek — Ula'tek's Breath and Ula'tek's Blood — that have stood guard in the Vaults for centuries. Saturated with the temple's poisons, they animate the venom and infect with lethal toxins anyone who attempts to reach the inner sanctum.
Below we will cover each fight ability in detail.
The fight description uses abilities from the Mythic version of the raid.
Fight Overview
The fight is waged against both golems simultaneously. While the wardens are within 40 yards of each other, they are protected by Ula'tek's Dominance, which reduces their damage taken by 99% — so the golems must always be kept apart.
Ula'tek's Breath is dangerous in melee: it strikes the tank with Empowering Slam, scatters Toxic Droplets, and animates venomous oozes. Ula'tek's Blood poisons the raid: it applies Bloodvenom Injection to the tank and marks players with Unstable Miasma.
After accumulating 100 energy, both golems converge at the center and enter Vitriolic Stasis: the more wounded warden heals up to the health level of the less wounded one, so they must be kept at equal health throughout. Stasis ends with Helical Toxins — the raid is infected with a venom that must be managed carefully.
Boss Abilities
 Ula'tek's Dominance (Important)
While the Entombed Wardens are within 40 yards of each other, an effect reduces their damage taken by 99%. Keep the golems apart.
 Empowering Slam (Tank)
Ula'tek's Breath strikes the current target with great force, dealing high Physical damage. Each successive hit on the same target deals 10% more damage; switching targets resets the stacking buff.
 Bloodvenom Injection (Tank)
Ula'tek's Blood afflicts the current target with venomous blood, dealing heavy Physical damage immediately and then periodic Shadow damage for 40 seconds. The effect stacks.
-
Ula'tek's Breath sprays numerous toxic droplets, each exploding after a few seconds. Players can proactively step on droplets to destroy them, taking Nature damage in the process.
-
Ula'tek's Breath spews a sticky glob of venom that animates and becomes an ooze.
 Unstable Miasma (Important)
Ula'tek's Blood marks a player with unstable miasma. After 8 seconds it explodes, dealing Shadow damage split evenly among all nearby players and spreading Sticky Filth to them.
 Vitriolic Stasis (Lethal)
After accumulating 100 energy, both sentinels rush toward each other and equalize fluid levels for 30 seconds. During this time they take 99% less damage, and the more wounded warden heals up to the health of the less wounded one.
 Helical Toxins (Important)
The sentinels blend their fluids and infect players with venomous blood, dealing periodic Plague damage. Touching another infected player stacks the venom's potency; reaching exactly 4 stacks of Helical Toxins neutralizes the poison without consequence.
Entombed Wardens Strategy
Tanks
Keep Ula'tek's Breath and Ula'tek's Blood separated, more than 40 yards apart, to remove
Ula'tek's Dominance. Swap targets on stacks of Empowering Slam and Bloodvenom Injection.Healers
The primary raid damage comes from
Helical Toxins and Unstable Miasma — ramp healing for these moments and monitor tanks accumulating venom stacks.DPS
Keep both golems at equal health so
Vitriolic Stasis does not undo your progress. Kill the oozes from  Venom Coagulation, avoid
  Toxic Droplets, and correctly position Unstable Miasma. During Helical Toxins build to exactly 4 stacks to cleanse the poison without consequence.
Loot
| Item | Equipment Slot |
|---|---|
 Venom-Singed Cuffs Venom-Singed Cuffs |
Cloth Armor: Wrists |
 Shadow Hunter's Warmask Shadow Hunter's Warmask |
Leather Armor: Head |
 Venom Warden's Greaves Venom Warden's Greaves |
Plate Armor: Legs |
 Ancient Construct's Venomshiv Ancient Construct's Venomshiv |
Dagger |
 Caustic Keeper-Crusher Caustic Keeper-Crusher |
Two-Hand Mace |
| Spine of the Hissing Abyss |
Off-Hand |
 Sentinel's Vitriolic Chain Sentinel's Vitriolic Chain |
Neck |
 Keeper's Seething Core Keeper's Seething Core |
Trinket |
 Venomwoven Idol Venomwoven Idol |
Set Token (Cloth): Hands |
 Venomcured Idol Venomcured Idol |
Set Token (Leather): Hands |
 Venomcast Idol Venomcast Idol |
Set Token (Mail): Hands |
 Venomforged Idol Venomforged Idol |
Set Token (Plate): Hands |
Vashnik the Malignant
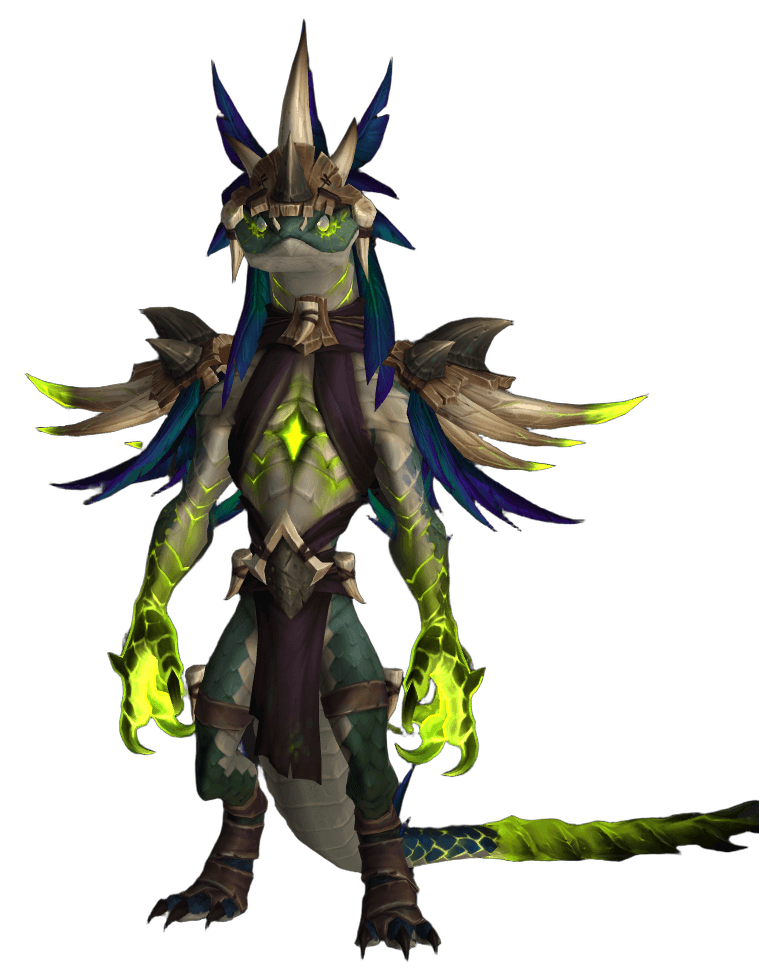
Vashnik the Malignant is the twisted alchemist of Atal'Utek, who drinks the temple's poisons straight from its fountains. With every sip he animates new batches of venom and fills the hall with toxic vapors, seeking to dissolve unwanted visitors in poison.
Below we will cover each fight ability in detail.
The fight description uses abilities from the Mythic version of the raid.
Fight Overview
Vashnik's hall is surrounded by venom fountains. After accumulating 100 energy, Vashnik uses Imbibe — drinking from the two nearest fountains: he gains Toxic Vapor (a persistent raid-wide damage-over-time that intensifies with each Imbibe) and creates living venom that crawls toward the malignant crevasse at the center of the hall. If the living venom reaches the crevasse a Malignant Burst hits the entire raid — so it must be destroyed along the way.
Fountains come in different elements (blood, shadow, flame): imbibing from them grants Vashnik the corresponding Blood Infusion, empowering his next Imbibe and the living venom it creates. A separate threat is the Splitting Clot: it is immune to crowd control and splits into two smaller clots upon death.
Boss Abilities
 Imbibe (Lethal)
After accumulating 100 energy, Vashnik draws power from the two nearest fountains: gains Toxic Vapor and creates living venom that begins moving toward the malignant crevasse.
 Toxic Vapor (Healer)
Toxic vapors fill the hall, dealing periodic Nature damage to the entire raid. The effect stacks and intensifies with each new Imbibe.
 Malignant Burst (Important)
When the living venom reaches the malignant crevasse, it explodes, dealing Nature damage to the raid immediately and then periodically for 30 seconds. The effect stacks.
-
After drinking from a fountain, Vashnik is infused with its element (blood, shadow, or flame), empowering his next Imbibe, the damage of the corresponding eruption, and the living venom's health pool. The effect stacks.
-
The Splitting Clot is immune to crowd control effects from the moment it appears until it is destroyed.
-
Upon being destroyed, the Splitting Clot divides into two smaller clots.
 Malignance (Important)
A totem emits a wave of venom, dealing heavy Nature damage to the raid immediately and then periodic damage for one minute. The effect stacks.


Vashnik Strategy
Tanks
Hold Vashnik and keep him faced away from the raid. Save defensive and raid cooldowns for
Imbibe — that is the primary group damage spike.Healers
Raid damage constantly increases from
Toxic Vapor, with peaks during Imbibe and Malignant Burst — ramp healing for these moments.DPS
Destroy the living venom before it reaches the malignant crevasse or the raid will be hit by
Malignant Burst. Note that the  Splitting Clot cannot be crowd-controlled and splits upon death via Splitting Clot, so finish it carefully, and move out of Malignance waves.
Loot
| Item | Equipment Slot |
|---|---|
 Frothing Venom Spaulders Frothing Venom Spaulders |
Leather Armor: Shoulders |
 Serpentine Mixing Belt Serpentine Mixing Belt |
Mail Armor: Waist |
 Scaled Fiend's Warboots Scaled Fiend's Warboots |
Plate Armor: Feet |
 Venomancer's Winged Channeler Venomancer's Winged Channeler |
Two-Hand Staff |
 Malignant Toothed Edge Malignant Toothed Edge |
Two-Hand Sword |
 Vile Alchemist's Band Vile Alchemist's Band |
Finger |
 Vashnik's Sanguine Rancor Vashnik's Sanguine Rancor |
Trinket |
 Fang of Umbral Malignance Fang of Umbral Malignance |
Trinket |
| Venomwoven Icon |
Set Token (Cloth): Chest |
| Venomcured Icon |
Set Token (Leather): Chest |
| Venomcast Icon |
Set Token (Mail): Chest |
| Venomforged Icon |
Set Token (Plate): Chest |
The Lost Expedition
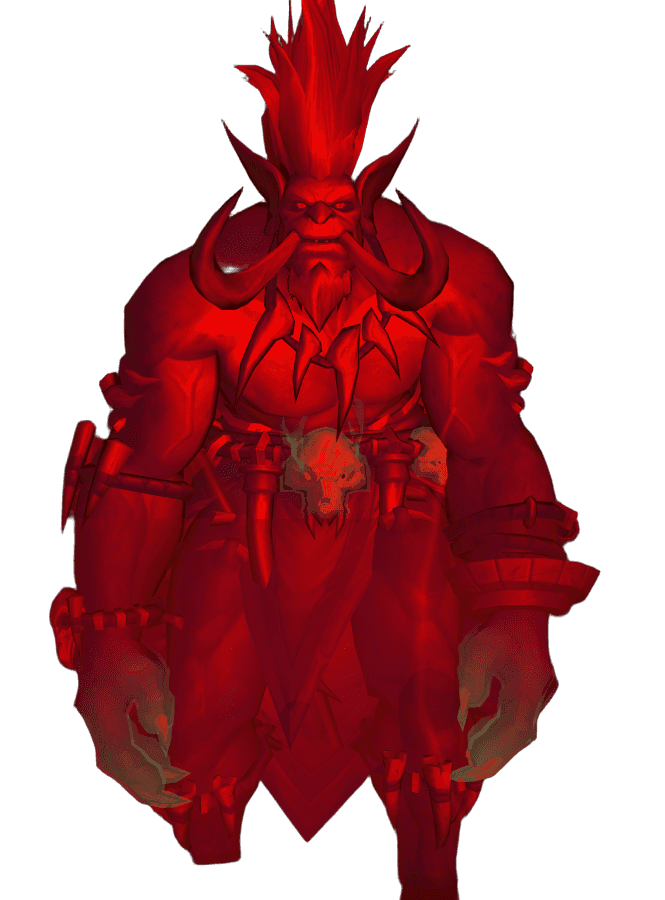
The Lost Expedition is a group of tortollan explorers lured into the temple by the dark sorcerer Mor'zahi and enslaved to his will. They now fight against the raid under his control while Mor'zahi himself prepares his Final Ascension.
Below we will cover each fight ability in detail.
The fight description uses abilities from the Mythic version of the raid.
Fight Overview
At the center of the encounter is Mor'zahi, who uses Dark Whispers to subjugate tortollan explorers and force them to attack the raid. Each subjugated ally gains a unique set of abilities: scroll-keeper Iku unleashes a Frostfire Volley and a Blink Nova, merchant Gebbo hurls bombs with Explosive Surprise, and first mate Nama leaps to targets with Mighty Thud.
Mor'zahi's control can be broken — the subjugated tortollan must eat Revolting Fish. Mor'zahi then uses Mor'zahi's Command to forcibly restore control and empower the target. The primary threat of the fight is Final Ascension: if Mor'zahi is allowed to complete it, he deals lethal damage to the raid.
Boss Abilities
 Dark Whispers (Important)
Mor'zahi subjugates a target to his will and forces it to carry out his commands.
-
Mor'zahi forcibly reasserts control over a target and grants it additional abilities.
 Final Ascension (Lethal)
Mor'zahi slowly builds power for his final ascension, dealing heavy periodic Shadow damage to the raid. If allowed to complete the ability, the raid is wiped.
-
Under Mor'zahi's control, scroll-keeper Iku rains charges of fire and frost on players, leaving zones of flame and ice on the ground. These can be removed with the opposing element.
 Mighty Thud (Important)
First mate Nama marks three players and leaps to each in turn. The damage of each landing is split among nearby players; if the leap hits no one, the entire raid takes damage.
-
Merchant Gebbo hurls a bomb at a player, dealing area damage at the point of impact.
 Blink Nova (Healer)
Scroll-keeper Iku teleports a short distance, dealing Arcane damage to the entire raid. Damage is lower the farther a player is from her.

The Lost Expedition Strategy
Tanks
Hold Mor'zahi and the subjugated explorers, keep them faced away from the raid, and prevent them from freely striking the group.
Healers
The primary damage spikes come from
Blink Nova and Mighty Thud, and during Final Ascension the raid takes heavy constant damage — ramp healing for these moments.DPS
Interrupt
Final Ascension by breaking Mor'zahi's control via Revolting Fish. Share Mighty Thud and  Explosive Surprise among multiple players, clear
  Frostfire Volley zones with the opposing element, and spread away from Iku during Blink Nova.
Loot
| Item | Equipment Slot |
|---|---|
 Errant Scrollsage's Hood Errant Scrollsage's Hood |
Cloth Armor: Head |
 Unpossessed Skullsash Unpossessed Skullsash |
Leather Armor: Waist |
 Boots of the Reckless Wayfarer Boots of the Reckless Wayfarer |
Mail Armor: Feet |
 Shellbound Bracers Shellbound Bracers |
Plate Armor: Wrists |
 Malevolent Spiritcudgel Malevolent Spiritcudgel |
One-Hand Mace |
 Gebbo's Backup Blaster Gebbo's Backup Blaster |
Gun |
| Venom-Slashed Scuteward |
Shield |
 First Mate's Shellward First Mate's Shellward |
Trinket |
 Gebbo's Bottomless Bag Gebbo's Bottomless Bag |
Trinket |
| Venomwoven Remnant |
Set Token (Cloth): Shoulders |
| Venomcured Remnant |
Set Token (Leather): Shoulders |
| Venomcast Remnant |
Set Token (Mail): Shoulders |
| Venomforged Remnant |
Set Token (Plate): Shoulders |
Sszorak
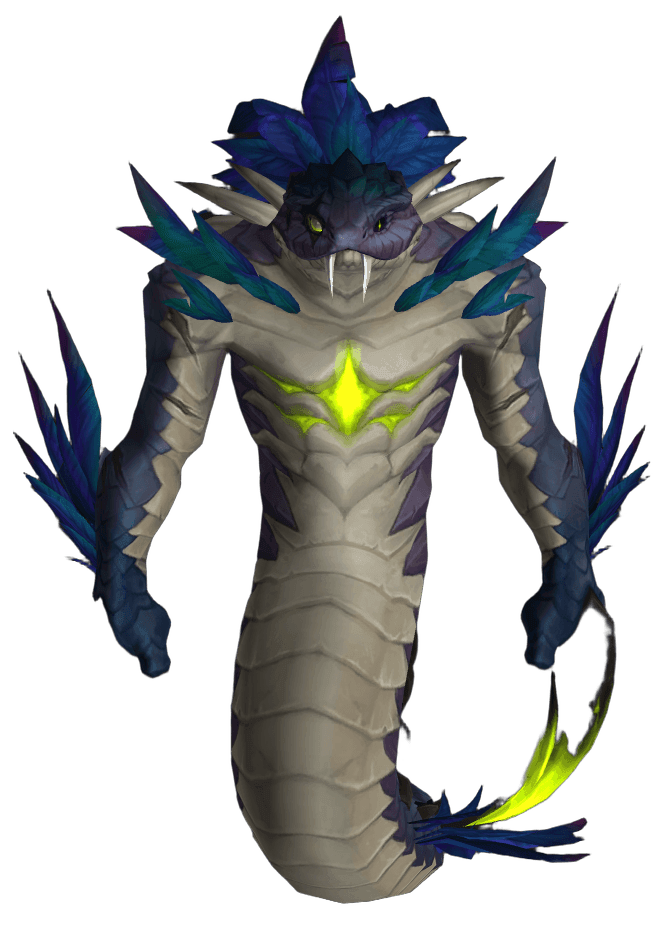
Sszorak is a monstrous predator that guards the Altar of Six Winds. In combat he tears into the raid with rapid attack chains and drenches players with fresh venom while the altar itself batters the platform with gale-force winds.
Below we will cover each fight ability in detail.
The fight description uses abilities from the Mythic version of the raid.
Fight Overview
The fight combines two threats: Sszorak himself and the Altar of Six Winds. Sszorak rapidly strikes with Apex Predator and drenches players with Venomous Surge, while the altar fills the platform with Raging Crosswinds and gradually builds to a Howling Maelstrom that hurls the raid with hurricane-force blasts.
During the Howling Maelstrom, Sszorak burrows into the ground (Dig In) and takes 30% more damage for 25 seconds — this is the best window to unleash burst damage on him.
Boss Abilities
 Apex Predator (Tank)
Sszorak performs a rapid flurry of attacks. Taunt effects can redirect his target mid-cast.
 Corroding Venom (Tank)
Sszorak's venomous claws corrode the target's armor: each melee attack increases the Physical damage the target takes. The effect stacks, so tanks should swap.
- Venomous Surge (Healer)
Sszorak drenches several players with fresh venom, dealing periodic damage. When it expires the venom explodes, creating a Viscous Cyst and dealing damage to the entire raid that fades with distance.
 Raging Crosswinds (Important)
The altar fills several players with the force of howling winds: they first take periodic damage, then strike the surrounding area and knock players in a designated direction.
 Howling Maelstrom (Important)
The Altar of Six Winds launches several hurricanes across the platform, each pushing players in its own direction.
-
While Howling Maelstrom is active, Sszorak hunkers down and takes 30% more damage for 25 seconds. The best time to burst the boss.
 Ula'tek's Presence (Healer)
The altar emits a caustic haze, dealing constant Nature damage to the entire raid.
Sszorak Strategy
Tanks
Swap on stacks of
Corroding Venom and keep in mind that taunting redirects Apex Predator.Healers
The raid constantly takes damage from
Ula'tek's Presence, with spikes during Venomous Surge and Raging Crosswinds — ramp healing for those moments.DPS
Spread for
Venomous Surge; during Raging Crosswinds and Howling Maelstrom watch the knockback direction to avoid being blown into a dangerous zone. Unleash all cooldowns during  Dig In while Sszorak is vulnerable.
Loot
| Item | Equipment Slot |
|---|---|
 Caustic Chain-Wrapped Sash Caustic Chain-Wrapped Sash |
Cloth Armor: Waist |
 Ruthless Slaughtergrips Ruthless Slaughtergrips |
Leather Armor: Hands |
 Ferocious Scaleboots Ferocious Scaleboots |
Mail Armor: Feet |
 Venomous Boneglaive Venomous Boneglaive |
Warglaive |
| Slithering Savage's Gavel |
One-Hand Mace |
 Apex Brute's Claw Ring Apex Brute's Claw Ring |
Finger |
 Sszorak's Ferocity Sszorak's Ferocity |
Trinket |
 Idol of the Howling Nexus Idol of the Howling Nexus |
Trinket |
| Venomwoven Relic |
Set Token (Cloth): Legs |
| Venomcured Relic |
Set Token (Leather): Legs |
| Venomcast Relic |
Set Token (Mail): Legs |
| Venomforged Relic |
Set Token (Plate): Legs |
Twin Fangs
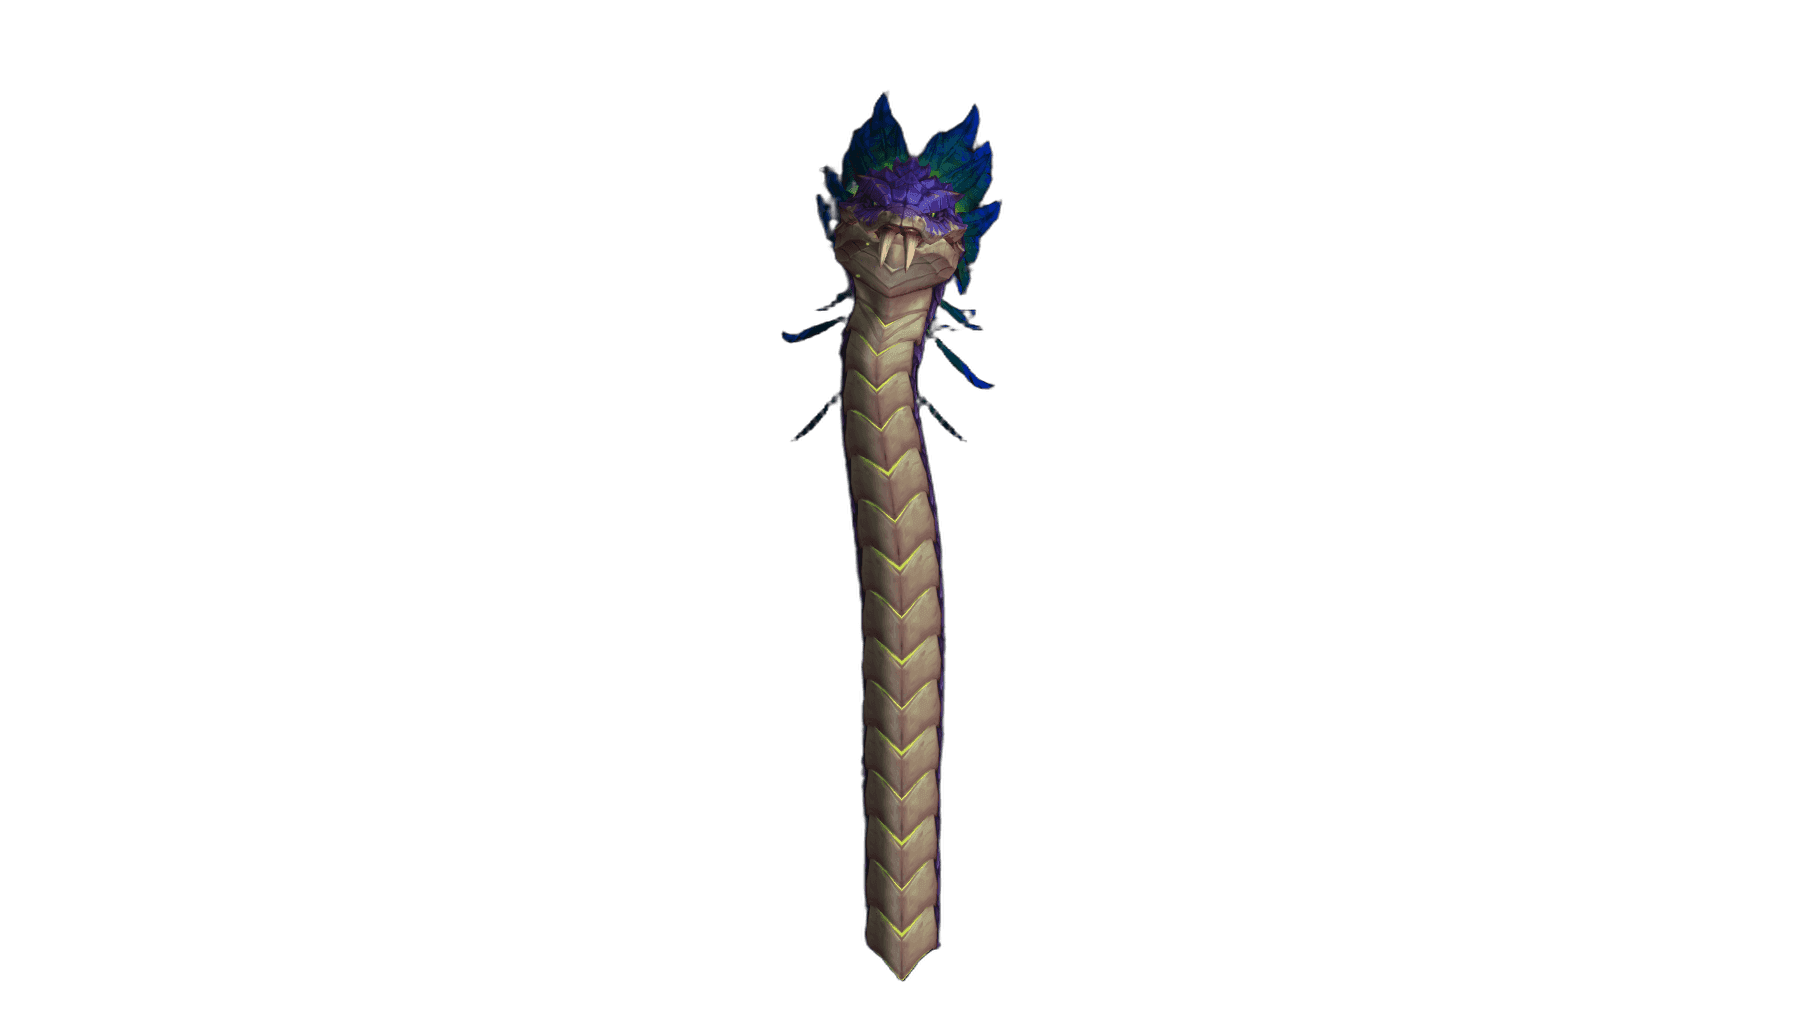
The Twin Fangs are two ancient serpents — Vexhul and Ithraz — that guard the path to the altar. Vexhul poisons the raid with venom and summons his brood, while Ithraz devours players and shatters the platform beneath their feet.
Below we will cover each fight ability in detail.
The fight description uses abilities from the Mythic version of the raid.
Fight Overview
The fight is waged against both serpents simultaneously. Throughout the encounter, players accumulate stacks of Eternal Venom — a stacking poison that becomes lethal at high counts. The only way to remove it is through Ithraz's Ravenous Feast: each bite of that ability removes one stack of Eternal Venom from struck players, so players with high stacks must position to be hit in order to survive.
Vexhul meanwhile floods the target with Caustic Deluge and summons broodlings with Venomous Emergence. After accumulating 100 energy, both serpents dive underwater and resurface to attack together: Vexhul unleashes a Vile Flood and Ithraz a Sanguine Storm.
Boss Abilities
 Eternal Venom (Important)
Certain serpent abilities inject eternal venom into players' veins, dealing periodic Nature damage. The effect stacks and becomes lethal at high counts.
-
Vexhul channels venom into the current target for several seconds and sprays it outward. Each burst applies Eternal Venom to nearby players and creates a Caustic Glob at the impact point.
-
Vexhul summons his brood from the churning sea, dealing raid damage and applying Eternal Venom. The summoned creatures continuously spit caustic saliva at players.
 Ravenous Feast (Important)
Ithraz attempts to swallow players three times in succession, each bite dealing Physical damage split among nearby targets. Each bite also removes one stack of Eternal Venom from struck players.
 Stone Breaker (Tank)
Ithraz roars, knocking players back, then slams the platform multiple times. Each slam deals Physical damage to nearby players and increases their damage taken from Stone Breaker (stacks). If no one is struck, the entire raid takes damage.
-
Vexhul channels a swirling torrent of venom in front of him for several seconds, dealing heavy damage to anyone standing in it. Move out of the torrent's path.
-
After accumulating 100 energy, Ithraz surfaces and showers the platform with blood globules, dealing area damage to the raid.

Twin Fangs Strategy
Tanks
Hold Vexhul and Ithraz and swap on stacks of
Stone Breaker.Healers
Closely monitor
Eternal Venom stacks: players with high counts will die if the venom is not removed via Ravenous Feast. The major damage spikes come from the combination of Vile Flood and  Sanguine Storm.
DPS
Position into
Ravenous Feast to remove your Eternal Venom stacks and split its damage. Kill the broodlings from Venomous Emergence and move out of Vile Flood.
Loot
| Item | Equipment Slot |
|---|---|
 Ornaments of the Eternal Coil Ornaments of the Eternal Coil |
Cloth Armor: Shoulders |
 Bespittled Slitherslippers Bespittled Slitherslippers |
Leather Armor: Feet |
 Ophidian Fangmail Ophidian Fangmail |
Mail Armor: Chest |
 Scaleplate Strangulators Scaleplate Strangulators |
Plate Armor: Hands |
| Ravenous Feaster's Fang |
Dagger |
 Amulet of the Twin Fangs Amulet of the Twin Fangs |
Neck |
 Preternatural Antivenom Preternatural Antivenom |
Trinket |
 Vexhul's Everflowing Gland Vexhul's Everflowing Gland |
Trinket |
| Venomwoven Effigy |
Set Token (Cloth): Head |
| Venomcured Effigy |
Set Token (Leather): Head |
| Venomcast Effigy |
Set Token (Mail): Head |
| Venomforged Effigy |
Set Token (Plate): Head |
Coiled Altar
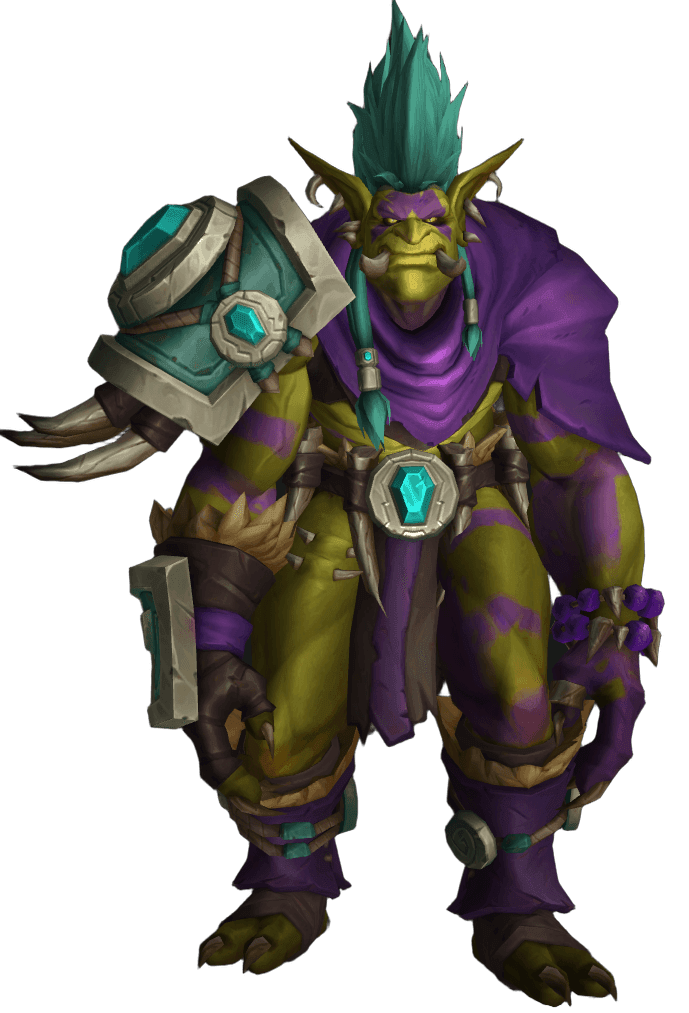
The Coiled Altar is a two-stage trial: first the mutated Zul'jan, drawing power from the altar itself, and then the hex lord Malacras, who seeks to bind his soul to Zul'jan and turn him into his puppet.
Below we will cover each fight ability in detail.
The fight description uses abilities from the Mythic version of the raid.
Fight Overview
The fight unfolds in multiple phases. The raid first engages Zul'jan: he floods the arena with a Toxic Deluge, cleaves players with Sever using his paired axes, and draws power from the altar with Fangs of the Coiled Altar.
After Zul'jan dies, Malacras enters the fight. He subjugates players with Dreadmarch, driving them toward the platform edge, strikes with Soul Sever, and prepares a lethal Eternal Nightfall while shielded by Twilight Veil. Defeating Malacras requires interrupting his Soulbinding ritual, which he uses to attempt to resurrect Zul'jan as his puppet.
Boss Abilities
-
The altar spews venom across the platform, dealing damage to nearby players and creating puddles of Coagulated Poison.
 Sever (Tank)
Zul'jan delivers a powerful cleave in a cone in front of him, dealing high Physical damage and increasing the damage the targets take from Sever by 200% for 30 seconds.
- Fangs of the Coiled Altar (Healer)
Zul'jan draws power from the altar, dealing raid damage while the altar spews venom, creating a growing zone of Blighted Ground.
 Dreadmarch (Important)
Malacras dominates the minds of several players, places an absorb shield on them, and compels them to march toward the platform edge to fall to their deaths. When the shield is broken, dread manifestations appear near the player.
-
Malacras fires a bolt of dark energy in a cone in front of him, dealing damage to players and destroying any dread manifestations caught in it.
 Eternal Nightfall (Lethal)
Malacras shields himself with Twilight Veil and prepares a devastating attack that deals massive Shadow damage to the entire raid. The cast can only be interrupted after the Twilight Veil shield is destroyed.
- Soulbinding (Important)
The defeated Malacras begins a ritual to bind his soul to Zul'jan and resurrect him. The raid must finish the boss before the ritual completes.

Coiled Altar Strategy
Tanks
Hold Zul'jan and then Malacras, always keeping them faced away from the raid —
Sever and  Soul Sever strike in a cone in front of the boss.
Healers
The primary damage spikes are
Fangs of the Coiled Altar and Eternal Nightfall. Monitor players subjugated by Dreadmarch.DPS
Avoid Coagulated Poison puddles and the growing Blighted Ground. Free
Dreadmarch victims before they fall, then herd the resulting dread manifestations into Soul Sever. Destroy the Twilight Veil to interrupt Eternal Nightfall, and finish Malacras before Soulbinding completes.
Loot
| Item | Equipment Slot |
|---|---|
 Grasps of the Eternal Shadow Grasps of the Eternal Shadow |
Cloth Armor: Hands |
 Cackling Soultreads Cackling Soultreads |
Cloth Armor: Feet |
 Sash of the Forlorn Vessel Sash of the Forlorn Vessel |
Leather Armor: Waist |
 Coiled Hex Legguards Coiled Hex Legguards |
Leather Armor: Legs |
 Cuisses of the Uncoiled Union Cuisses of the Uncoiled Union |
Mail Armor: Legs |
 Reckless Spirit Breastplate Reckless Spirit Breastplate |
Plate Armor: Chest |
 Girdle of Toxic Regret Girdle of Toxic Regret |
Plate Armor: Waist |
 Baleful Hexblade Baleful Hexblade |
One-Hand Sword |
| Aman'muso, Warlord's Vengeance |
One-Hand Axe |
 Maze-roa, Warlord's Fury Maze-roa, Warlord's Fury |
Two-Hand Axe |
 Silken Voodoo Drape Silken Voodoo Drape |
Back |
 Hex Lord's Dooming Idol Hex Lord's Dooming Idol |
Trinket |
 Zul'jin's Guillotine Technique Zul'jin's Guillotine Technique |
Trinket |
Ula'tek
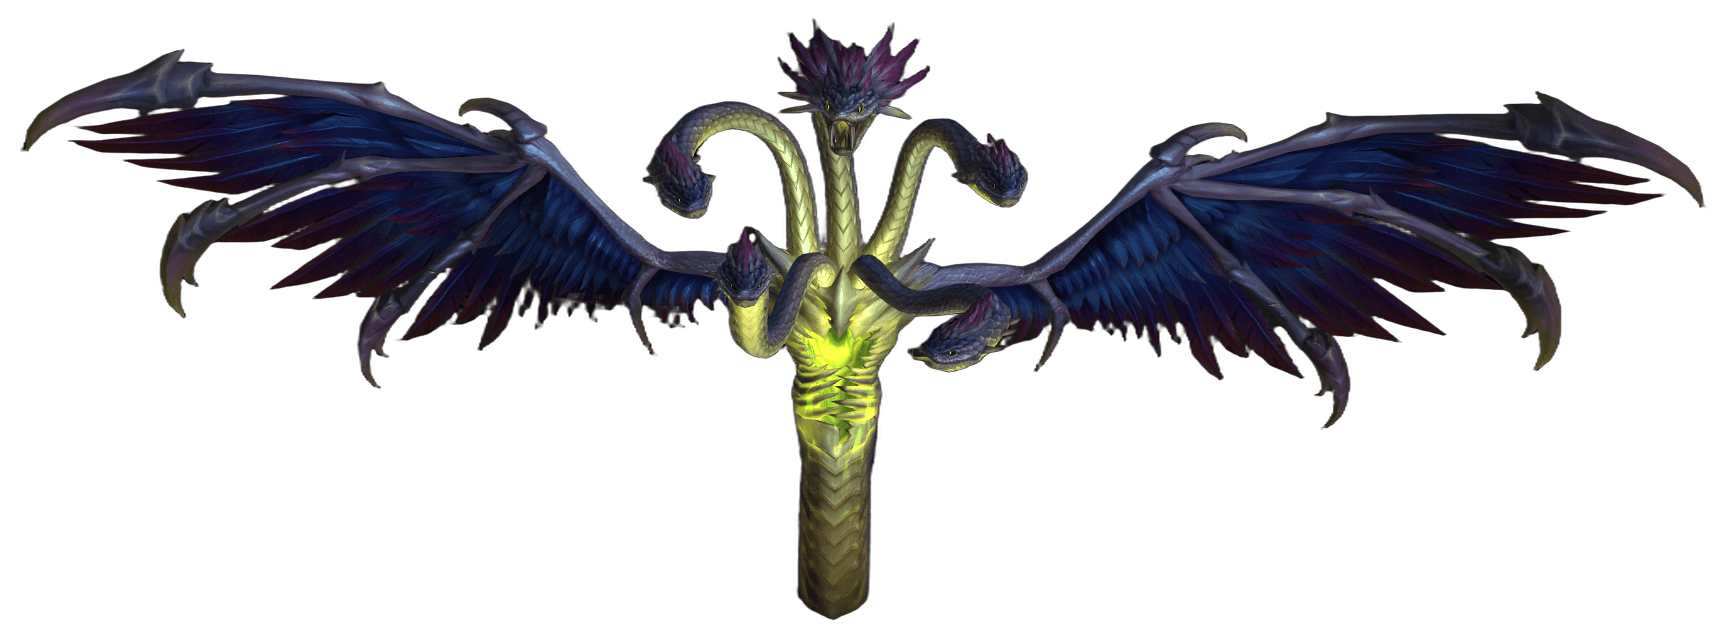
Ula'tek is the ancient serpent goddess for whose imprisonment the entire temple was constructed. Freed from a thousand years of captivity, she unleashes waves of venom upon the raid, summons countless brood, and destroys the very platform beneath the raiders' feet.
Below we will cover each fight ability in detail.
The fight description uses abilities from the Mythic version of the raid.
Fight Overview
The raid's finale is a multi-phase battle against Ula'tek herself. She floods the platform with Caustic Waves; a wave that washes over her eggs instantly hatches Venomscale Vipers, which rain Putrid Membrane on players. While her brood continues to appear, Ula'tek raises Spectral Coils that crush everything around them.
In Rage of the Shackled, the goddess bombards the raid with damage and falling debris — but during this time her Venomous Heart becomes vulnerable, making it the best window for burst damage. With Call of the Serpent she shakes the arena and drops more brood from the ceiling, while Circling Prey destroys sections of the platform, leaving less and less safe ground.
Boss Abilities
 Caustic Waves (Important)
Ula'tek sends waves of venom rolling across the platform, dealing Nature damage immediately and then periodically. A wave that washes over Ula'tek's eggs instantly hatches them.
-
When a Venomscale Viper hatches from an egg, membrane fragments fly toward players, dealing periodic Nature damage.
 Spectral Coils (Important)
Ula'tek's spectral coils rise above the battlefield and crush everything beneath them. Damage is reduced for each player near the impact point, making it beneficial to stack and share the hit.
 Mother's Wrath (Tank)
Ula'tek flings her current target away and focuses her wrath on it, dealing heavy periodic Nature damage.
 Rage of the Shackled (Lethal)
Ula'tek flies into a rage, dealing damage to the entire raid every few seconds and raining falling debris on the platform. During this time she forgets to guard herself and her Venomous Heart becomes vulnerable to attack.
-
Ula'tek roars, shaking the battlefield and dropping new brood from the ceiling.
- Circling Prey (Important)
Ula'tek destroys a section of the platform and forces prey to close in, dealing massive damage and knocking nearby players back. Players more than 13 yards away also take damage, so maintain a medium range.

Ula'tek Strategy
Tanks
Hold Ula'tek faced away from the raid and be ready for
Mother's Wrath on the current target.Healers
The primary damage spikes are
Spectral Coils, Rage of the Shackled, and Circling Prey, while multiplying vipers deal constant damage via  Putrid Membrane.
DPS
Kill Ula'tek's brood and stack under
Spectral Coils to split their damage. During Rage of the Shackled unleash all cooldowns on the vulnerable Venomous Heart. Maintain medium range during Circling Prey and avoid the path of Caustic Waves.
Loot
| Item | Equipment Slot |
|---|---|
 Venomkeeper's Horrific Cowl Venomkeeper's Horrific Cowl |
Cloth Armor: Head |
 Gaze of the Coiled Watcher Gaze of the Coiled Watcher |
Leather Armor: Head |
 Awoken Dreadfang Cuirass Awoken Dreadfang Cuirass |
Mail Armor: Chest |
 Chausses of Unbound Rancor Chausses of Unbound Rancor |
Plate Armor: Legs |
| Jaw of the Shackled Goddess |
One-Hand Sword |
 Abyssal Broodfiend's Bardiche Abyssal Broodfiend's Bardiche |
Polearm |
 Caustic Repose Greatbow Caustic Repose Greatbow |
Bow |
 Zatha'tek, Breath of Corruption Zatha'tek, Breath of Corruption |
Dagger |
 Jan'thrazet, the Soul Fang Jan'thrazet, the Soul Fang |
Dagger |
 Aqirbane Reliquary Aqirbane Reliquary |
Neck |
 Font of Venomous Rage Font of Venomous Rage |
Trinket |
 Voracious Heart of Ula'tek Voracious Heart of Ula'tek |
Trinket |
 Slumbering Coil Curio Slumbering Coil Curio |
Set Token (Universal) |
Author

Fouren
Fouren has been playing World of Warcraft for over 15 years. He is an active player with 12 Cutting Edge achievements under his belt, and has reached the top 1% and 0.1% multiple times on various classes. His main classes are healers, particularly Holy Paladin.


Comments
0No comments yet. Be the first to comment!