



Mount Hyjal — Raid Guide
 views
viewsMount Hyjal
This is a raid from The Burning Crusade expansion where players face five bosses. It is located in the Caverns of Time in Tanaris, but it takes the raid to an entirely different place and time — to the slopes of Hyjal at the height of the Third War, when the armies of the Scourge and the Burning Legion storm the Alliance and Horde camps at the foot of the World Tree.
Here the raid stands shoulder to shoulder with Jaina Proudmoore and Thrall, repelling wave after wave of undead and demons, and then clashes with the Legion's commanders — from the lich Rage Winterchill to Archimonde himself.
Mount Hyjal is built differently from the other raids of the expansion. There is almost none of the usual "clear the trash — kill the boss" here.
The raid defends a camp against waves of enemies, and only after all the waves have been repelled does the boss appear on the field. That is why killing the regular mobs here matters just as much as the mechanics of the bosses themselves.
In this guide we break down each boss of the raid in detail: its abilities, the fight tactics, and the loot you can obtain from it.
Where the raid entrance is located
The raid entrance is in the Caverns of Time — in the central-eastern part of Tanaris. After descending into the crater, look for the portal into a wooded area: night elf glaive throwers stand along the path.
From them you need to head north and west — that is where the raid entrance is located.
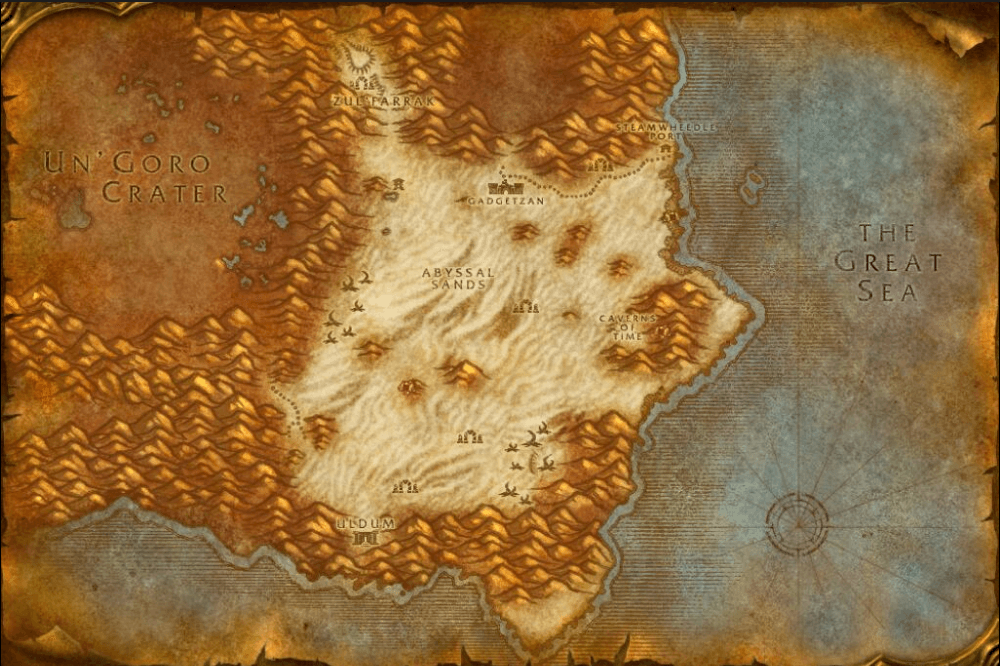
The nearest flight masters are Bulkrek Ragefist for the Horde and Bera Stonehammer for the Alliance, both in Gadgetzan.
Entering the raid requires attunement: reach Revered with the Keepers of Time faction and complete the The Vials of Eternity quest chain. The chain requires visiting both Phase 2 raids and obtaining items that drop from their final bosses.
Item levels and loot
Loot source | Item level |
|---|---|
| Bosses and trash | 141 |
| Tier 6 tokens | 146 |
| Archimonde | 151 |
Tier 6 tokens come in three types: Protector (warrior, hunter, shaman), Vanquisher (rogue, mage, druid), and Conqueror (paladin, priest, warlock). You can exchange them for set pieces at Tydormu by the raid entrance.
Token | Boss |
|---|---|
| Gloves | Azgalor |
| Helm | Archimonde |
Rage Winterchill
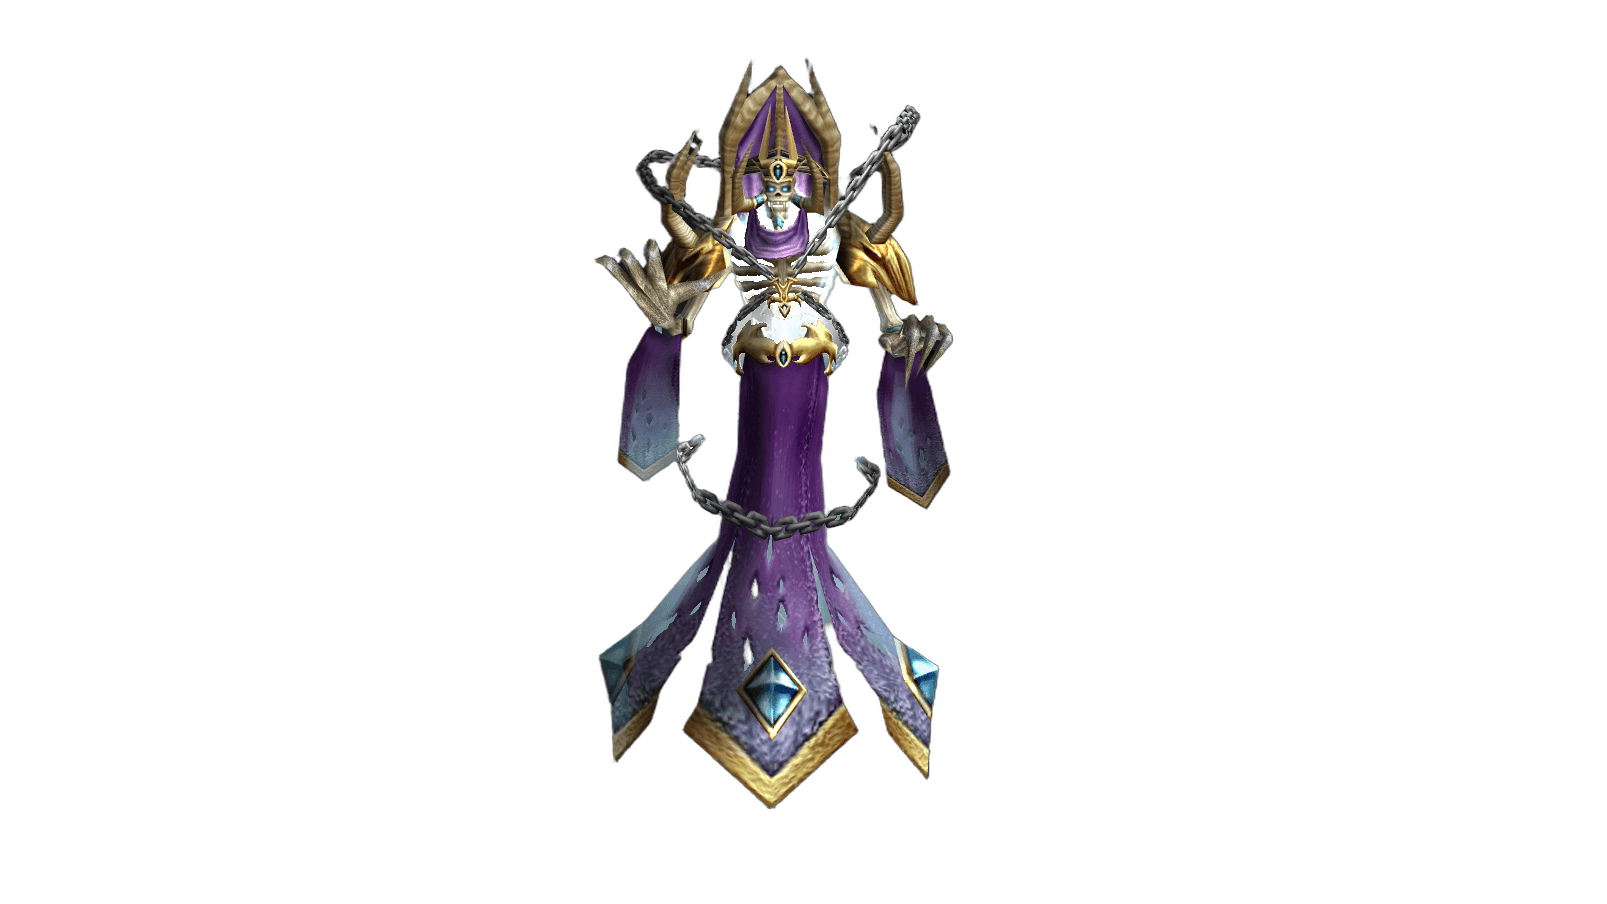
Rage Winterchill is the first boss of the raid, a lich who, unlike most of his kind, served the Burning Legion. In the battle for Mount Hyjal he led the army of the Scourge side by side with the demon Azgalor against the united forces of the Horde and Alliance.
He appears at the camp after eight waves of trash and greets the raid with icy bolts, chains of frost, and corruption creeping across the ground.
Below we break down each ability of the fight in detail.
Killing Rage Winterchill is required for attunement to the Black Temple — it is part of the An Artifact From the Past quest, for which the
Time-Phased Phylactery drops from the boss.
Fight overview
The fight is single-phase: all abilities are active from the first second until the boss dies, with no switches or pauses here.
The most dangerous ability is  Icebolt. It strikes a random raid member, deals heavy frost damage instantly, and keeps burning the target while it is stunned.
Healing the victim in time is not easy, so many raids prefer to remove the effect themselves — with a  Medallion of the Alliance or a
  Medallion of the Horde, or with a
  Living Action Potion. Removing the stun also breaks the periodic damage.
On himself the boss casts  Frost Armor, which raises his armor and frost resistance, and covers everyone attacking him in melee with Chilled — a slow to movement and attack speed.
A  Free Action Potion and
  Blessing of Freedom work excellently against this.
Periodically Rage Winterchill uses  Frost Nova, immobilizing everyone around him. On its own this is not deadly, but it becomes a trap if
  Death & Decay then appears in the same spot — a large pool on the ground that quickly burns away the health of everyone standing in it.
It is precisely the "immobilized — then flooded with a pool" combination that wipes raids on this boss. Dispellers must remove Frost Nova instantly, and everyone else must step out of Death & Decay the moment it appears.
Boss's main abilities
- Icebolt (Deadly)
Rage Winterchill strikes a random raid member, dealing heavy frost damage and stunning the target. While the stun lasts, the target keeps taking frost damage every second.
The stun is removed with a
Medallion of the Alliance, a Medallion of the Horde, or a Living Action Potion — and with it the periodic damage is broken as well. - Frost Armor (Tank)
A buff on the boss himself: it raises his armor and frost resistance. Everyone who attacks Rage Winterchill in melee gets
Chilled, reducing movement and attack speed. - Frost Nova (Important)
A wave of frost immobilizes all players and friendly NPCs near the boss and deals frost damage to them. The effect must be removed as quickly as possible so that players do not get trapped in
Death & Decay. - Death & Decay (Deadly)
A large area on the ground that lasts for some time and deals shadow damage to everyone standing in it, proportional to their maximum health pool.
The radius is very large, so you need to leave immediately — sometimes it takes several seconds of running.
Tactics for the fight against Rage Winterchill
Tanks
Chilled from Frost Armor greatly hinders building threat — use Blessing of Freedom or a Free Action Potion.The tank must always keep the ability to move, so ask to have
Frost Nova dispelled from you, in order to step out of Death & Decay in time and, if needed, move the boss aside.The main tank can also be hit by
Icebolt, so keep a Medallion of the Alliance, a Medallion of the Horde, or a Living Action Potion ready.Healers
Your main headache is
Icebolt: if you react quickly, the target can be healed, but it is more reliable when the raid removes the stun itself.Keep a separate eye on anyone stuck in
Frost Nova — the effect removed in time lets the player step out of Death & Decay and saves their life.Before the fight starts, make sure the whole raid has restored health and mana: the fight is short, but the damage comes in bursts.
DPS
Melee absolutely need a
Free Action Potion: removing Chilled gives more damage than even a  Haste Potion.
Everyone else — keep a means of removing the stun from
Icebolt ready; for mages,  Blink and
  Ice Block work.
And the main rule of the fight: if you see
Death & Decay — run out of it right away, without waiting for your health to drop.
Loot
Item | Equipment slot |
|---|---|
 Cuffs of Devastation Cuffs of Devastation | Cloth armor: wrists |
 Bracers of Martyrdom Bracers of Martyrdom | Cloth armor: wrists |
 Rejuvenating Bracers Rejuvenating Bracers | Leather armor: wrists |
 Deadly Cuffs Deadly Cuffs | Leather armor: wrists |
 Bracers of the Pathfinder Bracers of the Pathfinder | Mail armor: wrists |
 Howling Wind Bracers Howling Wind Bracers | Mail armor: wrists |
 Stillwater Boots Stillwater Boots | Mail armor: feet |
 Blessed Adamantite Bracers Blessed Adamantite Bracers | Plate armor: wrists |
 Furious Shackles Furious Shackles | Plate armor: wrists |
 Blood-Stained Pauldrons Blood-Stained Pauldrons | Plate armor: shoulders |
 Tracker's Blade Tracker's Blade | Dagger |
 Chronicle of Dark Secrets Chronicle of Dark Secrets | Held in off-hand |
Anetheron
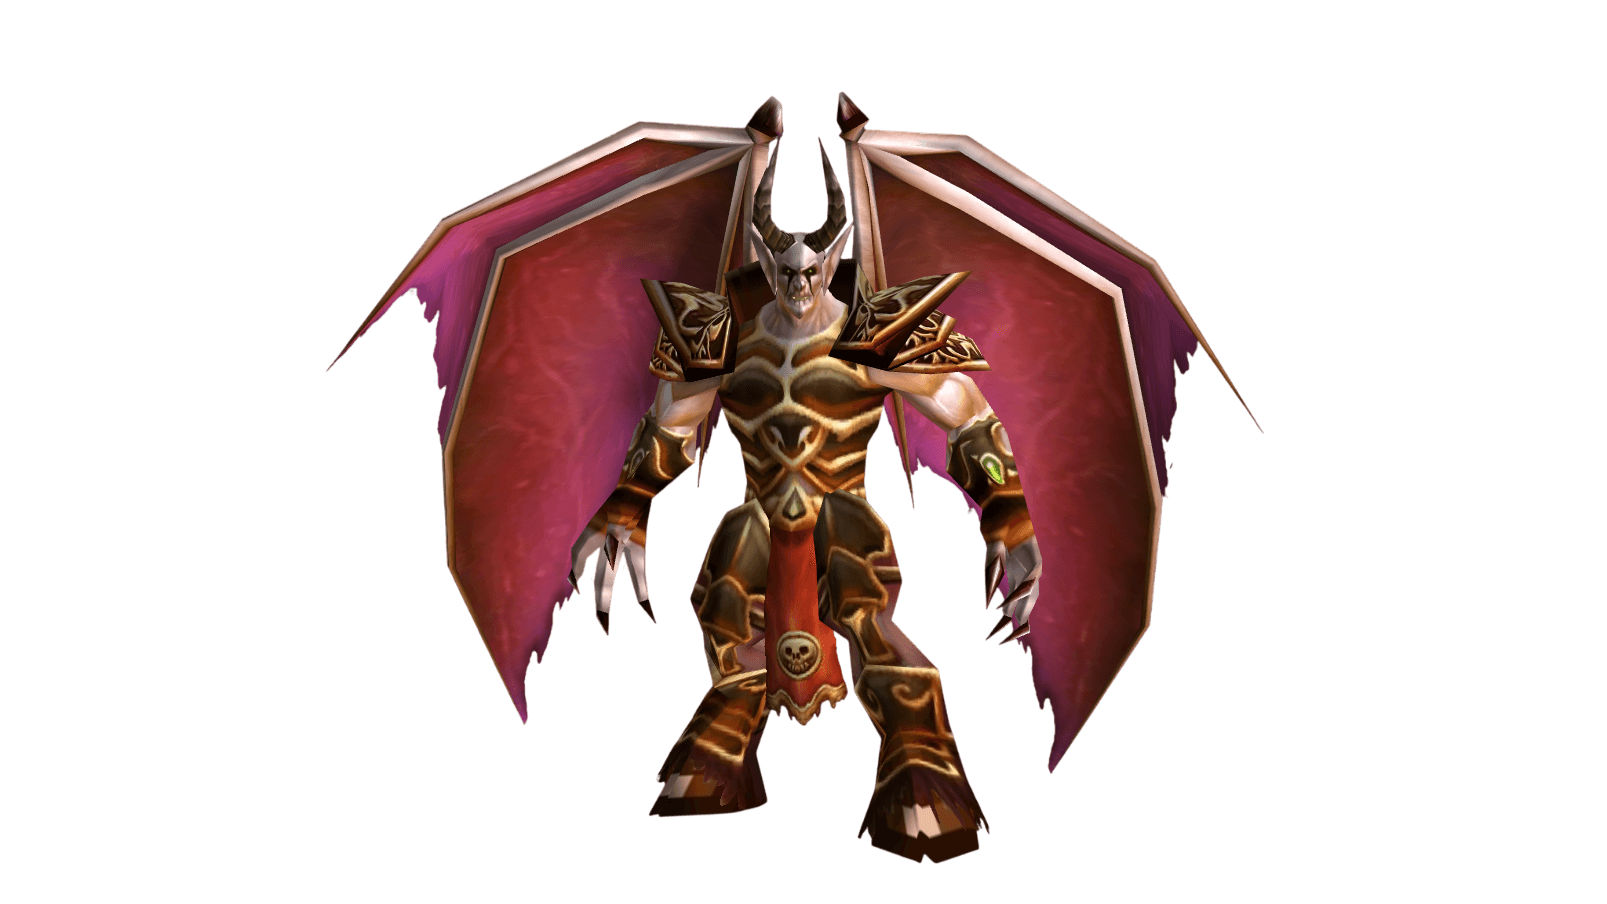
Anetheron is the second boss of the raid, a dreadlord who helped Rage Winterchill lead the army of the Scourge against the Horde and Alliance. Archimonde entrusted him with keeping an eye on the Lich King, though Anetheron himself regarded that alliance with great skepticism.
In the fight he brings the classic dreadlord kit from Warcraft III: a vampiric aura, a swarm of carrion, sleep, and the summoning of infernals.
Below we break down each ability of the fight in detail.
Fight overview
The fight is single-phase but packed with mechanics, and almost all of them hit the healers.
The main danger is  Carrion Swarm. The boss picks a random player and releases a wide cone in their direction: everyone it touches takes shadow damage and, far worse, loses most of their healing for a long time.
If the cone covers several healers at once, the raid falls apart within seconds — which is why healers are required to stand spread out around the boss.
The second mechanic is  Sleep: three random players fall asleep at once. The effect is not dispellable and cannot be broken by the player themselves, but any damage taken immediately wakes the target. If a key healer falls asleep, someone must cover for them.
 Vampiric Aura causes Anetheron to heal from his own melee strikes, many times more than the damage dealt.
Without healing reduction the fight drags on forever, so the boss must always have  Wound Poison,
  Mortal Strike, or
  Aimed Shot on him.
Roughly once a minute the boss summons an  Inferno — a Towering Infernal drops right onto a random player and stuns them.
High-damage raids simply pull all the infernals onto a dedicated fire-resistance tank; weaker raids kill them at range as they appear.
The infernal tank and their healers should be led far from the boss so that they are guaranteed not to get caught by Carrion Swarm.
Boss's main abilities
- Vampiric Aura (Important)
Anetheron heals three times more than the damage he deals in melee. The aura also empowers Towering Infernals that end up near the boss — their attacks begin to heal them as well.
- Carrion Swarm (Deadly)
A cone toward a random player. Everyone hit takes shadow damage and loses most of the healing they cast for a long time. This ability is what most often wipes raids on Anetheron.
- Inferno (Tank)
Roughly once a minute the boss summons a Towering Infernal at a random raid member's location; the summon itself briefly stuns that target.
The arriving Towering Infernal must be picked up by a tank immediately, otherwise it will cut down those standing nearby.
- Sleep (Healer)
Three random players fall asleep. The effect cannot be dispelled and cannot be broken by yourself, but any damage taken wakes the target.
Tactics for the fight against Anetheron
Tanks
Two are needed: one in a normal set on the boss, the second — with moderate fire resistance on the Towering Infernals.
A paladin is an excellent fit for the second tank role thanks to ranged taunt: an infernal can drop anywhere on the platform.
For the tank on the boss it is useful to stack dodge, parry, and enemy miss chance: the less often Anetheron hits him, the less he heals himself with
Vampiric Aura.Healers
Spread out around the boss as widely as possible so that
Carrion Swarm does not cover several healers at once. Always place the two healers of the main tank on opposite sides of the boss — they must not fall under the cone simultaneously.Healers assigned to the infernal tank can move farther than 70 yards from Anetheron: at that distance
Carrion Swarm simply will not reach them.And watch for
Sleep — be ready to fill in for a sleeping comrade.DPS
Anetheron is a demon, so instead of a regular elixir it is more profitable to drink an
 Elixir of Demonslaying. In melee there is less space, but even there it is worth standing in a semicircle so that Carrion Swarm does not catch everyone at once.
A rogue or warrior is required to keep
Wound Poison or Mortal Strike on the boss — over the fight this denies Anetheron hundreds of thousands of points of healing.If there are no such classes, the task is taken on by a hunter with
Aimed Shot.Ranged handle the infernals, if the raid decides to kill them; hunters also help the tanks pick them up with
 Misdirection.
Loot
Item | Equipment slot |
|---|---|
 Anetheron's Noose Anetheron's Noose | Cloth armor: waist |
 Hatefury Mantle Hatefury Mantle | Cloth armor: shoulders |
 Archbishop's Slippers Archbishop's Slippers | Cloth armor: feet |
 Enchanted Leather Sandals Enchanted Leather Sandals | Leather armor: feet |
 Don Alejandro's Money Belt Don Alejandro's Money Belt | Leather armor: waist |
 Quickstrider Moccasins Quickstrider Moccasins | Mail armor: feet |
 Golden Links of Restoration Golden Links of Restoration | Mail armor: chest |
| Glimmering Steel Mantle | Plate armor: shoulders |
 The Unbreakable Will The Unbreakable Will | One-handed sword |
 Blade of Infamy Blade of Infamy | One-handed sword |
 Pillar of Ferocity Pillar of Ferocity | Staff |
 Bastion of Light Bastion of Light | Shield |
Kaz'rogal
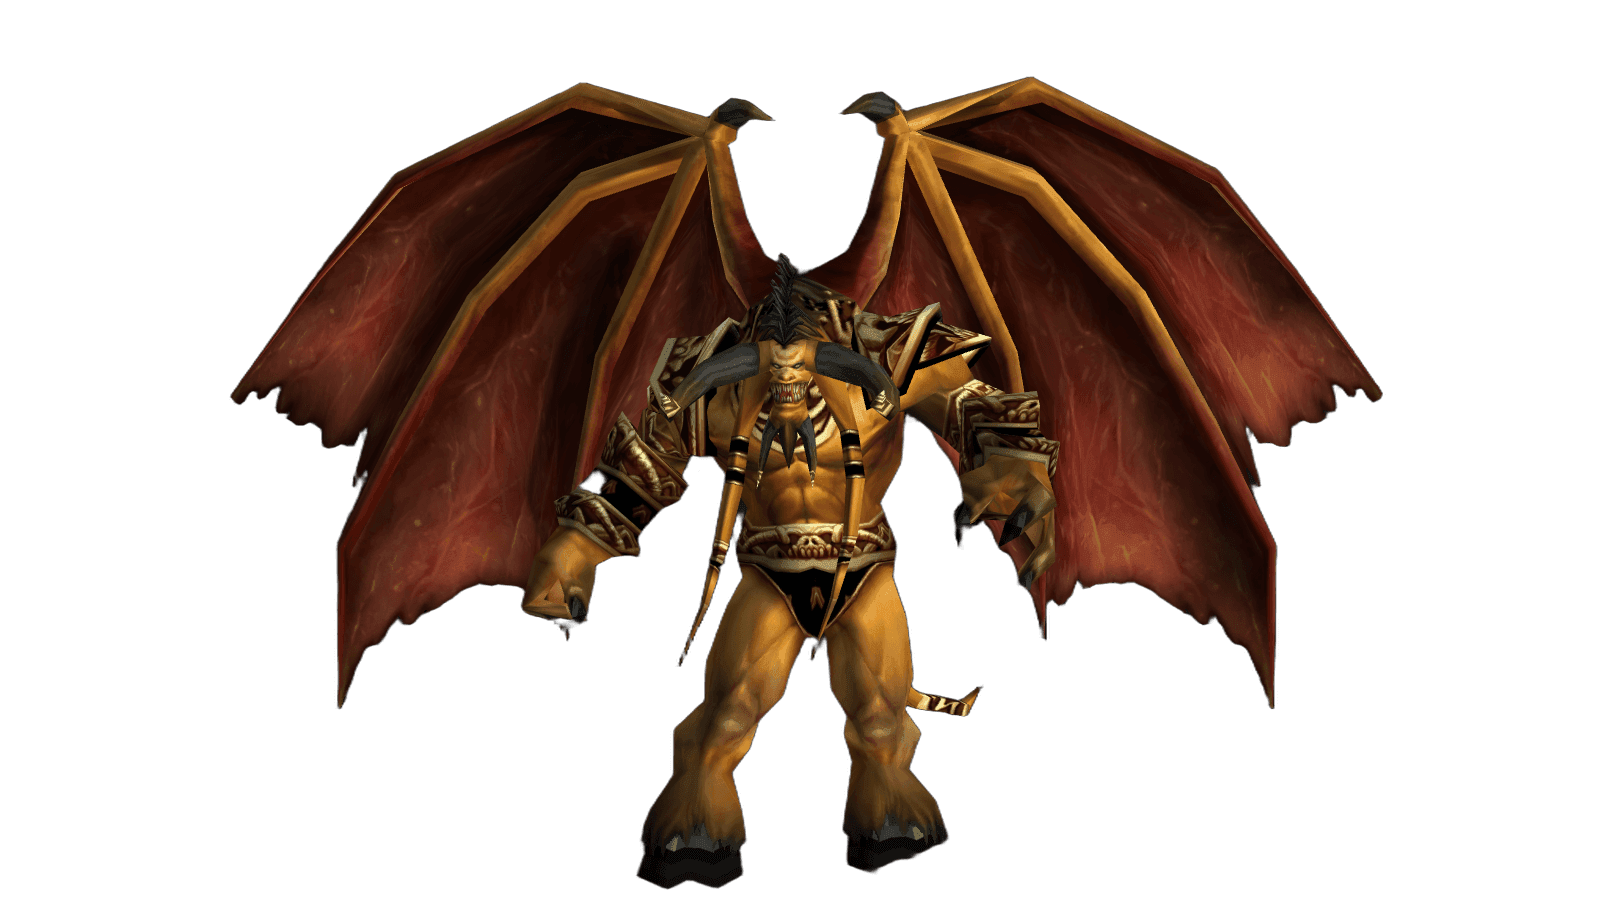
Kaz'rogal is the third boss of the raid and one of Archimonde's lieutenants, sent to destroy the orc camp on the slope of Hyjal. His main weapon is not brute force but hunger: he drains mana from all who use it and makes the emptied ones explode.
The fight takes place in the Horde camp, and Thrall and his guards fight on the raid's side.
Below we break down each ability of the fight in detail.
This is the only fight in the raid where the mana pool matters more than damage per second. The order of using consumables is worth agreeing on in advance.
Fight overview
The fight is single-phase, and in essence it has only one truly dangerous mechanic — the  Mark of Kaz'rogal.
Kaz'rogal applies it to everyone who uses mana, and does so more and more often each time — a kind of "soft berserk".
The mark drains mana over several seconds; if a player does not have enough, they explode instead, dealing enormous damage to themselves and everyone around. One such explosion in a tight group can end the fight.
Hence the single rule: any mana user is obliged to keep a substantial safety margin of reserve at all times.  Super Mana Potion,
  Dark Rune, and
  Elixir of Major Mageblood help, as do class abilities —
  Shadowfiend,
  Evocation, and
  Mana Tide Totem.
Mages and paladins can skip one mark entirely through Ice Block and  Divine Shield.
If you still realize you are about to explode — run away from the raid as far as possible.
The remaining abilities are background.  War Stomp regularly stuns everyone near the boss, and melee usually cover it with a Free Action Potion.
 Malevolent Cleave strikes a cone in front of the boss and splits the damage among all affected targets, so the boss must be turned so that Thrall attacks him from behind.
 Cripple lands on random targets and slows them, while also lowering their strength. The effect is not dispelled by ordinary means, but
  Cloak of Shadows and Blessing of Freedom remove it.
Boss's main abilities
- Mark of Kaz'rogal (Deadly)
Applied to all mana users in the raid and drains mana over several seconds, and it is applied more and more often as the fight goes on. If there is not enough mana, the player explodes, dealing heavy damage to themselves and everyone around them.
- War Stomp (Tank)
Kaz'rogal strikes the ground, dealing damage to all players and friendly NPCs near him and stunning them. It is used often, so melee benefit from a
Free Action Potion. - Malevolent Cleave (Tank)
A strike to the cone in front of the boss. The total damage is split evenly among all affected targets, so if the tank cannot withstand it, a second tank can be placed in front of the boss.
- Cripple (Important)
Applied to random players, pets, and NPCs: it reduces attack speed, movement speed, and strength. The effect is neither a magic, a curse, a poison, nor a disease, so it cannot be removed by ordinary dispelling.
Tactics for the fight against Kaz'rogal
Tanks
After taking the boss, drag him through the camp past the Horde NPCs so they join the fight, and turn him so that Thrall hits Kaz'rogal from behind and does not fall under
Malevolent Cleave.At the start it is useful to drink a
Free Action Potion against War Stomp.It is better not to put a paladin in the main tank role: holding threat while also not running low on mana under the
Mark of Kaz'rogal is too difficult.Healers
The main damage goes to the tank, with a little reaching the melee from
War Stomp. Your main task, however, is your own mana: each time, by the moment of the Mark of Kaz'rogal, it should be in reserve.Choose the most economical spells and do not hesitate to spend a
Super Mana Potion and a Dark Rune — a healer's explosion almost always means a wipe.DPS
Kaz'rogal is a demon, so an
Elixir of Demonslaying noticeably raises damage. Melee should also keep a Free Action Potion against War Stomp.Retribution paladins and Enhancement shamans need to watch their mana especially closely so as not to blow up their neighbors in melee.
Ranged replenish mana with a
Super Mana Potion and a Dark Rune; Shadow priests, who return mana to the raid, are especially valuable in this fight.
Loot
Item | Equipment slot |
|---|---|
 Leggings of Channeled Elements Leggings of Channeled Elements | Cloth armor: legs |
 Blue Suede Shoes Blue Suede Shoes | Cloth armor: feet |
 Angelista's Sash Angelista's Sash | Cloth armor: waist |
 Razorfury Mantle Razorfury Mantle | Leather armor: shoulders |
 Black Featherlight Boots Black Featherlight Boots | Leather armor: feet |
 Belt of the Crescent Moon Belt of the Crescent Moon | Leather armor: waist |
 Beast-Tamer's Shoulders Beast-Tamer's Shoulders | Mail armor: shoulders |
 Sun-Touched Chain Leggings Sun-Touched Chain Leggings | Mail armor: legs |
| Valestalker Girdle | Mail armor: waist |
 Belt of Seething Fury Belt of Seething Fury | Plate armor: waist |
 Hammer of Atonement Hammer of Atonement | One-handed mace |
 Kaz'rogal's Hardened Heart Kaz'rogal's Hardened Heart | Shield |
Azgalor
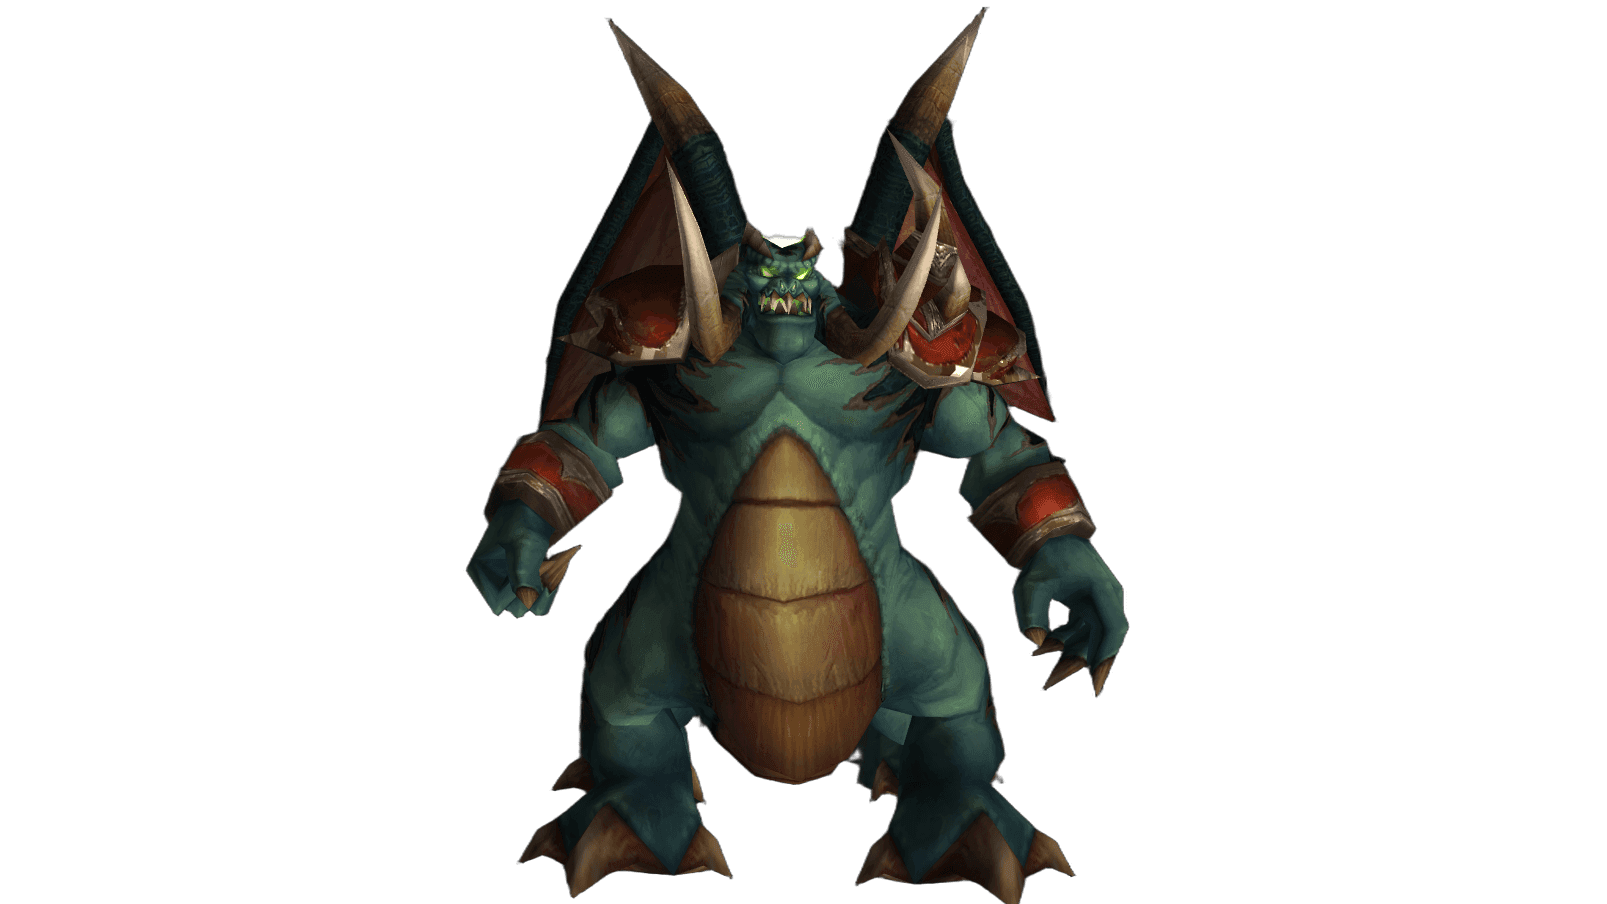
Azgalor is the fourth boss of the raid and Archimonde's right hand in the battle for Mount Hyjal. This colossal pit lord crashed down on the Horde camp, intending to destroy the enemies together with his dread guards.
This is the first boss of the raid to drop Tier 6 set pieces — the glove tokens for all classes.
Below we break down each ability of the fight in detail.
Fight overview
The fight is single-phase: all mechanics work from beginning to end.
The main one is  Doom. Roughly every half a minute to a minute the effect lands on a random player and after some time kills them, and a Lesser Doomguard appears at the place of death.
Warlocks must prepare a  Master Soulstone in advance and put it on the doomed one.
Raids handle the guards in different ways. You can send the doomed ones to Thrall, so that he and his warriors finish off the guards. You can assemble a separate "guard squad" of a couple of tanks, a couple of healers, and several melee DPS, to which the doomed ones will run — then Thrall and his NPCs hit the boss himself the whole time.
The Lesser Doomguards that appear apply Cripple to their tanks and strike with  War Stomp.
Cripple is not removed by ordinary dispelling, but Cloak of Shadows and Blessing of Freedom help.
Melee on the boss constantly deal with  Rain of Fire: the area appears at the location of a player who is near Azgalor, and additionally applies Unquenchable Flames, which keeps burning the target even after leaving the fire.
That is exactly why all ranged and healers must stand beyond the target-selection radius — then the rain simply does not appear on them.
Finally,  Howl of Azgalor regularly silences the whole raid. This is a shadow-school spell, so shadow resistance — for example, from a
  Medallion of Karabor — gives a chance to resist it.
A paladin with  Improved Concentration Aura in the healer group noticeably shortens the silence duration.
Rounding out the list is Cleave — an ordinary cone in front of the boss, because of which only the main tank should stand in front of Azgalor, while Thrall attacks from behind.
Boss's main abilities
- Doom (Deadly)
Lands on a random raid member and after some time kills them. At the place of death a Lesser Doomguard appears.
Death is inevitable, so the doomed one is "insured" in advance with a
Master Soulstone and led to the right spot. - Rain of Fire (Important)
An area of fire appears at the location of a random player who is near the boss and lasts for some time. Everyone standing in it takes periodic fire damage and
Unquenchable Flames, which keeps burning even after leaving the area. - Howl of Azgalor (Healer)
A silence on the whole raid that prevents casting spells. The spell belongs to the shadow school, so shadow resistance increases the chance to avoid the effect.
- Cleave (Tank)
A strike to the cone in front of the boss, affecting both players and friendly NPCs. Only the main tank should stand in front of Azgalor.
- Cripple (Tank)
Applied by the Lesser Doomguards: it heavily slows the target's attack and movement speed and reduces its strength. It is not removed by ordinary dispelling.
Tactics for the fight against Azgalor
Tanks
One tank is needed on the boss and one or two on the Lesser Doomguards; a normal physical-defense set is enough for everyone — there is no significant magic damage on the tanks here.
The main tank holds the boss so that no one extra is in front of him, and during
Howl of Azgalor he can even stop attacking altogether: this rules out a parry and the burst of damage that follows it.The guard tanks stand noticeably farther from the boss so as not to get caught by
Rain of Fire.Healers
You will have to heal the main tank, the tanks of the Lesser Doomguards, and the melee, who periodically pick up
Rain of Fire.The key skill of the fight is to apply a periodic heal to the tank in advance before each
Howl of Azgalor, so that he survives the silence.A paladin with
Improved Concentration Aura in your group shortens the silence and noticeably makes life easier.DPS
Both Azgalor and his guards are demons, so an
Elixir of Demonslaying is more profitable here than any ordinary elixir.Melee will have to constantly move behind the boss's back, stepping out of
Rain of Fire; rogues can cut part of this damage with Cloak of Shadows.Ranged and healers stand beyond the target-selection radius — then the rain does not appear on them at all.
Warlocks keep a
Master Soulstone ready for those on whom Doom has landed, and those wishing to resist Howl of Azgalor put on a Medallion of Karabor.
Loot
Item | Equipment slot |
|---|---|
 Gloves of the Forgotten Conqueror Gloves of the Forgotten Conqueror | Tier 6 token: hands (priest, paladin, warlock) |
| Gloves of the Forgotten Vanquisher | Tier 6 token: hands (druid, mage, rogue) |
| Gloves of the Forgotten Protector | Tier 6 token: hands (warrior, hunter, shaman) |
 Don Rodrigo's Poncho Don Rodrigo's Poncho | Leather armor: chest |
 Shady Dealer's Pantaloons Shady Dealer's Pantaloons | Leather armor: legs |
 Bow-Stitched Leggings Bow-Stitched Leggings | Mail armor: legs |
 Glory of the Defender Glory of the Defender | Plate armor: chest |
 Girdle of Hope Girdle of Hope | Plate armor: waist |
| Boundless Agony | Dagger |
Archimonde
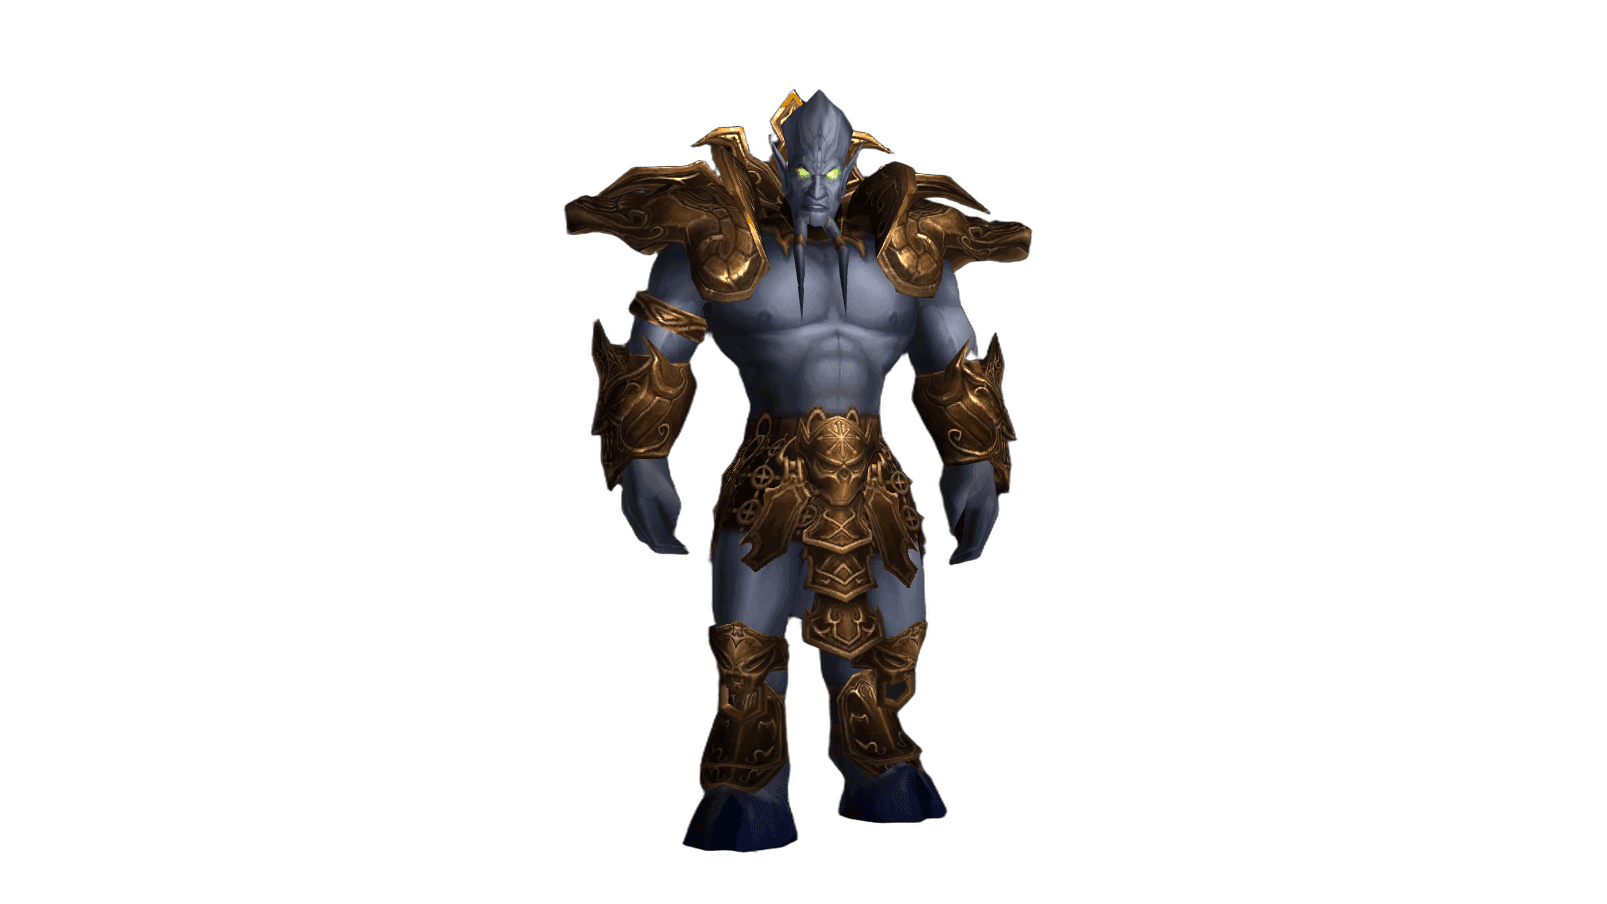
Archimonde is the last boss of the raid, the lord of the eredar at the head of the Legion's forces and one of the first demons to follow Sargeras.
In the Third War he led the invasion into Kalimdor to destroy the World Tree and absorb its power, but the wisps fell upon him and cut short his existence.
In the fight itself the raid is aided by Tyrande Whisperwind and the spirits of the forest, who deal the Defiler the final blow. For the victory over Archimonde the raid receives the helm tokens of Tier 6 for all classes.
Below we break down each ability of the fight in detail.
Fight overview
The fight is single-phase and built entirely around survival. There is formally a time limit, but with the boss's health pool it almost never comes into play.
To cope with the abundance of mechanics, it is convenient to split the raid into groups of five people. In each group a shaman with a  Tremor Totem and someone able to remove curses are desirable.
The groups stay in a loose cluster — tight enough that the totem covers everyone and the curse removals reach, but loose enough that a single ability does not catch several people at once.
The groups themselves, meanwhile, spread far apart from each other, occupying the whole platform.
Before the fight the whole raid must approach Tyrande Whisperwind and take the  Tears of the Goddess — without them you cannot survive
  Air Burst.
The most dangerous ability is  Doomfire. It originates at Archimonde's feet and begins to chase a random player, leaving a trail of flame behind it.
The fire lasts a long time, and usually several trails are burning on the platform at once. Whoever stands in the fire takes heavy damage and additionally catches fire themselves; this effect cannot be dispelled, but Cloak of Shadows, Ice Block, and Divine Shield remove it.
What makes Doomfire truly deadly is  Fear, which regularly covers the whole raid: a player fleeing in panic runs straight into the flames.
The main tank needs immunity to fear, so a warrior with  Berserker Rage is preferable; everyone else should stay within the radius of the Tremor Totem.
Backup options are a pre-applied Cloak of Shadows,  Will of the Forsaken, a Medallion of the Horde, and
  Fear Ward.
A separate mechanic is Air Burst: it strikes a random player and everyone near them, tossing them high into the air.
If you become the target — immediately run away from your comrades, and use the Tears of the Goddess an instant before landing: too early — the fall will still kill you, too late — there will be nothing left to slow.
 Grip of the Legion is a long and very painful curse on random players. The curse-removing classes must be distributed across the whole raid so that the effect is removed instantly wherever it appears.
Mistakes are punished by  Soul Charge: for each death in the raid Archimonde gains a charge and unleashes a blow on everyone, depending on the class of the deceased.
The raid will survive one such blow, but it will almost certainly cause another death — and the chain reaction finishes off the group.
The boss uses  Finger of Death only when there is no one left in melee near him. If he has started casting this spell, the raid has almost certainly already lost, so the tank must not step away from Archimonde for even a second.
When the boss is left with 10% health, the fight is essentially over: Tyrande Whisperwind grants the raid  Protection of Elune, making everyone invulnerable, while the wisps surround the Defiler and put an end to this story.
Boss's main abilities
- Doomfire (Deadly)
The flame originates at Archimonde's feet and chases a random player, leaving a long-burning trail behind it. Whoever stands in the fire takes heavy fire damage and catches fire themselves — the effect keeps burning even after leaving the flames.
It cannot be dispelled, but
Cloak of Shadows, Ice Block, and Divine Shield remove it. - Fear (Deadly)
A regular fear on the whole raid. On its own it is harmless, but in combination with
Doomfire it becomes the main cause of deaths. - Air Burst (Important)
Archimonde picks a random player and after a short delay tosses them and everyone nearby high into the air, dealing nature damage. Surviving the fall is made possible by the
Tears of the Goddess, used shortly before landing. - Grip of the Legion (Healer)
A long-lasting curse on a random player, dealing heavy periodic shadow damage. It must be removed as quickly as possible.
- Finger of Death (Deadly)
Used only if there is no one in melee near the boss, and almost guaranteed to kill a random raid member.
- Soul Charge (Deadly)
A charge that Archimonde gains for the death of a priest, mage, or warlock. Deals fire damage to the whole raid and deprives everyone of the ability to cast spells.
 Soul Charge (Deadly)
A charge for the death of a warrior, rogue, or paladin. Deals physical damage to the whole raid and increases the damage it takes.
 Soul Charge (Deadly)
A charge for the death of a druid, shaman, or hunter. Drains mana from the whole raid and deals nature damage.
Tactics for the fight against Archimonde
Tanks
The fight is designed for one tank, so all extra tanks must heal or deal damage. The death of the main tank almost always means the end of the attempt, even if a backup is ready.
The best choice is a warrior with
Berserker Rage: he is immune to every Fear.The main tank is obliged to be in melee at all times without exception — otherwise Archimonde will start using
Finger of Death.Healers
The first priority is to survive yourselves: any death in the raid gives the boss a
Soul Charge. Archimonde hits the main tank very hard, and he needs more attention than usual.Stay as far as possible from any
Doomfire and within the radius of your group's Tremor Totem.A
Medallion of the Horde in the trinket slot is a good insurance against an unlucky Fear.DPS
Here survival is more important than damage: risking for extra numbers is almost never worth it. Melee will sometimes have to step away from the boss if there are too many trails of
Doomfire nearby, and ranged will have to move for long stretches instead of attacking.If
Air Burst has chosen you — run away from your neighbors right away: the ability has a large radius. And do not forget to take the Tears of the Goddess before the fight starts.Mages and druids must watch for
Grip of the Legion on those around them and remove it instantly.
Loot
Item | Equipment slot |
|---|---|
 Helm of the Forgotten Conqueror Helm of the Forgotten Conqueror | Tier 6 token: head (priest, paladin, warlock) |
| Helm of the Forgotten Vanquisher | Tier 6 token: head (druid, mage, rogue) |
| Helm of the Forgotten Protector | Tier 6 token: head (warrior, hunter, shaman) |
 Robes of Rhonin Robes of Rhonin | Cloth armor: chest |
 Leggings of Eternity Leggings of Eternity | Cloth armor: legs |
| Midnight Chestguard | Leather armor: chest |
 Mail of Fevered Pursuit Mail of Fevered Pursuit | Mail armor: chest |
| Savior's Grasp | Plate armor: chest |
 Legguards of Endless Rage Legguards of Endless Rage | Plate armor: legs |
 Tempest of Chaos Tempest of Chaos | One-handed sword |
 Cataclysm's Edge Cataclysm's Edge | Two-handed sword |
 Apostle of Argus Apostle of Argus | Staff |
 Bristleblitz Striker Bristleblitz Striker | Bow |
 Antonidas' Aegis of Rapt Concentration Antonidas' Aegis of Rapt Concentration | Shield |
 Scepter of Purification Scepter of Purification | Held in off-hand |
Author

Fouren
Fouren has been playing World of Warcraft for over 15 years. He is an active player with 12 Cutting Edge achievements under his belt, and has reached the top 1% and 0.1% multiple times on various classes. His main classes are healers, particularly Holy Paladin.

Comments
0No comments yet. Be the first to comment!