



Where to Level as Alliance in WoW: Forever from 1 to 60

Important Information
In WoW: Forever, you can level from 1 to 60 across a variety of zones.
Zone levels do not scale to your character. Easy quests, later quest hubs, and elite enemies can all be found in the same zone. City guards, bosses, special events, and some high-level areas can be much stronger than ordinary enemies.
On a PvP realm, players of the opposing faction can attack you in contested zones. Stay aware of your surroundings while questing and avoid pulling too many enemies: a surprise attack makes defending yourself or retreating harder.
Choose targets close to your level. If most nearby quests are too difficult, switch to another zone and come back later. You can alternate between several towns and zones within the same level range.
Where to Go at Your Level
A Simple Route from Level 1 to 60
For humans, follow this route: Elwynn Forest → Westfall → Redridge Mountains and Duskwood → Stranglethorn Vale → Riverglades → Tanaris or Feralas → Felwood and Un'Goro Crater → Winterspring or the Plaguelands.
For dwarves and gnomes, start with Dun Morogh → Loch Modan → Wetlands → Arathi Highlands.
For night elves, follow Teldrassil → Darkshore → Ashenvale → Desolace. Then choose shared zones that suit your level.
Move between neighboring areas when convenient quests run out. You do not need to finish every quest chain in a zone before moving on.
Elwynn Forest: 1–10
When to Go: Level 1–10. Location: Eastern Kingdoms.
Enemies: Levels 1–5 in the starting valley, then 5–10 along the main routes; some targets are higher level.
Leave Northshire for Goldshire, then complete quests at the farms and eastern logging camps. At level 10–12, head west to Westfall. Return to Redridge Mountains later: being close to the road does not mean the enemies match your level.
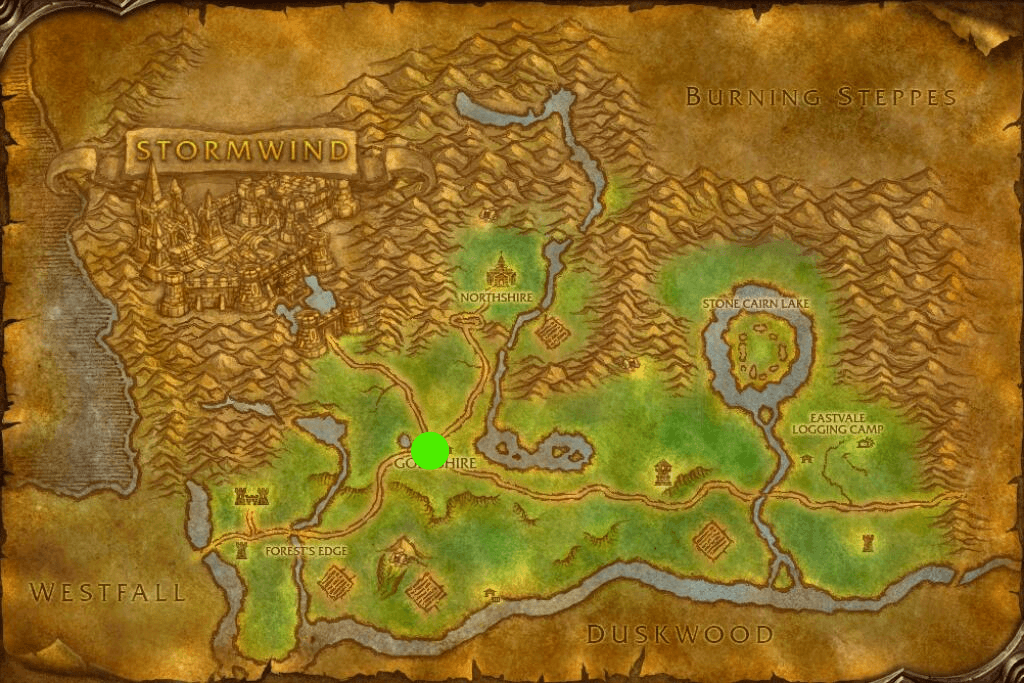
Goldshire
Dun Morogh: 1–10
When to Go: Level 1–10. Location: Eastern Kingdoms.
Enemies: Mostly levels 1–11 for the starting quests. High-level inhabitants and certain special areas fall outside this range.
After Coldridge Valley, head to Kharanos, then complete quests in the eastern part of the zone. Around level 10–12, take the eastern tunnels to Loch Modan. Ironforge is a convenient place to learn abilities and unlock transportation options.
Dungeons: Gnomeregan is in western Dun Morogh and is intended for roughly levels 29–38.
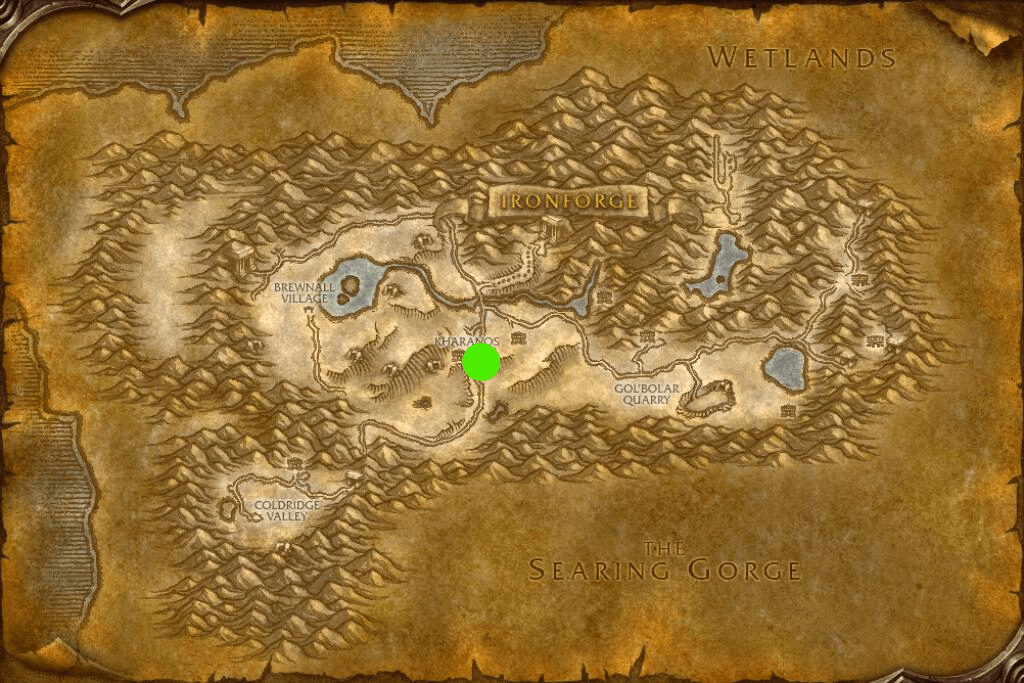
Kharanos
Teldrassil: 1–11
When to Go: Level 1–11. Location: Kalimdor.
Enemies: Levels 1–5 at the start, mostly 5–11 in later areas.
Start in Shadowglen, then clear Dolanaar and the area around Darnassus. After level 10–12, go down to Rut'theran Village and travel to Darkshore. Cave quests may require clearing several groups even when the enemies' levels look suitable.
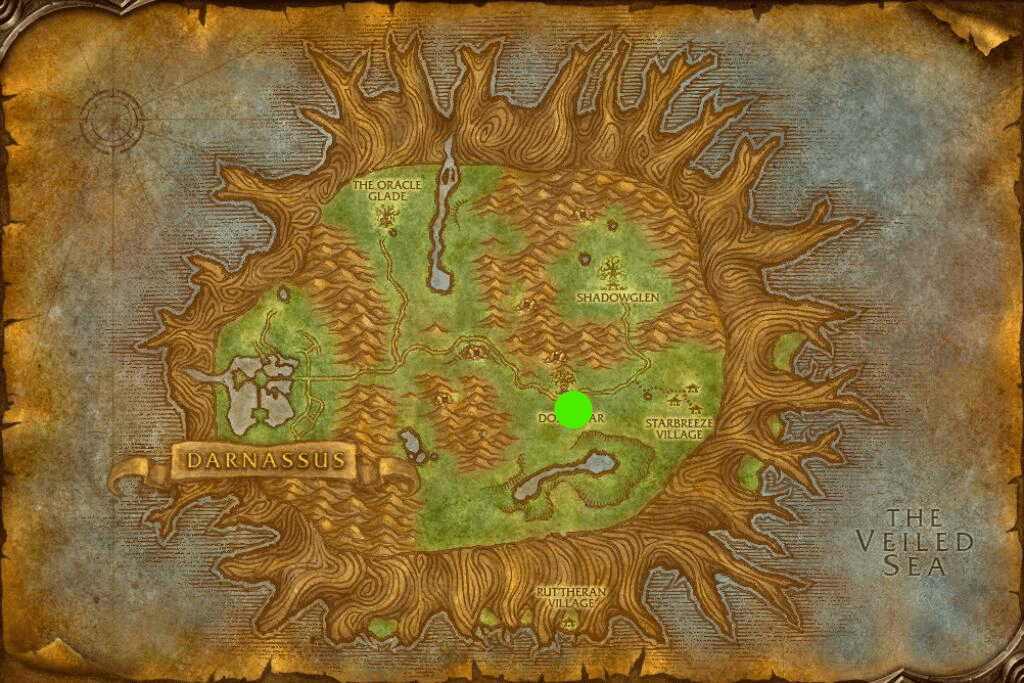
Dolanaar
Zephras Isle: 1–12
Zephras Isle is only accessible to Skyborne. Other races cannot enter this zone.
When to Go: Level 1–12. Location: Separate Starting Zone.
Enemies: The island has starting enemies at 1–5 and later groups around 6–12.
Skyborne of both factions complete their own introduction here. Follow the quests from Tendal Village through Shen'dar Village to Valanaar. After the introduction, the airship from Valanaar takes you to Dalaran. The route from there crosses higher-level areas: do not automatically start the local quests. Travel to your chosen level 10–20 zone instead.
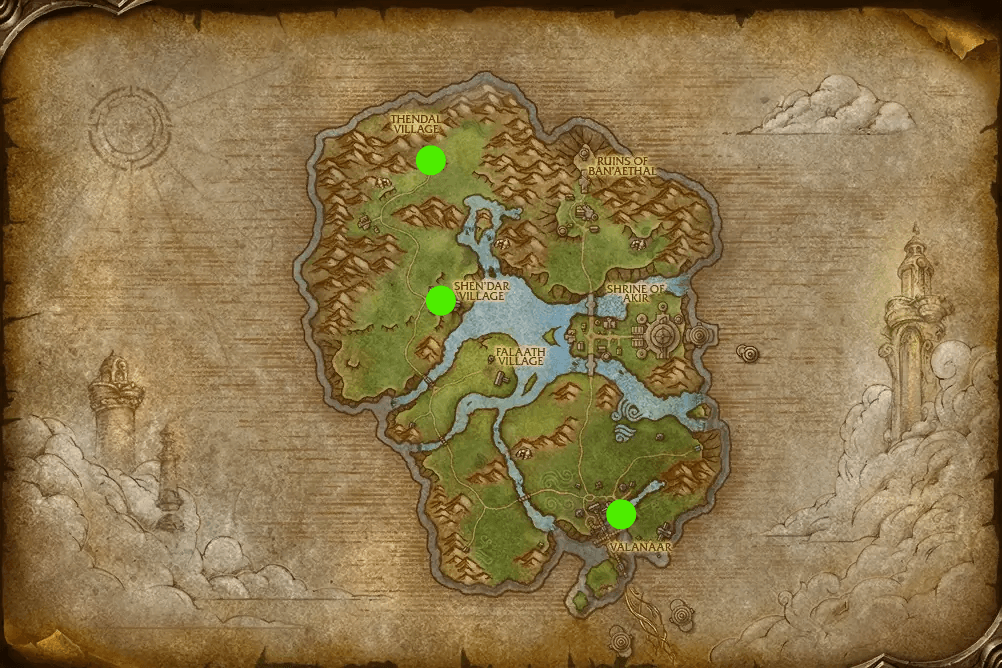
Tendal Village
Shen'dar Village
Valanaar
Westfall: 10–20
When to Go: Level 10–20. Location: Eastern Kingdoms.
Enemies: Roughly levels 9–13 in the first areas, then about 14–18 in the south and around later objectives; some targets are higher level.
Arrive from Elwynn Forest. Pick up quests on the way to Sentinel Hill, then clear the farms and southern areas. At level 15–17, alternate this zone with Redridge Mountains or Loch Modan rather than getting stuck on a difficult quest chain alone.
Dungeons: The Deadmines is in the Moonbrook area. Plan a full run around level 18–23 and pick up the available quests beforehand.
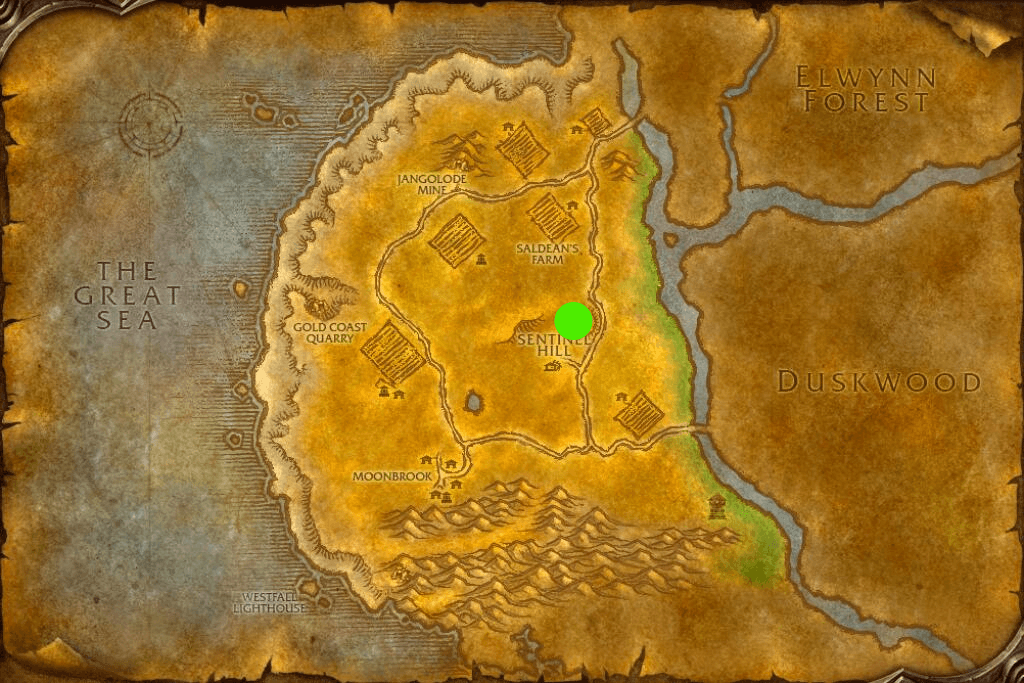
Sentinel Hill
Loch Modan: 10–20
When to Go: Level 10–20. Location: Eastern Kingdoms.
Enemies: Main enemies are roughly levels 10–18; elite targets and some groups are stronger.
A convenient next stop for dwarves and gnomes after Dun Morogh. Start in Thelsamar, then cover the western and eastern shores of the loch. If the quests become too difficult, switch to Westfall or the early quests in Redridge Mountains. By level 20–22, head north to Wetlands.
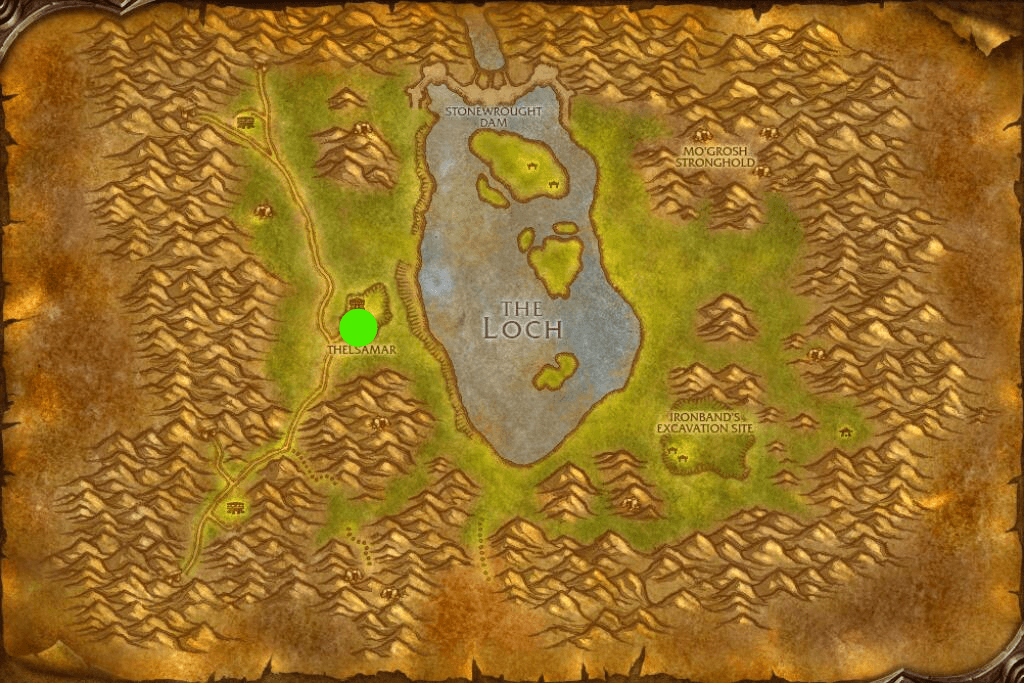
Thelsamar
Darkshore: 10–20
When to Go: Level 10–20. Location: Kalimdor.
Enemies: Usually levels 11–19, with groups around level 20–21 in the southern camps.
After Teldrassil, make Auberdine your base. Start with objectives around town, then work along the coast and southward. Move into Ashenvale at the end of this stage. To change continents, take a boat and account for the levels of the zones along your route beforehand.
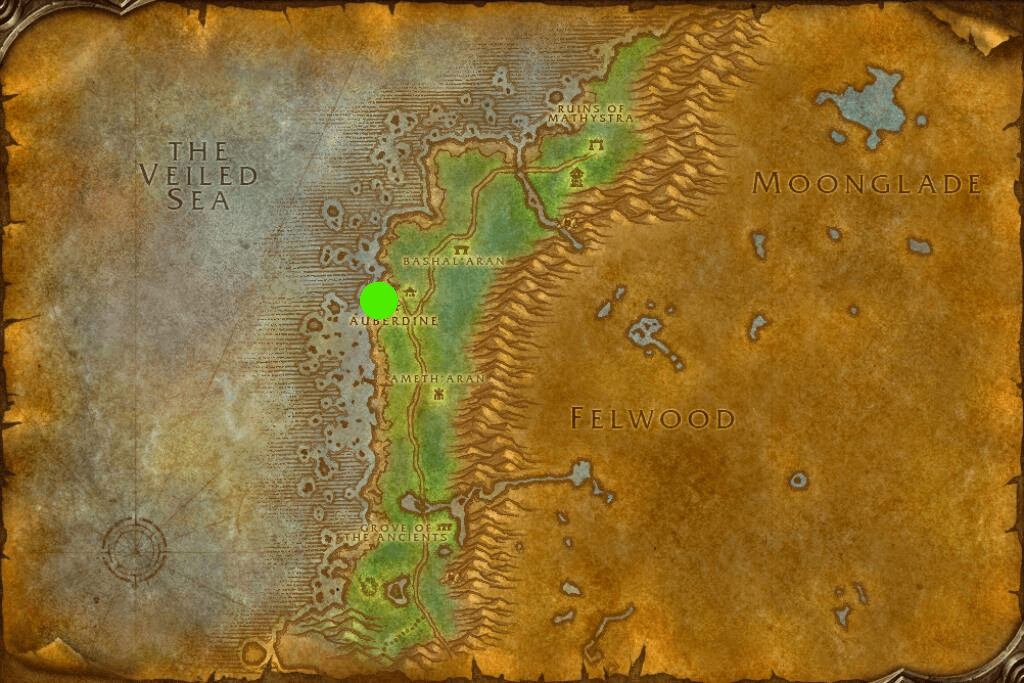
Auberdine
Redridge Mountains: 16–25
When to Go: Level 16–25. Location: Eastern Kingdoms.
Enemies: Roughly levels 15–18 near the western entrance and about 20–26 around the eastern objectives. Elite camps are more dangerous.
Take the eastern road from Elwynn Forest and start in Lakeshire. At level 16–18, choose western objectives and save the distant eastern camps for a later visit. Alternate this zone with Westfall, then Duskwood.
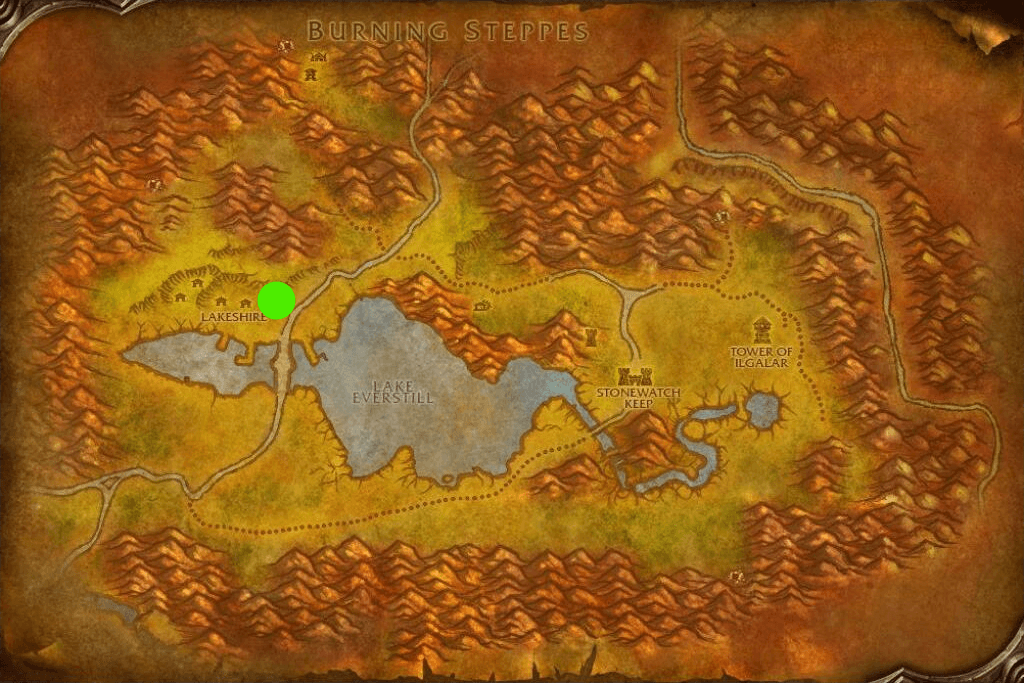
Lakeshire
Stonetalon Mountains: 18–27
When to Go: Level 18–27. Location: Kalimdor.
Enemies: Around 15–20 in early areas, roughly 20–27 deeper in the mountains.
A good additional zone between the early quests and Desolace. Do not try to clear every ravine in one visit: camps vary considerably in difficulty. The Alliance has easier access from Ashenvale. Stonetalon Peak is the northern base; the zone's quests do not all start in one settlement.
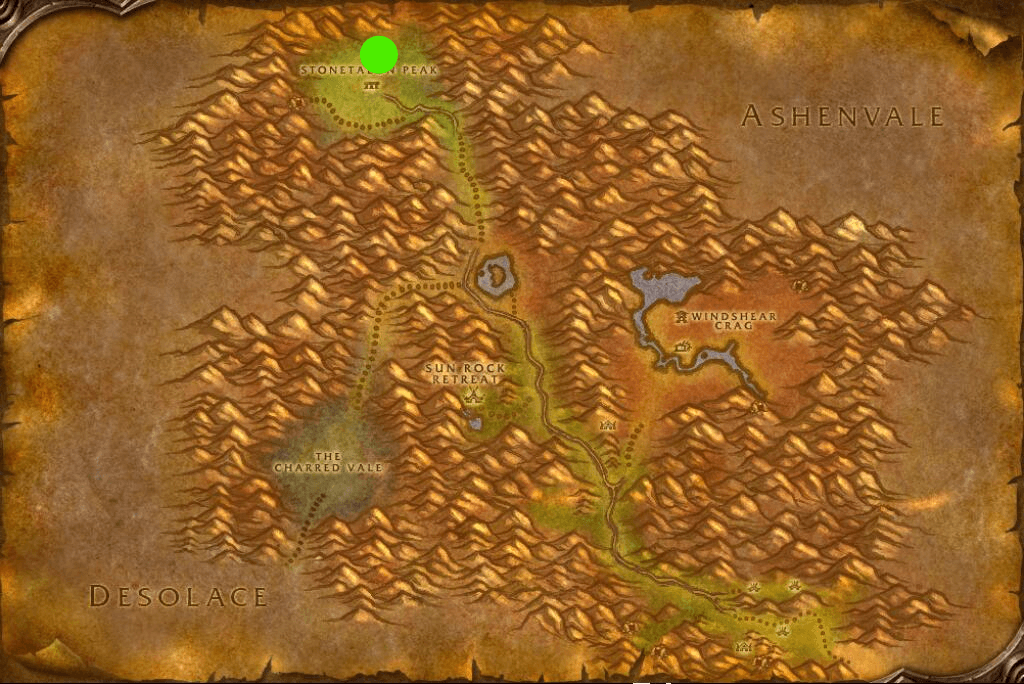
Stonetalon Peak
Duskwood: 20–30
When to Go: Level 20–30. Location: Eastern Kingdoms.
Enemies: About levels 18–23 around the first suitable objectives, then roughly 24–30 in later camps. Dangerous special enemies can appear on the road.
Start in Darkshire and gradually move into the western part of the zone. Quests often send you back to places you have already visited, so gather several objectives before heading out. If a difficult chain stalls your progress, switch to Wetlands, then to Stranglethorn Vale around level 30.
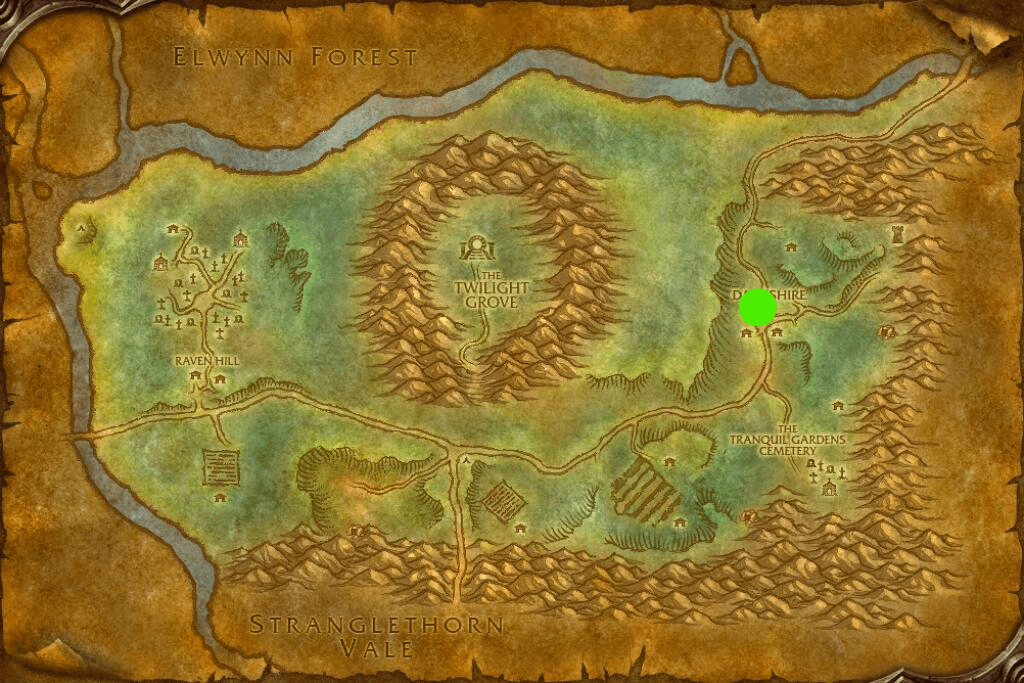
Darkshire
Ashenvale: 20–30
When to Go: Level 20–30. Location: Kalimdor.
Enemies: Roughly 19–30 along normal routes. Forever also includes some areas with enemies well above this range.
Separate the western and eastern forest quests to avoid crossing the entire map for one objective. Once you have finished the convenient quests, move to Desolace or the next part of your route. The Alliance's main base is Astranaar. Start with accessible quests nearby and venture farther as you level up.
Dungeons: Blackfathom Deeps on the northwest coast suits roughly level 24–32.
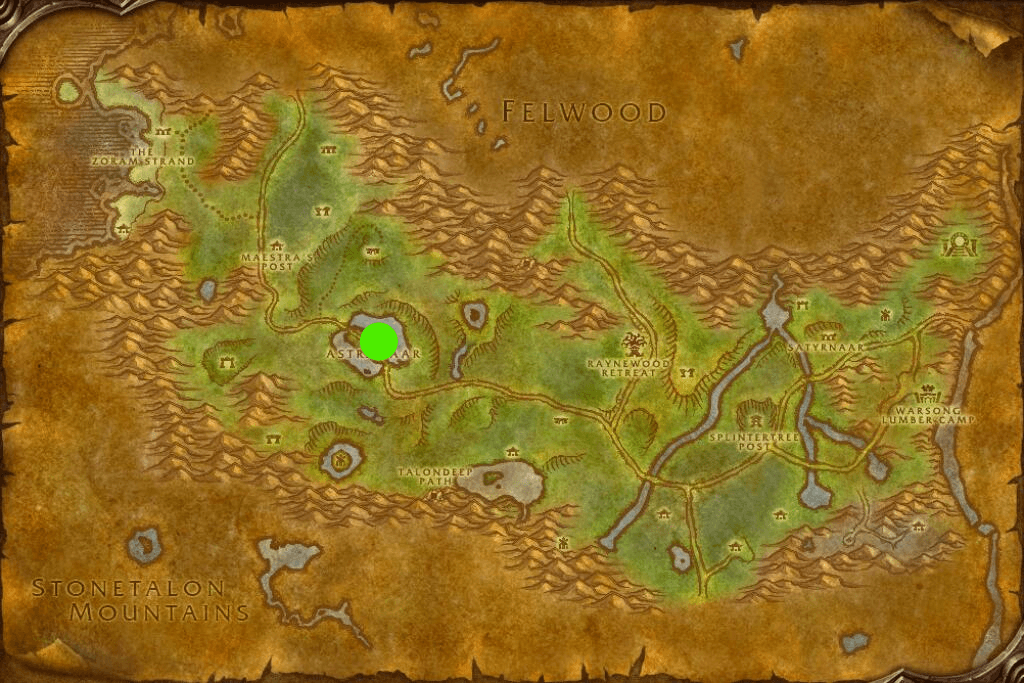
Astranaar
Hillsbrad Foothills: 22–30
When to Go: Level 22–30. Location: Eastern Kingdoms.
Enemies: Roughly 20–31 in the main areas; some mountain and coastal objectives have stronger enemies.
A useful place to gain a few levels before Arathi Highlands and Alterac Mountains. Give enemy settlements a wide berth when following the roads, especially on rulesets with open-world PvP. Your main base is Southshore. Some local quests are too difficult at the bottom of the level range, so alternate early visits with Wetlands.
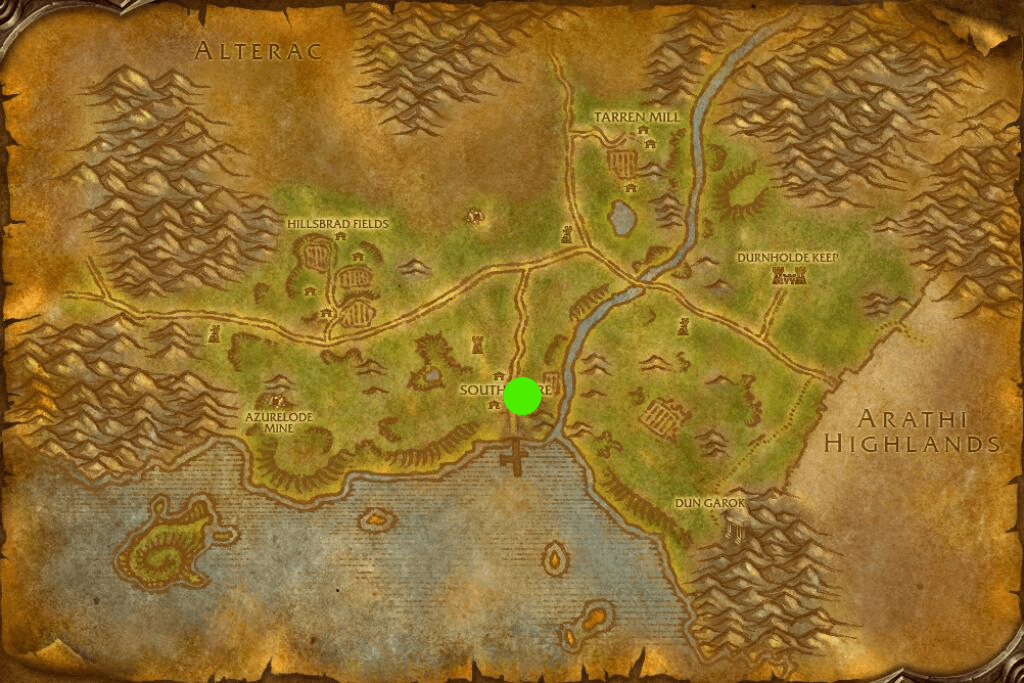
Southshore
Wetlands: 20–30
When to Go: Level 20–30. Location: Eastern Kingdoms.
Enemies: Mostly levels 20–30, with some camps around level 30–32.
Enter from the south through Loch Modan and unlock Menethil Harbor. Pick up coastal, marsh and excavation quests, grouping nearby objectives together. After level 30, follow the northern road to Arathi Highlands or change course for Stranglethorn Vale.
Dungeons: Excavation Site: Wetlands is near Whelgar's Excavation Site. Aim for levels 26–32 as a group; later quests and the final enemies may require a few more levels.
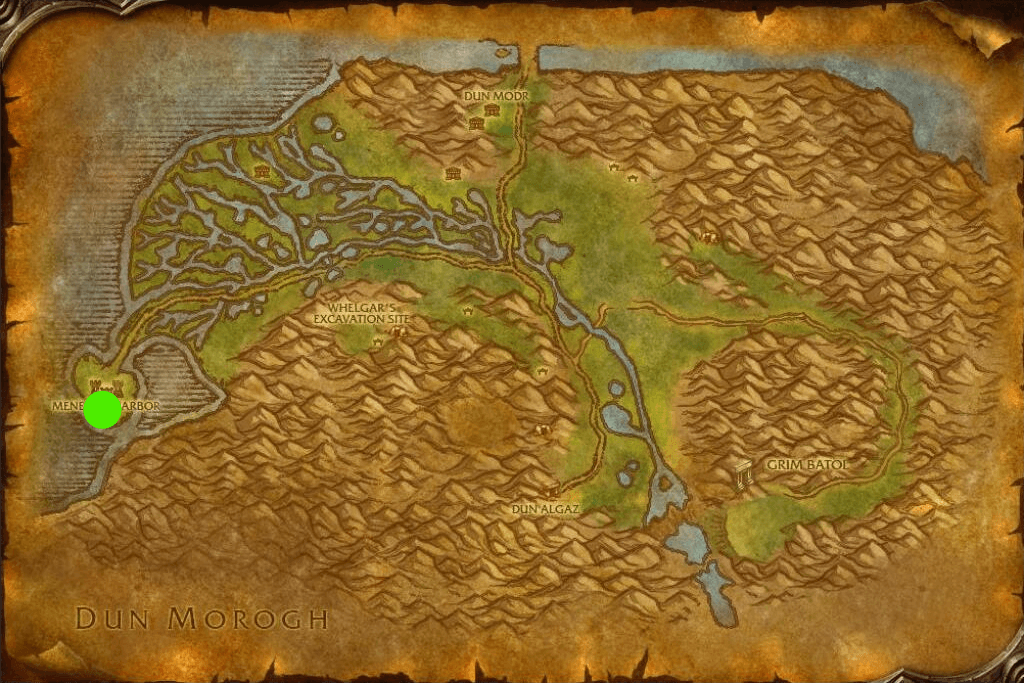
Menethil Harbor
Thousand Needles: 25–35
When to Go: Level 25–35. Location: Kalimdor.
Enemies: Roughly 24–30 in the canyons, around 30–35 in The Shimmering Flats.
The Shimmering Flats are especially convenient from around level 30: several neutral quests can be completed in one area. You can then head south to Tanaris, though it is still too early for its main quests. Alliance players should focus on the neutral quests in The Shimmering Flats around level 30–35. Freewind Post belongs to the Horde.
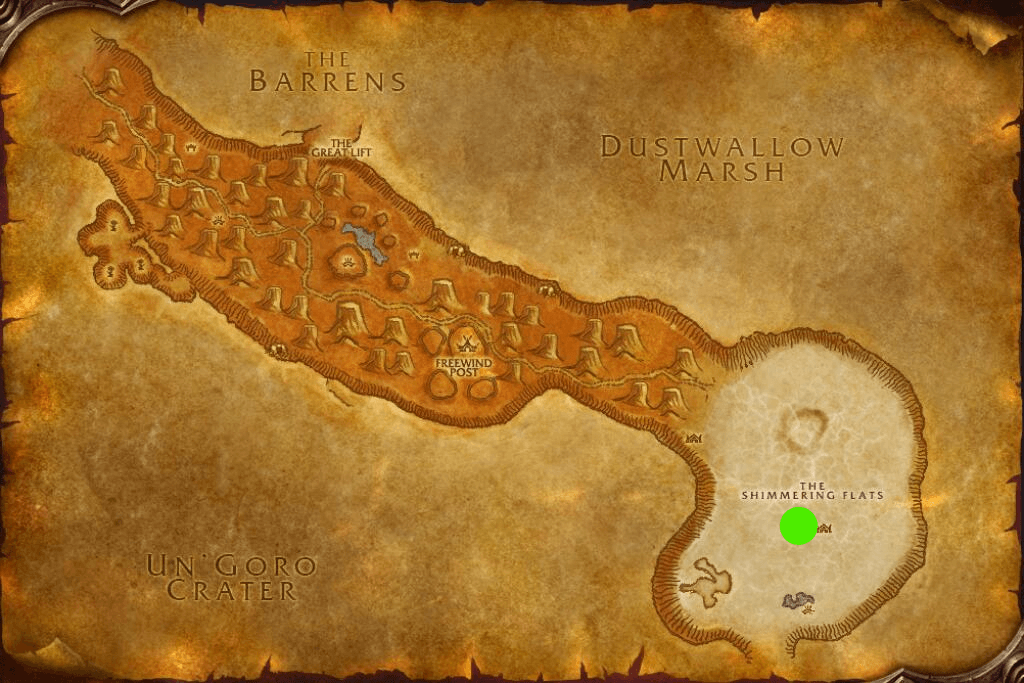
The Shimmering Flats
Arathi Highlands: 30–40
When to Go: Level 30–40. Location: Eastern Kingdoms.
Enemies: Roughly 30–39 for ordinary quests; fortifications and some objectives may be elite.
Arrive through Hillsbrad Foothills or from Wetlands to the south. Start with open fields and nearby camps; save difficult strongholds for a group. Alternate this zone with Stranglethorn Vale and Alterac Mountains. The Alliance's main base is Refuge Pointe in the central part of the map.
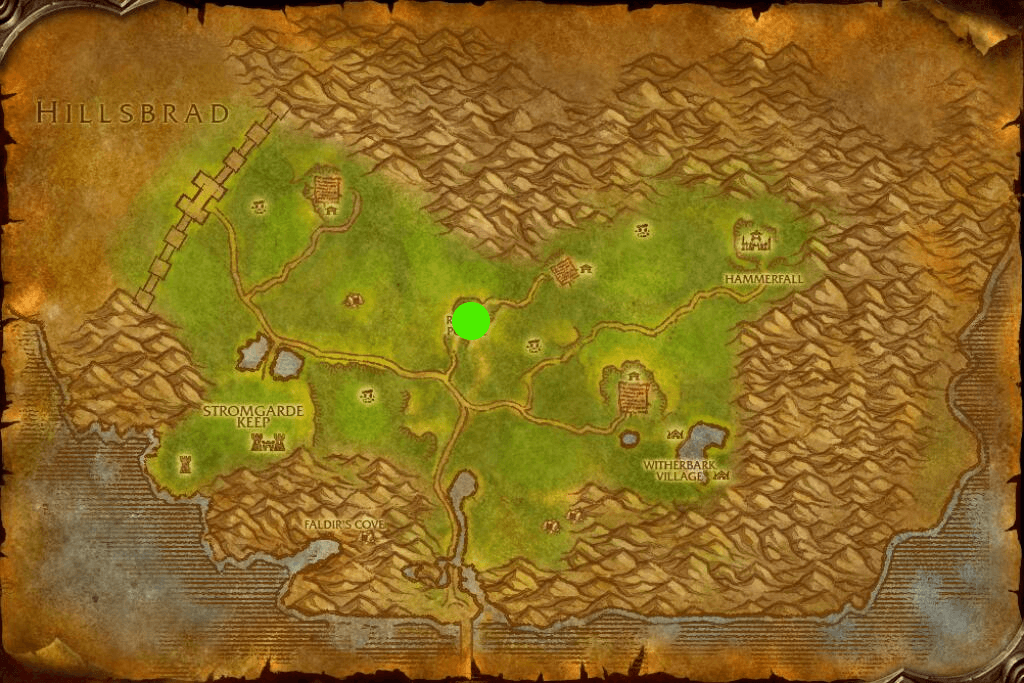
Refuge Pointe
Alterac Mountains: 30–40
When to Go: Level 30–40. Location: Eastern Kingdoms.
Enemies: Roughly 30–39 along ordinary routes; some creatures are weaker, while others are much stronger.
An extra zone alongside Hillsbrad Foothills: quests and objectives are scattered through the mountains, so arrive with your tasks already collected. Dalaran is open in Forever and offers another option for this stage. Access to the city does not mean you are ready for its dungeon.
Dungeons: City of Dalaran is intended for roughly level 28–35. You can keep questing in the mountains after this dungeon stops being a main source of experience.
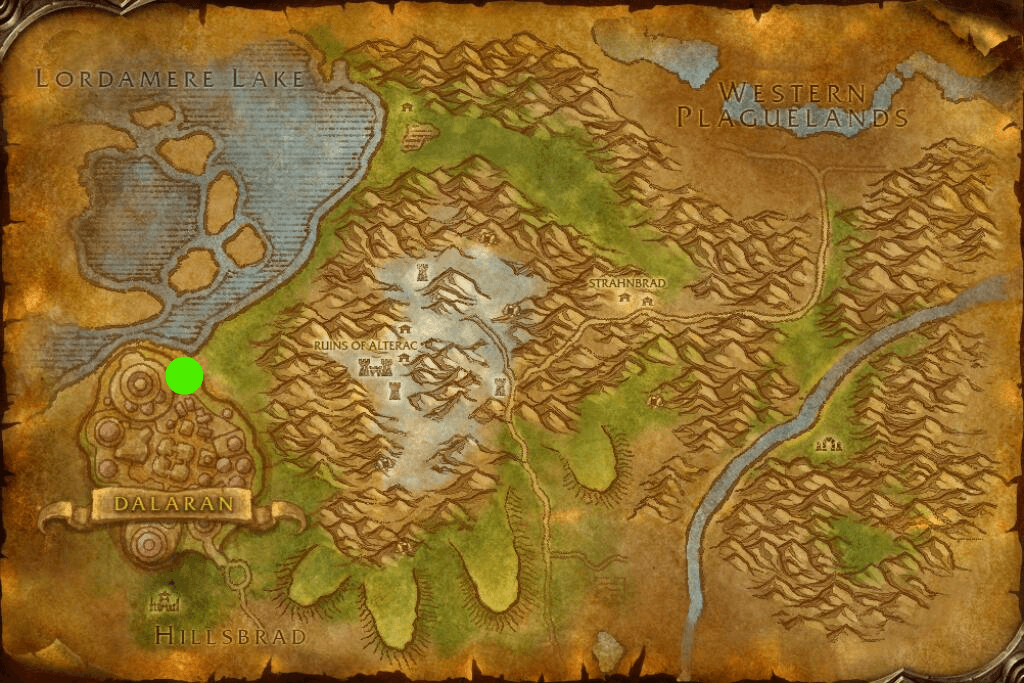
Dalaran
Stranglethorn Vale: 30–45
When to Go: Level 30–45. Location: Eastern Kingdoms.
Enemies: Around 30–36 in the north, roughly 36–45 in the central and southern areas. Some camps and objectives are higher.
Do not try to finish the whole zone at level 30. Complete the northern hunting and local quests first, then return for objectives farther south. Booty Bay is a neutral transport and trading hub, ideal for picking up quests before your next outing. The northern entrance comes from Duskwood. Start at Rebel Camp and gradually work toward the neutral quests in the south.
Dungeons: The Drowned City is off the coast and suits roughly level 35–42.
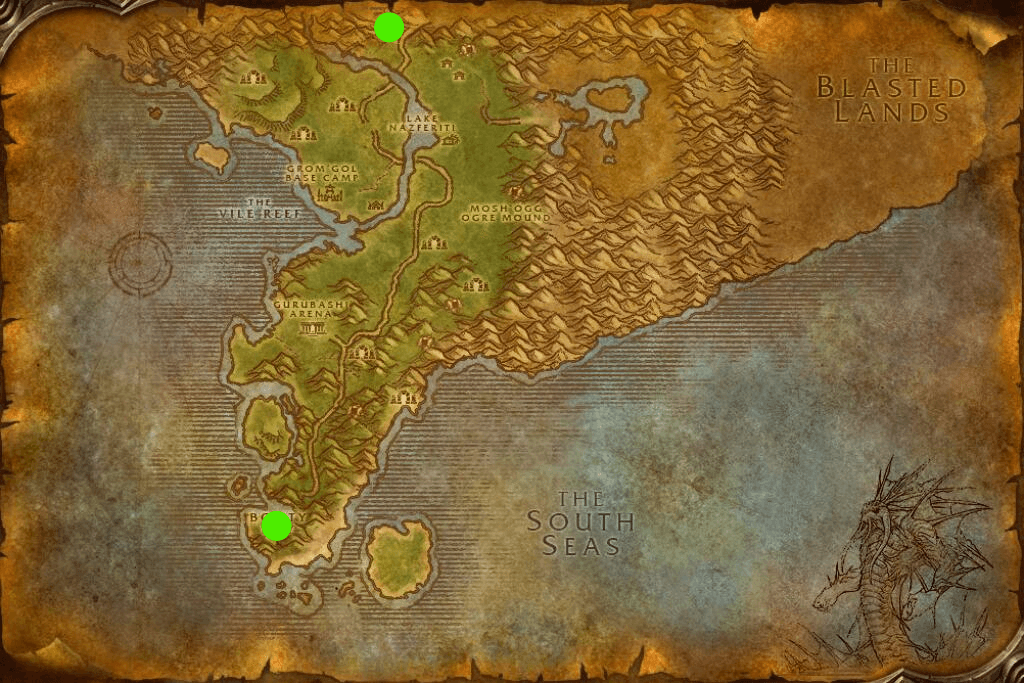
Rebel Camp
Booty Bay
Desolace: 32–40
When to Go: Level 32–40. Location: Kalimdor.
Enemies: Mostly 30–39, around 38–40 in later camps and near the southern passages.
A convenient alternative to Stranglethorn Vale. The road leads here through Stonetalon Mountains. Pick up several quests for neighboring areas before a long outing. New centaur quest chains continue in Shen'dralas; check their reputation requirements separately. The Alliance starts at Nijel's Point in the north.
Dungeons: Maraudon is here, but intended for later: roughly level 45–53 for the outer sections and around 48–57 for the inner areas.
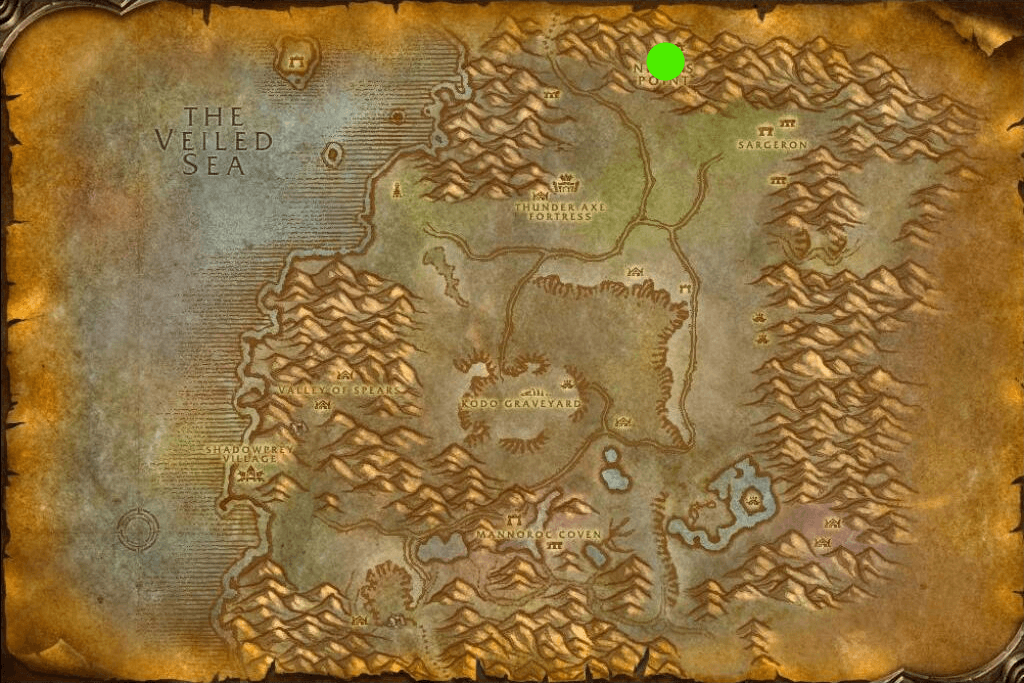
Nijel's Point
Badlands: 36–45
When to Go: Level 36–45. Location: Eastern Kingdoms.
Enemies: Roughly 35–45 along normal routes. Some camps and dungeon-area objectives are stronger.
The zone lies south of Loch Modan. It works well for short visits between Arathi Highlands, Stranglethorn Vale and Riverglades. Start with quests in open areas, then return for the stronger rock elementals and camps. The Alliance can take neutral quests and archaeological chains. Kargath is a Horde settlement; do not plan to rest or turn in quests there.
Dungeons: Uldaman in the north is intended for roughly level 42–52. The low level of the first enemies does not make the entire run suitable at level 36.
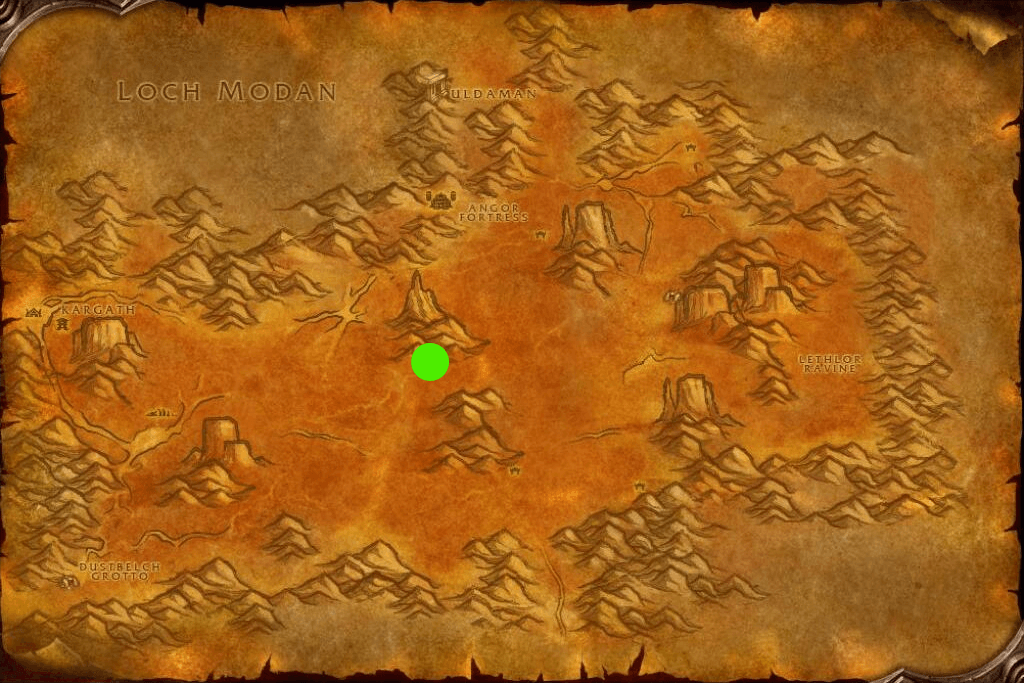
Central Neutral Camp
Swamp of Sorrows: 36–43
When to Go: Level 36–43. Location: Eastern Kingdoms.
Enemies: Roughly 34–38 in the west, around 38–45 farther east. Special objectives can have higher-level enemies.
Arrive from the west through Deadwind Pass. Use this as an additional zone when your main route runs short of convenient quests. Stay on the roads and check enemy levels in the water and eastern swamps. The Alliance has fewer convenient faction quests here. Start at The Harborage in the northwest and use the swamp to supplement Riverglades or Stranglethorn Vale.
Dungeons: Sunken Temple is in the eastern swamps, but intended for roughly level 50–60. While leveling at 36–43, leave it for later.
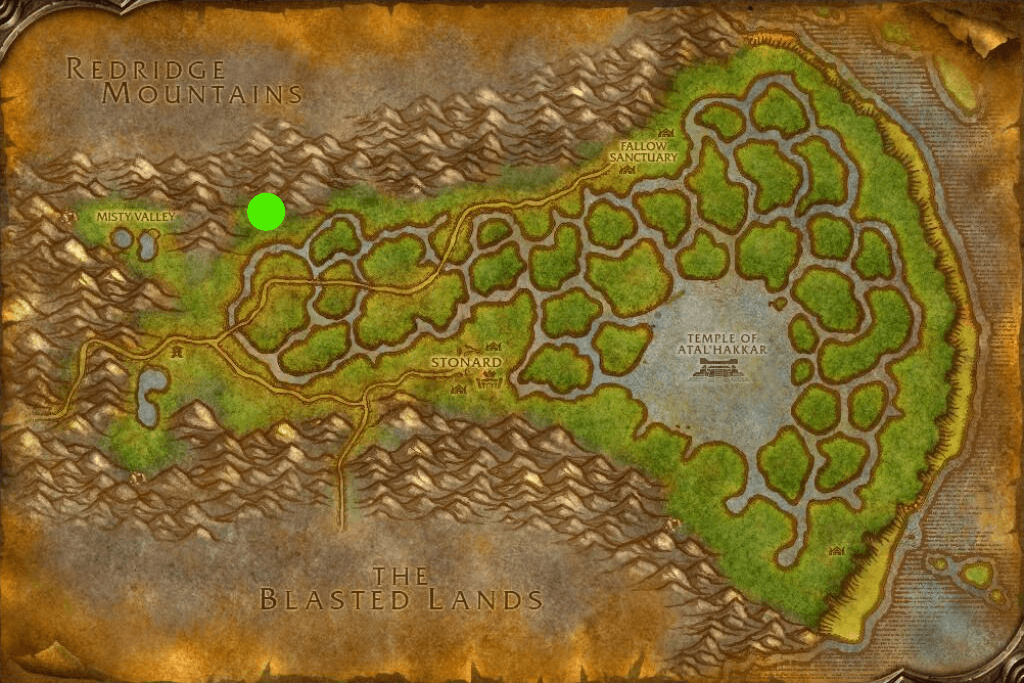
The Harborage
Dustwallow Marsh: 36–45
When to Go: Level 36–45. Location: Kalimdor.
Enemies: Roughly 35–45 along the main marsh routes; dragon and island areas can be much more dangerous.
An additional option between Thousand Needles, Tanaris and Feralas. The road comes from The Barrens. Separate northern and southern objectives: a straight line on the map often crosses water or tightly packed enemies. The Alliance's main base is Theramore on the eastern coast.
Dungeons: Alcaz Prison is on an island off the northeast coast, for roughly level 49–54.
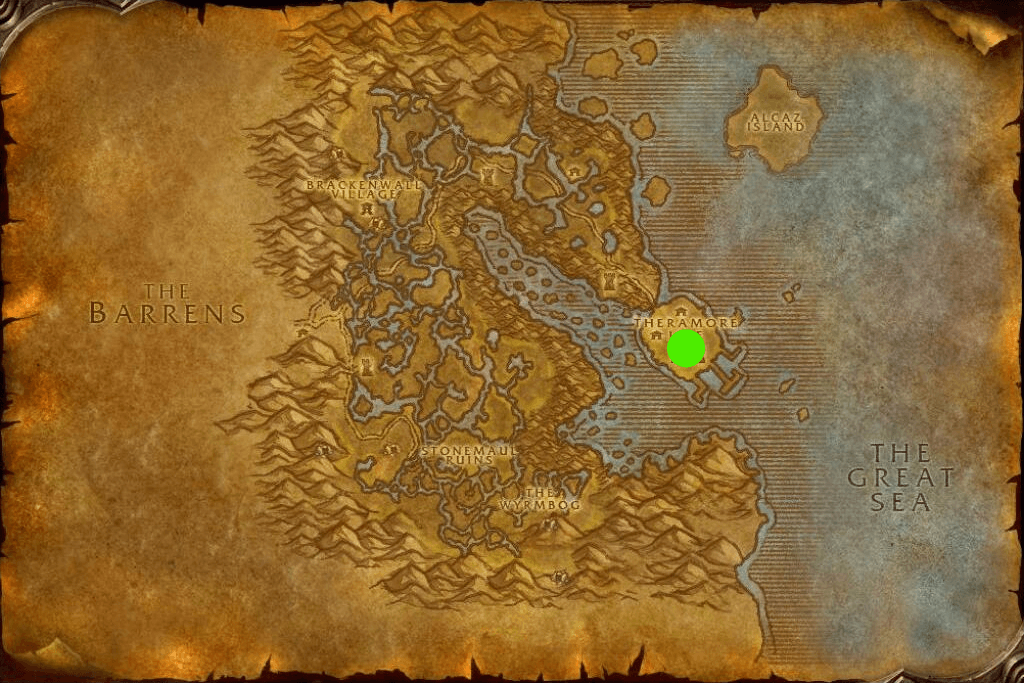
Theramore
Riverglades: 38–44
When to Go: Level 38–44. Location: Eastern Kingdoms.
Enemies: Around 35–38 in early areas, roughly 38–45 around later objectives. Some camps are elite.
A full new zone for both factions. Quests span roughly levels 36–44, but arriving around level 38–40 is more comfortable for a first solo visit. Roads lead here from Redridge Mountains and Badlands, and a boat runs from Steamwheedle Port in Tanaris to Powderfuse Port. The Alliance's main faction hub is Farholde Keep. Powderfuse Port offers neutral quests.
Dungeons: Krol'dok Stronghold is in the same zone and suits roughly level 40–45.
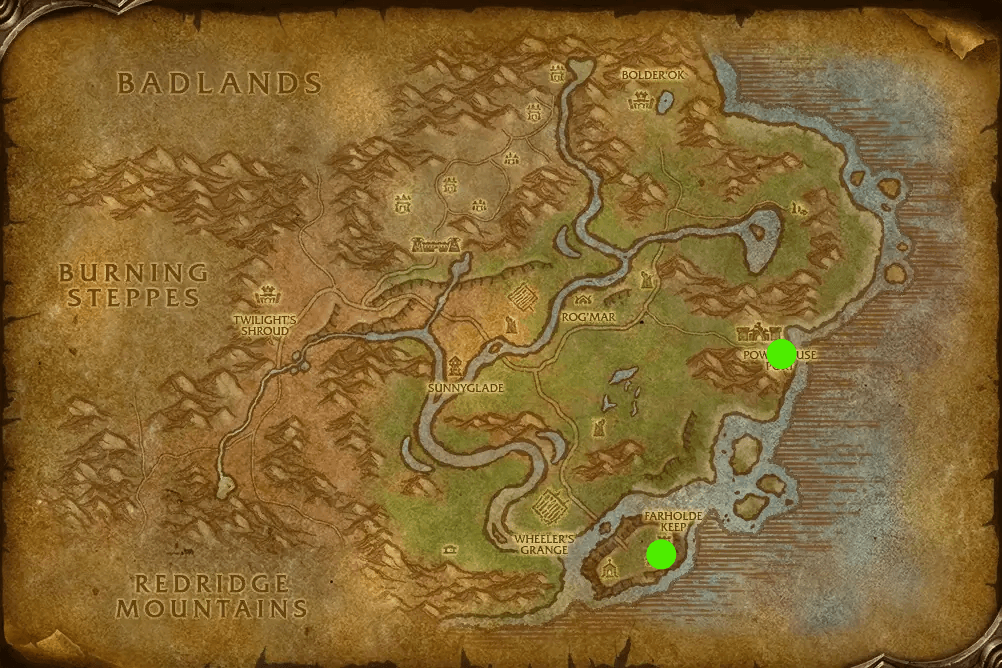
Farholde Keep
Powderfuse Port
Shen'dralas: 38–45
When to Go: Level 38–45. Location: Kalimdor.
Enemies: Around the Valley of Bones, ordinary enemies are roughly 37–40; the new area has later objectives and elites at 41–45.
A new area south of Desolace, reached through the Valley of Bones. The 38–45 range is a recommendation based on local quest levels, rather than an announced cap for the entire zone. Some chains are available from level 35, but require centaur reputation and prerequisite quests. Do not expect every quest to be available as soon as you enter.
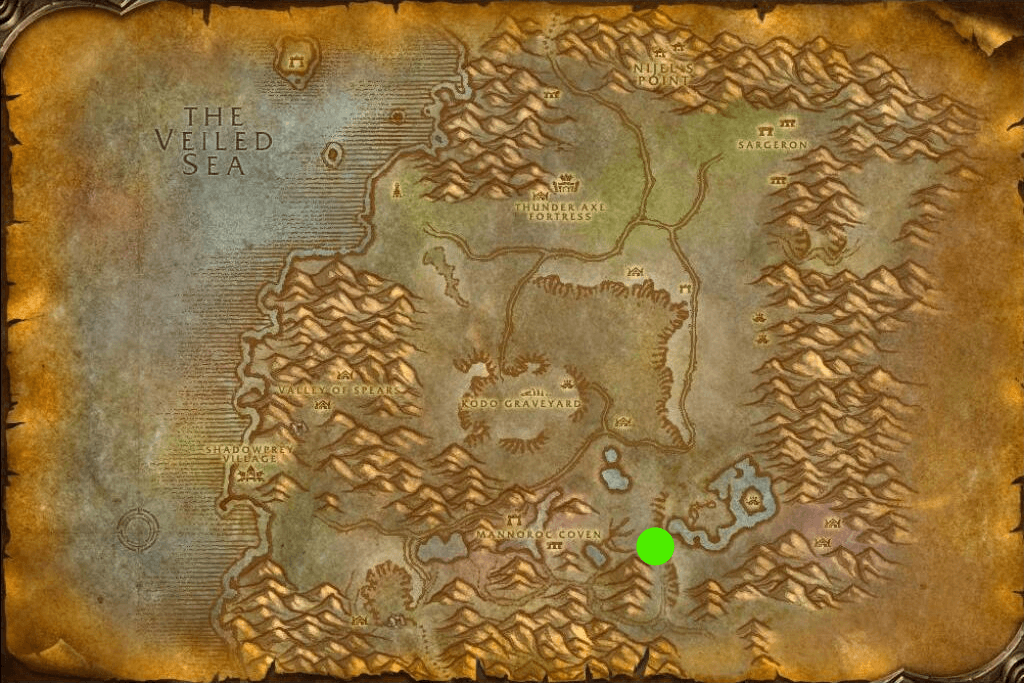
Approach to the Valley of Bones
Tanaris: 42–50
When to Go: Level 42–50. Location: Kalimdor.
Enemies: Around 40–44 near Gadgetzan, roughly 44–50 farther into the desert.
The main neutral zone for this stage. Enter from the north through The Shimmering Flats and collect quests in Gadgetzan and Steamwheedle Port. You can check the first available quests at level 40, but a comfortable initial visit is usually closer to 42–43. The sea route from Steamwheedle Port connects the zone to Riverglades.
Dungeons: Zul'Farrak is in the northwest, for roughly level 44–54. Prepare your quests before assembling the group.
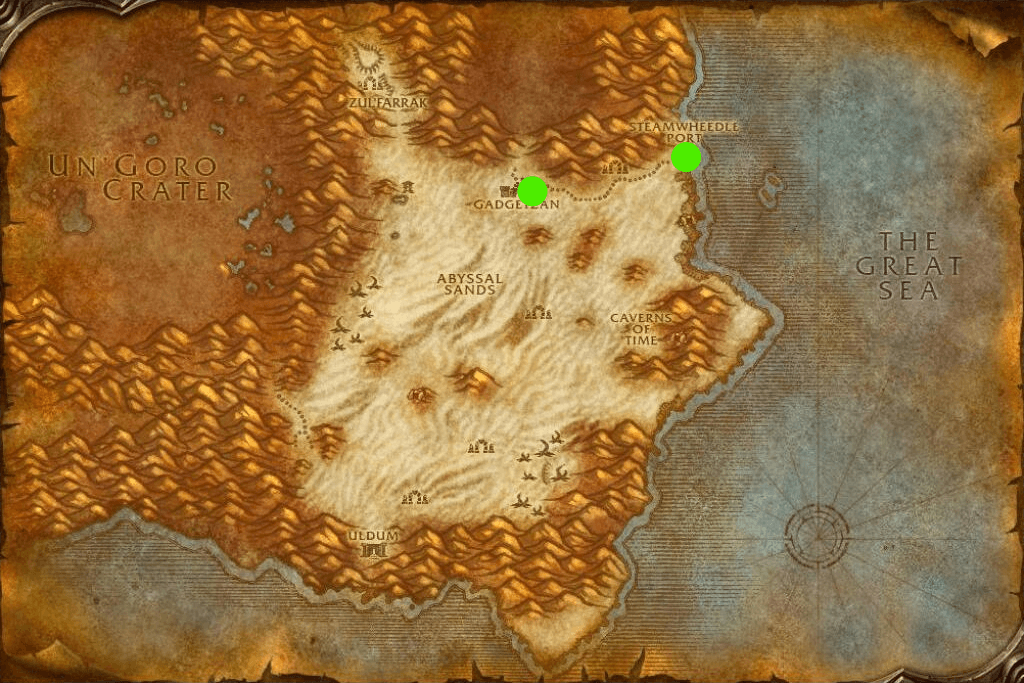
Gadgetzan
Steamwheedle Port
Feralas: 42–50
When to Go: Level 42–50. Location: Kalimdor.
Enemies: Roughly 40–50 for ordinary quests; high-level and elite areas are outside this route.
An alternative to Tanaris with plenty of quests involving wildlife, ogres and local threats. Roads lead here from Thousand Needles to the east and Desolace to the north. Do not judge routes only by how close objectives look: mountains and water greatly change the actual journey. The Alliance's main base is Feathermoon Stronghold on the island off the western coast. Allow for the crossing between the island and mainland.
Dungeons: Dire Maul is in central Feralas, but aim for roughly level 58–60 for your first visit. Open-world questing here ends earlier.
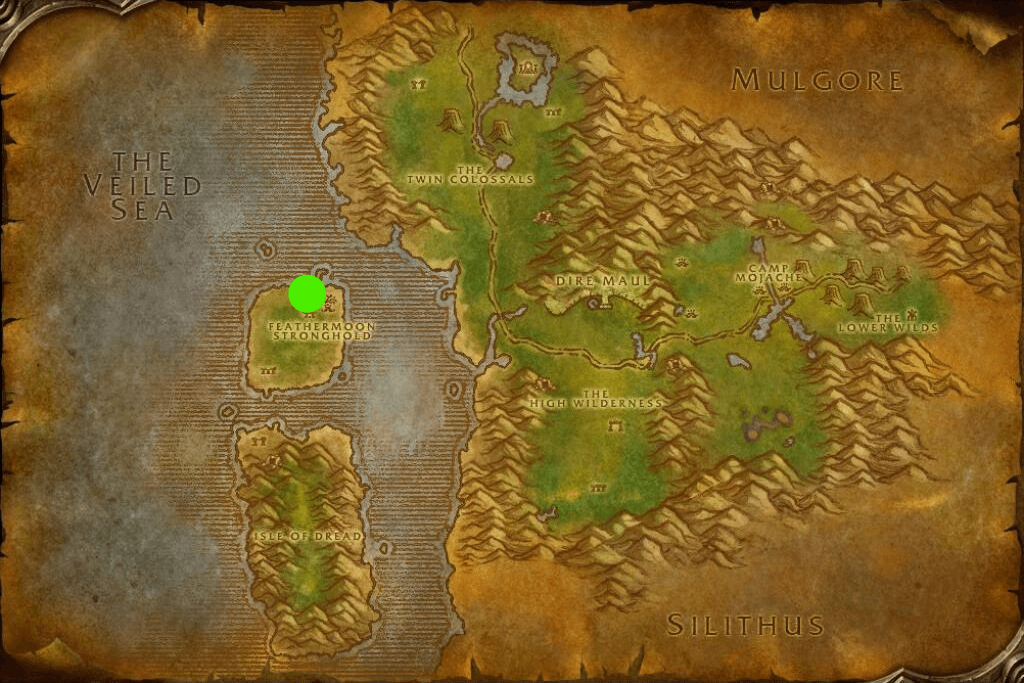
Feathermoon Stronghold
The Hinterlands: 43–50
When to Go: Level 43–50. Location: Eastern Kingdoms.
Enemies: Roughly 41–50 along normal routes; later troll areas and special objectives can be higher-level and elite.
The western entrance comes from Hillsbrad Foothills. At the bottom of the level range, choose western and central objectives and save difficult strongholds until you gain levels or form a group. The Alliance starts at Aerie Peak in the west. Then combine nearby hunting and exploration quests.
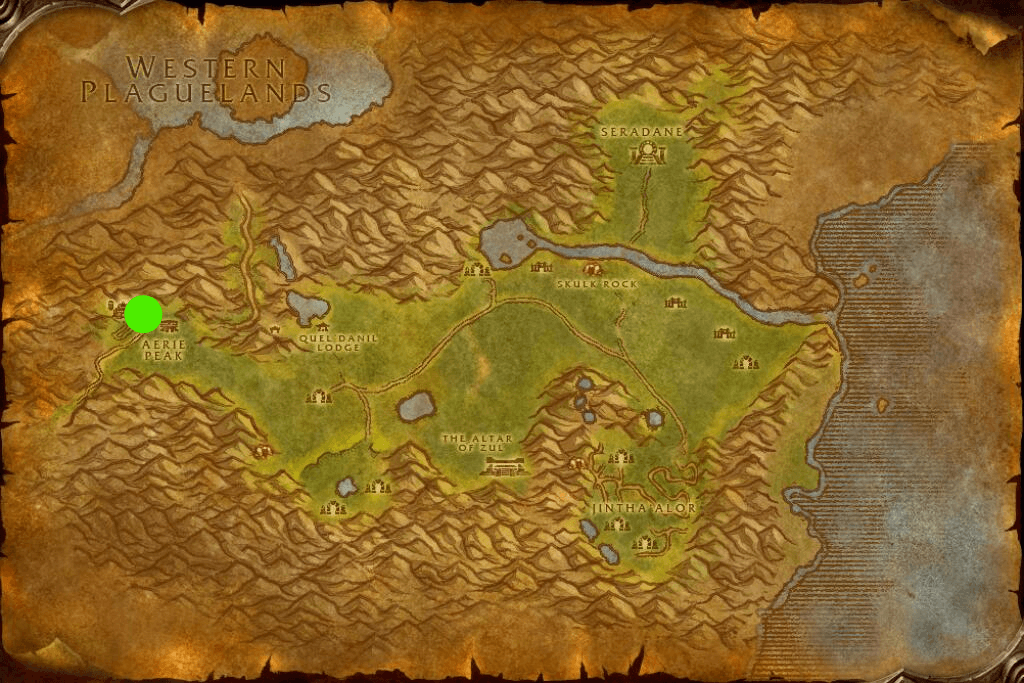
Aerie Peak
Searing Gorge: 46–51
When to Go: Level 46–51. Location: Eastern Kingdoms.
Enemies: Roughly 43–50 along the main routes, with some later objectives above that range.
A compact zone with convenient neutral quests. You can enter from the Badlands to the east. Pick up quests at the northern base first, then group your objectives around the pits and mines. Dense inner camps are safer with a few extra levels.
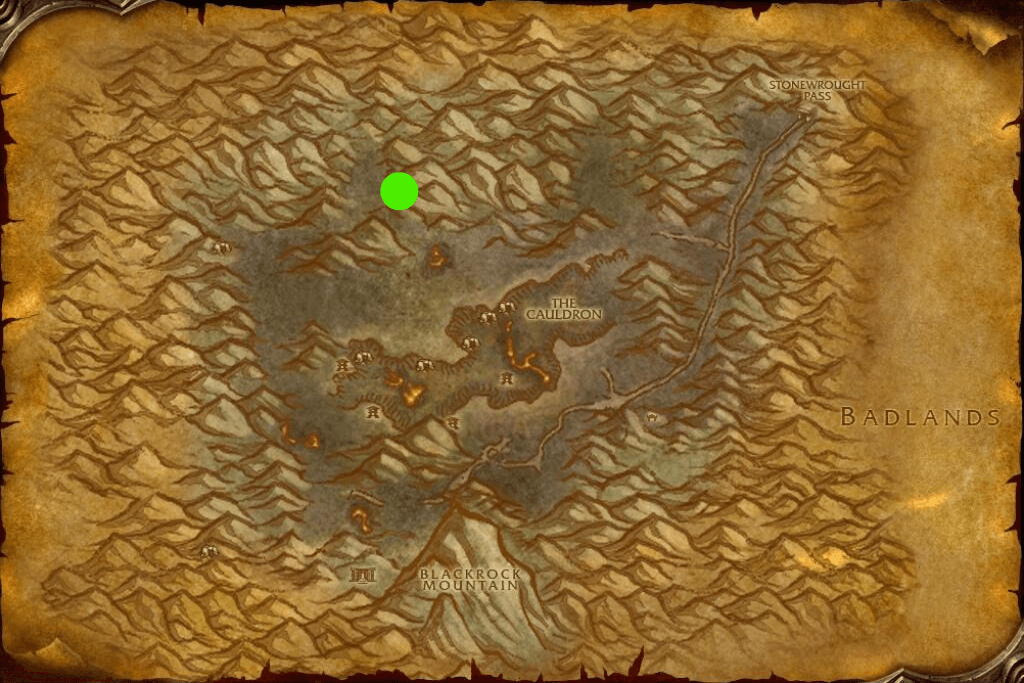
Thorium Brotherhood Camp
Azshara: 46–55
When to Go: Level 46–55. Location: Kalimdor.
Enemies: Around 42–47 in early areas, roughly 48–55 near later objectives. Elite areas are more dangerous.
An additional option after Tanaris and Feralas. Enter from Ashenvale to the west. Quests and services are scattered, so visit with a specific list of objectives rather than expecting to cover the entire level range without traveling elsewhere. Talrendis Point in the southwest is a useful landmark for Alliance players entering the zone.
Dungeons: Blackmaw Hold is in the north, for roughly level 55–60. Plan it separately from the zone's early quests.
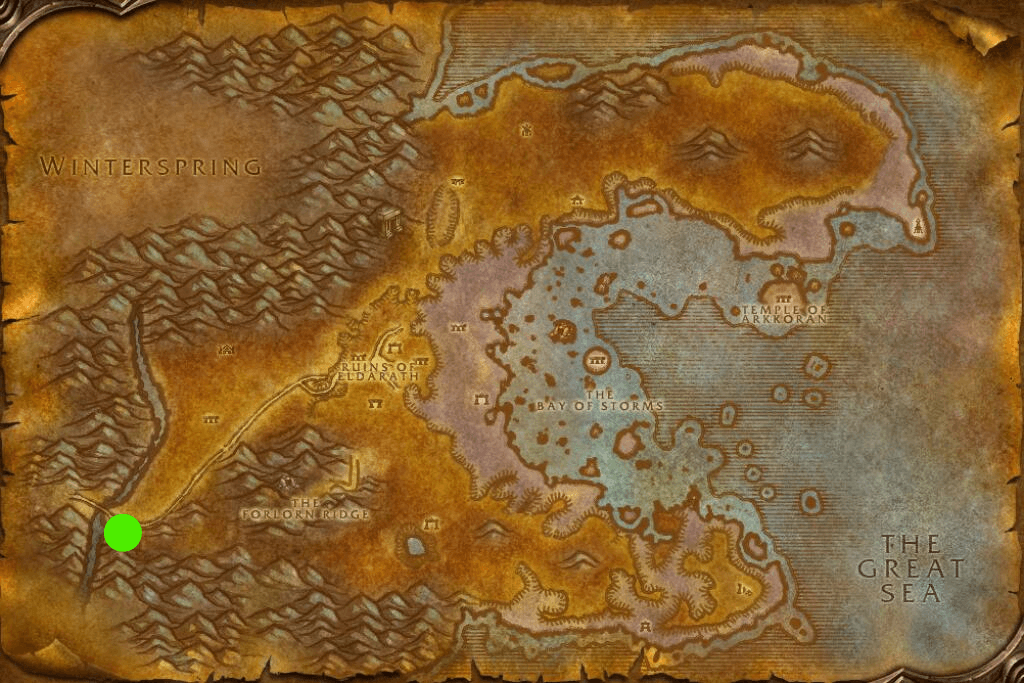
Talrendis Point
Blasted Lands: 48–55
When to Go: Level 48–55. Location: Eastern Kingdoms.
Enemies: Around 46–55 for ordinary quests; stronger enemies are found near some fortifications and southern objectives.
An additional zone alongside Searing Gorge and Felwood. Enter from the north through Swamp of Sorrows. Start with accessible neutral quests in the north, and do not venture into the dangerous southern areas just to explore. The Alliance can use Nethergarde Keep and the neutral quests along the northern road.
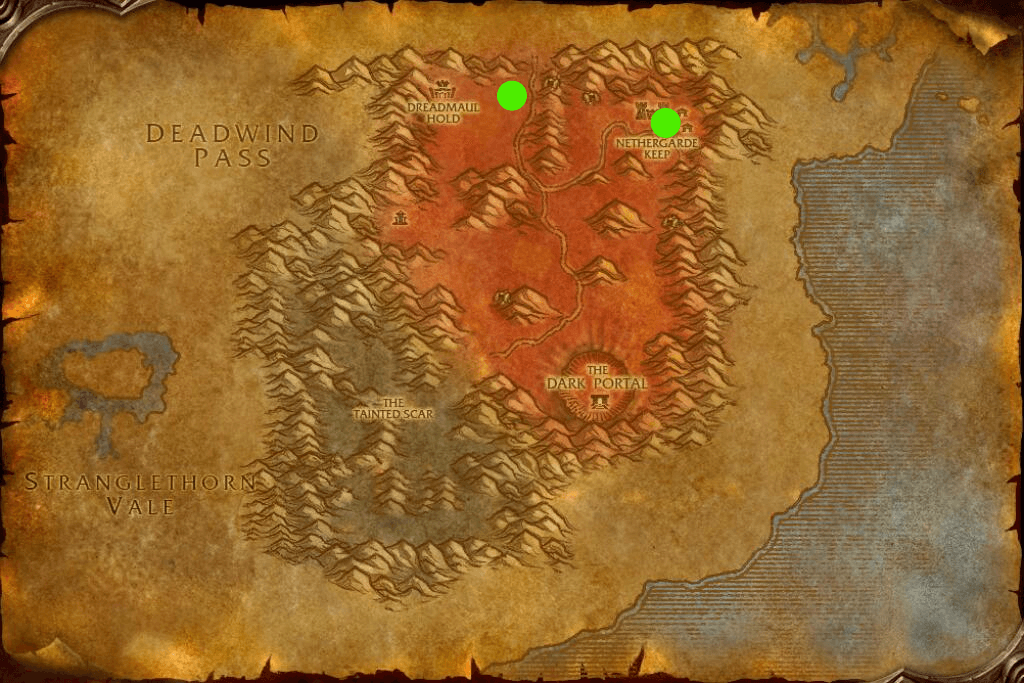
Nethergarde Keep
Camp by the Northern Road
Felwood: 49–55
When to Go: Level 49–55. Location: Kalimdor.
Enemies: Roughly 47–50 in the south, around 50–55 farther north, with some objectives higher still.
Enter from Ashenvale to the south. Start at Emerald Sanctuary, then work north. Pick up quests involving local threats and reputation along the way. For the later journey into Winterspring, consider your standing with the inhabitants of the northern tunnel.
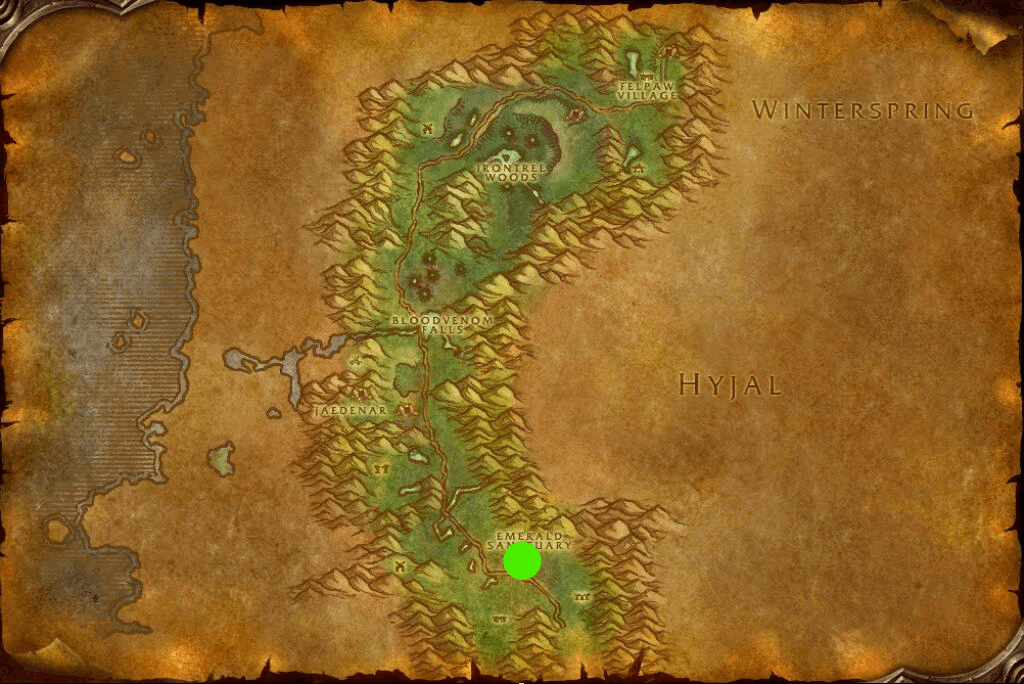
Emerald Sanctuary
Un'Goro Crater: 50–55
When to Go: Level 50–55. Location: Kalimdor.
Enemies: Roughly 48–55 in the main areas; dangerous elites roam the map.
A neutral zone with many quests that can be completed together. Enter from Tanaris and first unlock Marshal's Refuge in the north. Collect available quests before making a large loop of the crater, then combine nearby objectives. Avoid the large patrolling dinosaurs.
Dungeons: Shaper's Terrace is in the northern crater, for roughly level 58–60. At level 50–55, leave it for later.
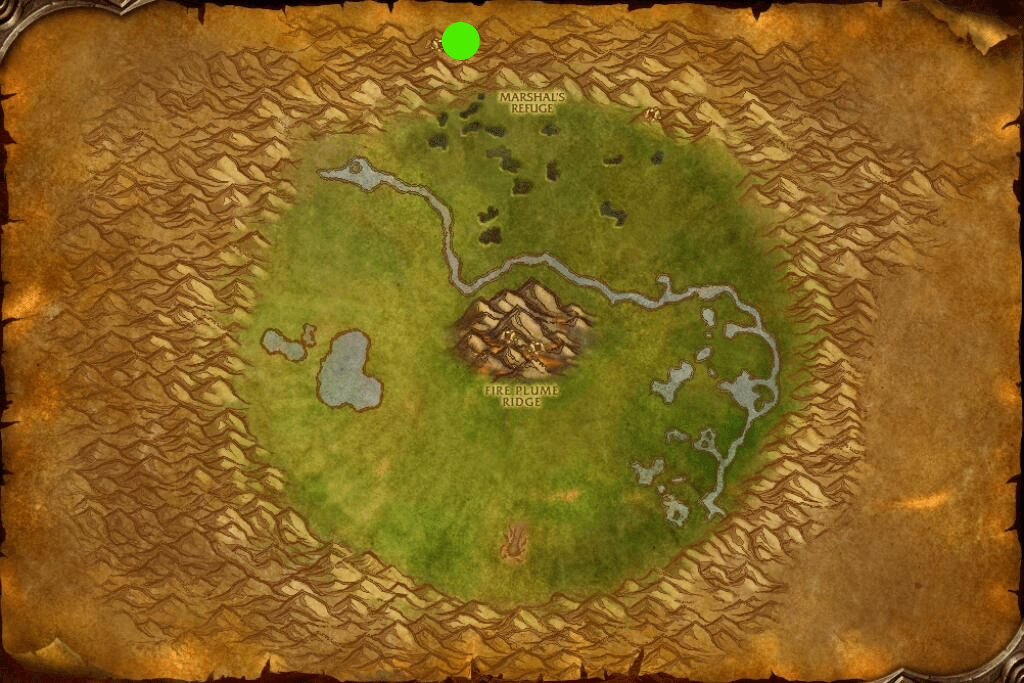
Marshal's Refuge
Burning Steppes: 52–58
When to Go: Level 52–58. Location: Eastern Kingdoms.
Enemies: Roughly 50–58 for ordinary quests; dragon, orc, and mountain elite areas are much more dangerous.
A useful zone before the late-game dungeons. Arrive from Redridge Mountains to the south or through Blackrock Mountain to the north. Some quests require a group; leave them for later while completing regular objectives. The Alliance's main base is Morgan's Vigil in the southeast.
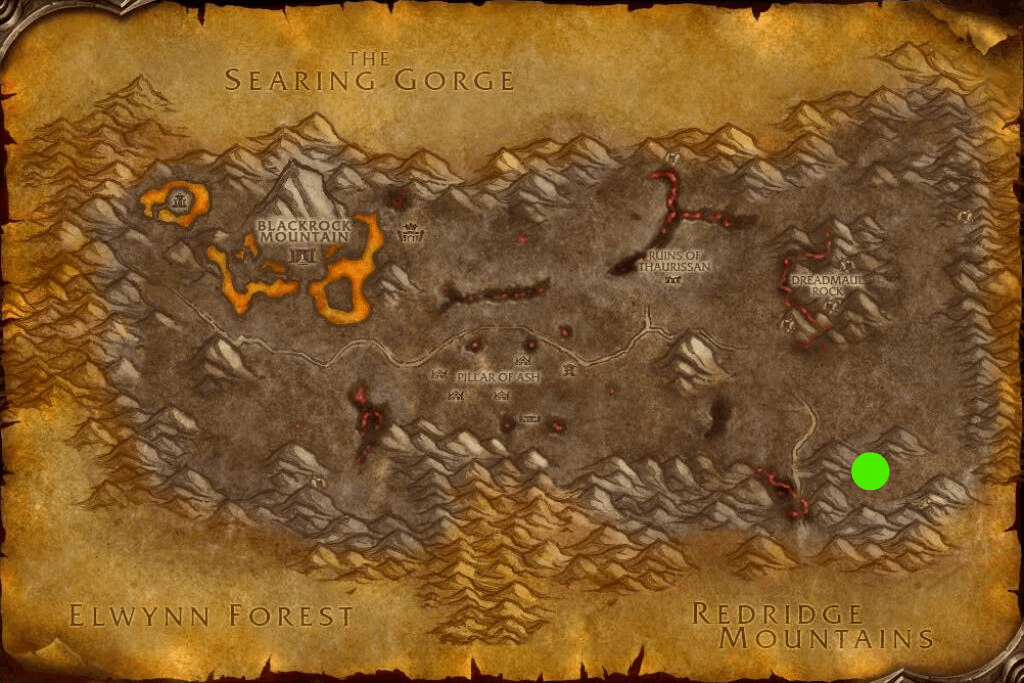
Morgan's Vigil
Western Plaguelands: 52–58
When to Go: Level 52–58. Location: Eastern Kingdoms.
Enemies: Roughly 50–54 in the west and around the first farms, then around 54–58. Elites and some objectives are higher.
Start with the quests available to your faction, and do not try to clear every farm and stronghold at the bottom of the level range. Dense undead packs require careful target selection. You can then head east into Eastern Plaguelands. The Alliance starts at Chillwind Camp in the south.
Dungeons: Scholomance is on Caer Darrow. Aim for roughly level 58–60 for a full clear.
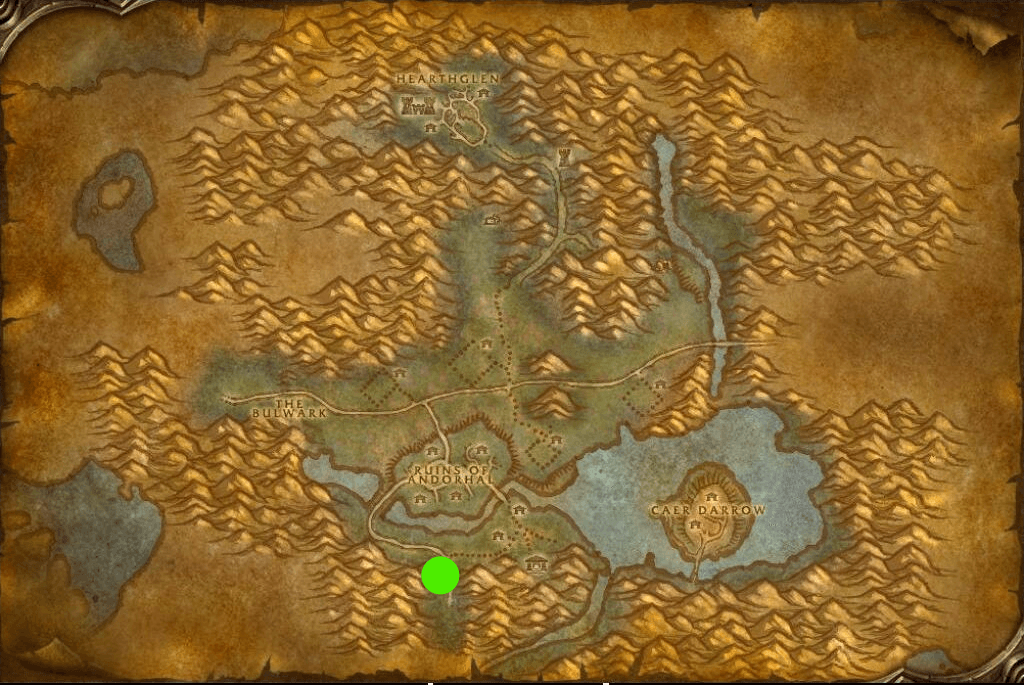
Chillwind Camp
Eastern Plaguelands: 55–60
When to Go: Level 55–60. Location: Eastern Kingdoms.
Enemies: Roughly 53–60 on the main routes; fortifications and special objectives have elite groups.
One of the main zones for the final levels. Enter from Western Plaguelands to the west and unlock quests along the road toward Light's Hope Chapel. Start with targets close to your level; save final chains and dense camps for 58–60, or tackle them with a group.
Dungeons: Stratholme is in the north, for roughly level 58–60. Collect quests for the intended section before the run.
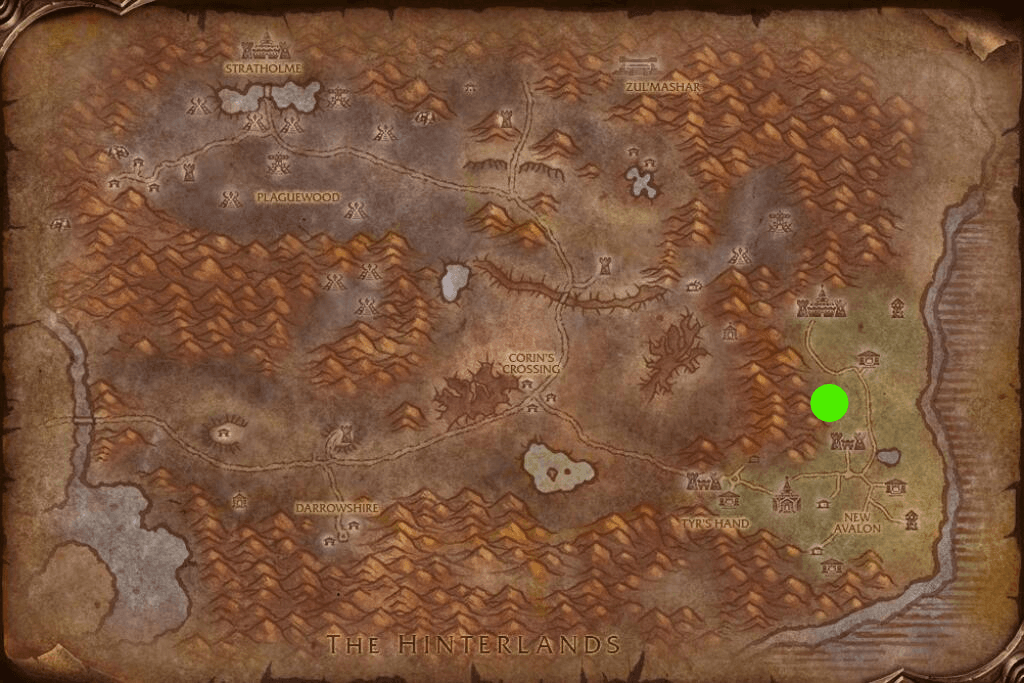
Light's Hope Chapel
Winterspring: 55–60
When to Go: Level 55–60. Location: Kalimdor.
Enemies: Mostly 53–60 along normal routes. The southern gorge and dragon areas are outside a safe solo route.
Travel through the northern Felwood tunnel and establish a base in Everlook. Alternate between town quests and those from surrounding camps. Darkwhisper Gorge in the south and the high-level dragon areas should not be used for ordinary solo leveling.
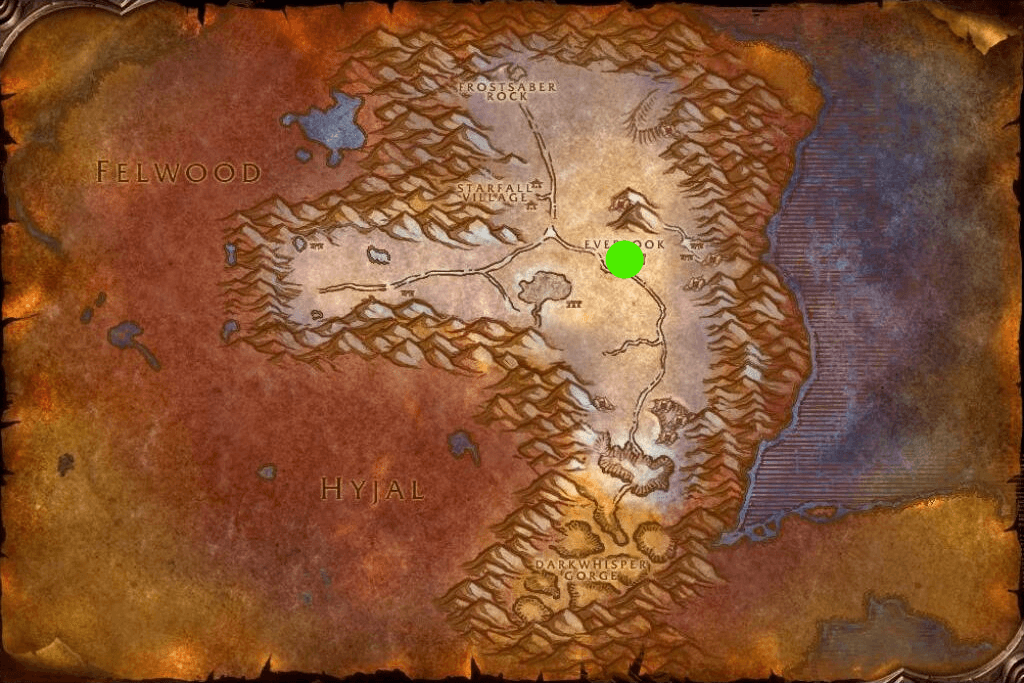
Everlook
Silithus: 55–60
When to Go: Level 55–60. Location: Kalimdor.
Enemies: Roughly 54–60 along ordinary open routes; hives and some objectives may be elite.
An extra option for the final levels. Enter from Un'Goro Crater. Start at Cenarion Hold, assess the available quests, and choose ordinary outdoor objectives. If most quests are inconvenient or need a group, continue in Winterspring or the Plaguelands.
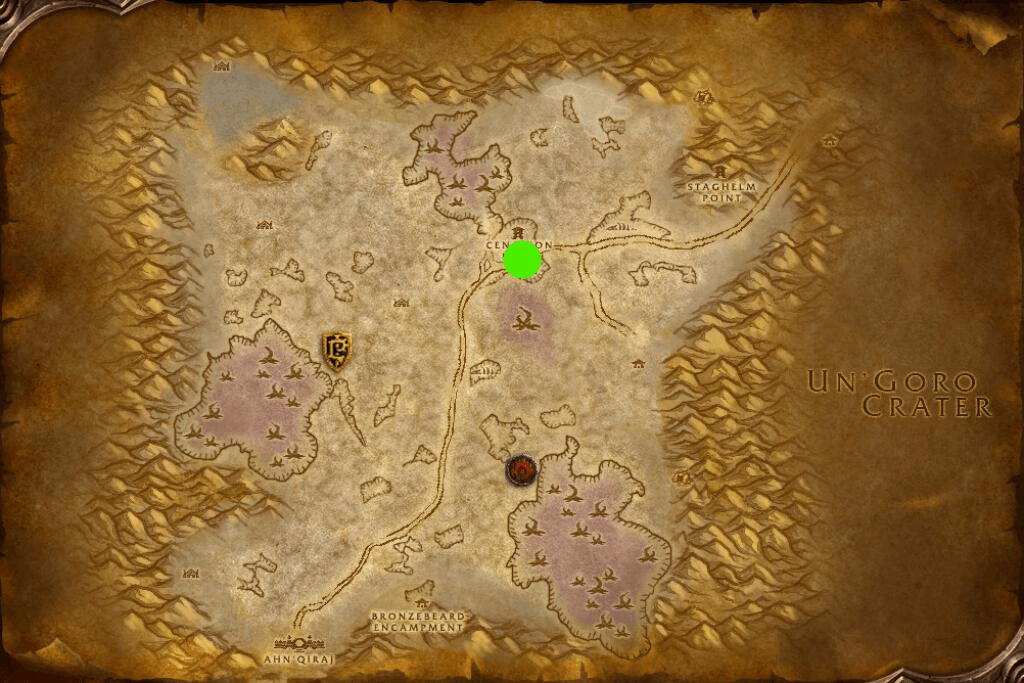
Cenarion Hold
Choosing Dungeons While Leveling
Prepare the quests available to you before forming a group. A nearby dungeon can be intended for a much higher level than the surrounding zone: Gnomeregan is in the starting zone of Dun Morogh, while Dire Maul is in a zone where ordinary questing begins long before level 60.
Dungeon | Recommended Level Range | Location |
|---|---|---|
| Hall of Thanes | 13–18 | Ironforge |
| Wailing Caverns | 15–25 | The Barrens |
| The Deadmines | 18–23 | Westfall |
| Shadowfang Keep | 22–30 | Silverpine Forest |
| The Stockade | 22–30 | Stormwind |
| Blackfathom Deeps | 24–32 | Ashenvale |
| Excavation Site: Wetlands | 26–32 | Wetlands |
| City of Dalaran | 28–35 | Alterac Mountains |
| Gnomeregan | 29–38 | Dun Morogh |
| Razorfen Kraul | 30–40 | The Barrens |
| Scarlet Monastery | 30–46 | Tirisfal Glades |
| The Drowned City | 35–42 | Stranglethorn Vale |
| Krol'dok Stronghold | 40–45 | Riverglades |
| Razorfen Downs | 40–50 | The Barrens |
| Uldaman | 42–52 | Badlands |
| Zul'Farrak | 44–54 | Tanaris |
| Maraudon | 45–57 | Desolace |
| Alcaz Prison | 49–54 | Dustwallow Marsh |
| Sunken Temple | 50–60 | Swamp of Sorrows |
| Blackrock Depths | 52–60 | Blackrock Mountain |
| Blackmaw Hold | 55–60 | Azshara |
| Lower Blackrock Spire | 55–60 | Blackrock Mountain |
| Upper Blackrock Spire | 58–60 | Blackrock Mountain |
| Dire Maul | 58–60 | Feralas |
| Shaper's Terrace | 58–60 | Un'Goro Crater |
| Scholomance | 58–60 | Western Plaguelands |
| Stratholme | 58–60 | Eastern Plaguelands |
Scarlet Monastery has different wings: Graveyard is roughly 30–38, Library 33–41, Armory 36–44, and Cathedral 38–46. The outer parts of Maraudon are usually run before the inner section: roughly 45–53 versus 48–57. For Blackrock Depths, check which bosses are included in advance: the early section and a full clear require different preparation.
If You Run Out of Quests or Experience
- Switch to another zone of the same level. At 32–35, for example, alternate between Arathi Highlands, Stranglethorn Vale, Desolace, and the neutral quests in The Shimmering Flats.
- Complete nearby objectives in the same outing. Before returning, check for another nearby quest involving the same enemies or items.
- Unlock flight paths along the way. This reduces repeat journeys to trainers, dungeons, and your next zone.
- Do not get stuck on a difficult quest. Leave an elite enemy, crowded cave, or target several levels higher for your next visit, or bring a group.
- Rest in an inn or capital between sessions. Rested experience helps you gain more experience from suitable enemies.
- Keep your abilities and gear up to date. If an ordinary enemy of your level becomes too difficult, check your training, item condition, and weapon before changing your entire route.
Where to Go After Level 60
Mount Hyjal is a new destination for max-level characters. The route leads through southern Winterspring and Darkwhisper Gorge. Do not plan on Hyjal as an ordinary replacement for level 50–55 zones. At level 60, choose max-level quests, suitable dungeons, and further raid preparation.
Author

Fouren
Fouren has been playing World of Warcraft for over 15 years. He is an active player with 12 Cutting Edge achievements under his belt, and has reached the top 1% and 0.1% multiple times on various classes. His main classes are healers, particularly Holy Paladin.

Comments
0No comments yet. Be the first to comment!